Articles contributed by the community, curated for your enjoyment and reading.
Filters
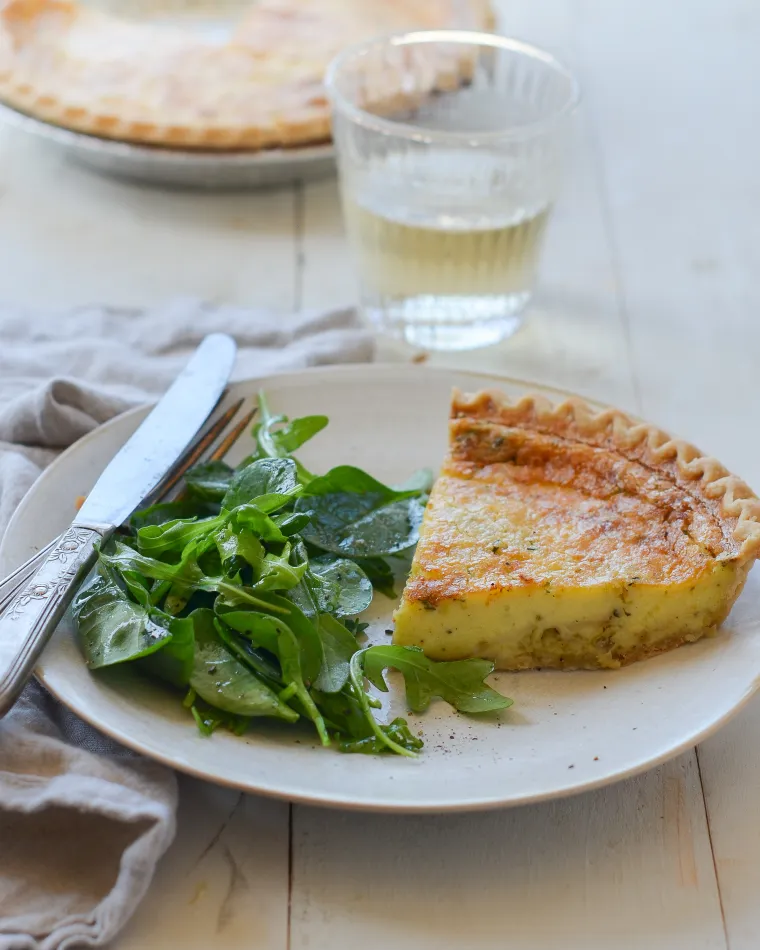
ResetParmesan & Leek Quiche
A variation on the classic French cheese quiche, this Parmesan and leek quiche is rich and flavorful. When I was studying abroad in France, every day for lunch I would walk to the pastry shop near my university and treat myself to an individual quiche fromage — a delicious little habit that quickly cost me all my skinny jeans. Over 20 years later, it is still one of my favorite things to eat. This parmesan and leek quiche is a wonderful variation on the classic French cheese quiche; the leeks impart a mellow, almost sweet onion flavor while Parmesan cheese makes the custard filling extra flavorful. What You’ll Need To Make Parmesan & Leek Quiche I use a good-quality store-bought crust to save time but feel free to make your own if you prefer. The secret to success, whether you make the crust yourself or use pre-made, is to pre-bake it so it won’t be soggy. For the cheese, it’s important to use authentic Parmigiano Reggiano cheese for this recipe. You can always tell if it’s authentic by looking at the rind, which is embossed with the name over and over. If the cheese is already grated, it should be labeled “Parmigiano Reggiano,” not “Parmesan.” Leeks are part of the onion family, but they have a milder flavor. They’re notoriously sandy and dirty (and very good at hiding it) so it’s important to wash them well. To clean them, cut off and discard the root ends and thick dark green parts, then cut the leeks in half lengthwise. Rinse each half under cold water, pulling apart the layers to remove any grit that’s tucked inside. How To Make Parmesan & Leek Quiche To begin, preheat the oven to 400°F. Remove the pie shell from the freezer and thaw it until just soft enough to easily prick with a fork (10 to 20 minutes). Prick the bottom and sides all over with a fork and bake on the center rack until lightly golden, 10 to 15 minutes. Turn the oven down to 325°F. While the crust bakes, melt the butter in small sauté pan over medium-low heat. Add the leeks and season with a bit of salt and pepper. Cook over medium-low heat, stirring occasionally, until very soft, about 15 minutes. Do not brown. Taste and adjust seasoning (they should be well-seasoned). Set aside to cool. In a medium bowl, combine the heavy cream, eggs, thyme, nutmeg, Parmigiano Reggiano cheese, 1/4 teaspoon salt and 1/4 teaspoon pepper. Whisk well. Spread the cooked leeks over the pre-baked pie shell, taking care not to puncture the crust. Pour the egg mixture over top. Bake at 325°F for 45 to 55 minutes, or until the custard is set and puffed. The quiche will deflate as it cools. Slice into wedges and serve hot or warm. Note: This recipe has been written by Jenn Segal and republished on MudMatter with Author’s Permission. Please find the original link here – Parmesan & Leek Quiche.
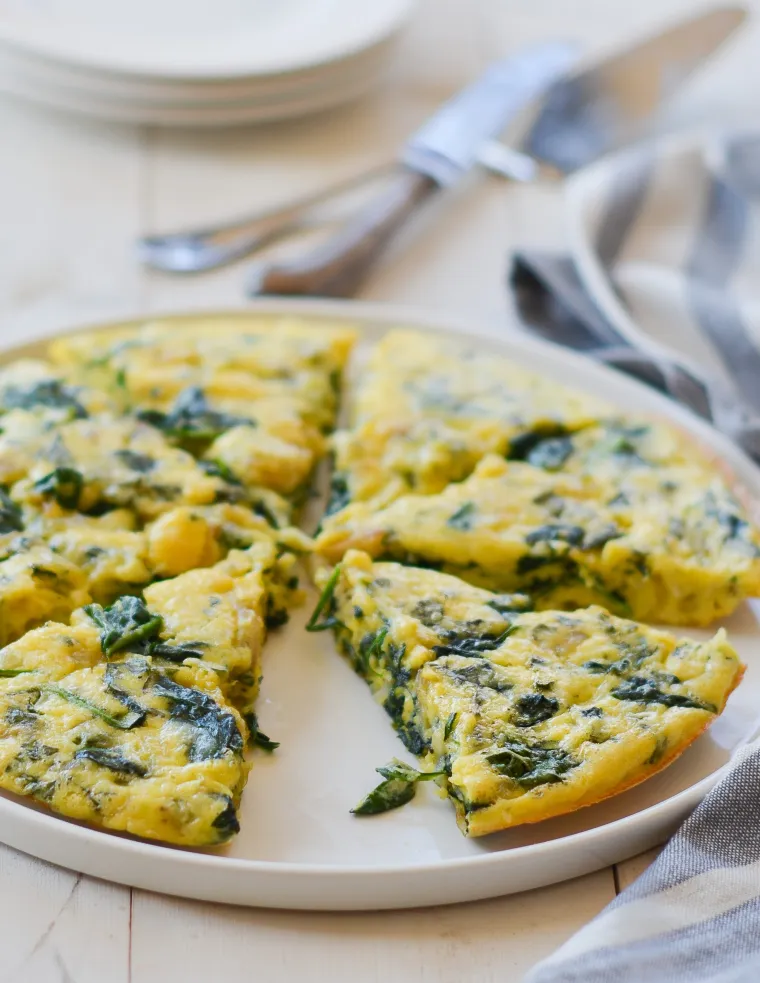
Spinach Frittata
Stuffed with baby spinach and two kinds of cheese, this spinach frittata makes a lovely brunch, lunch, or light dinner. Filled with heaps of baby spinach and two kinds of cheese, this spinach frittata tastes nutritious and rich, all at the same time. It’s silkier and more quiche-like than most frittatas, which are usually just glorified omelets with the fillings mixed in rather than stuffed inside. The key is adding heavy cream and lots of cheese to the egg mixture. It’s also important to bake the frittata in a low-temperature oven (as opposed to the traditional stovetop-to-broiler method), so the eggs cook gently into a custard without scrambling. This frittata can be served for brunch, lunch, or a light dinner – and since it’s good warm or at room temperature, leftovers can be packed for lunch or taken on a picnic. What You’ll Need To Make Spinach Frittata Step-by-Step Instructions Heat the oil in a 10-inch ovenproof nonstick skillet over medium heat. Add the shallot and cook, stirring frequently, until softened, 3 to 4 minutes. Do not brown. Add half of the spinach and cook until wilted down, about 1 minute. Add the remaining spinach and 1/4 teaspoon of the salt and continue cooking until all of the spinach is wilted, 1 to 2 minutes more. Meanwhile, in a large bowl, combine the eggs, heavy cream, pepper, and the remaining 1/4 teaspoon salt. Whisk to combine. Add the cooked spinach mixture, Cheddar, Parmigiano Reggiano, and basil to the egg mixture. Stir to combine. Pour the mixture back into the pan (no need to wash it). Place the pan in the oven and bake until set, 20 to 23 minutes. Immediately place an oven mitt over the pan handle to remind yourself that it is hot (it’s easy to forget and burn your hand, and the handle stays hot for a long time). Serve the frittata directly from the pan, or use a rubber spatula to loosen the edges and slide the frittata onto a serving platter. Note: This recipe has been written by Jenn Segal and republished on MudMatter with Author’s Permission. Please find the original link here – Spinach Frittata.
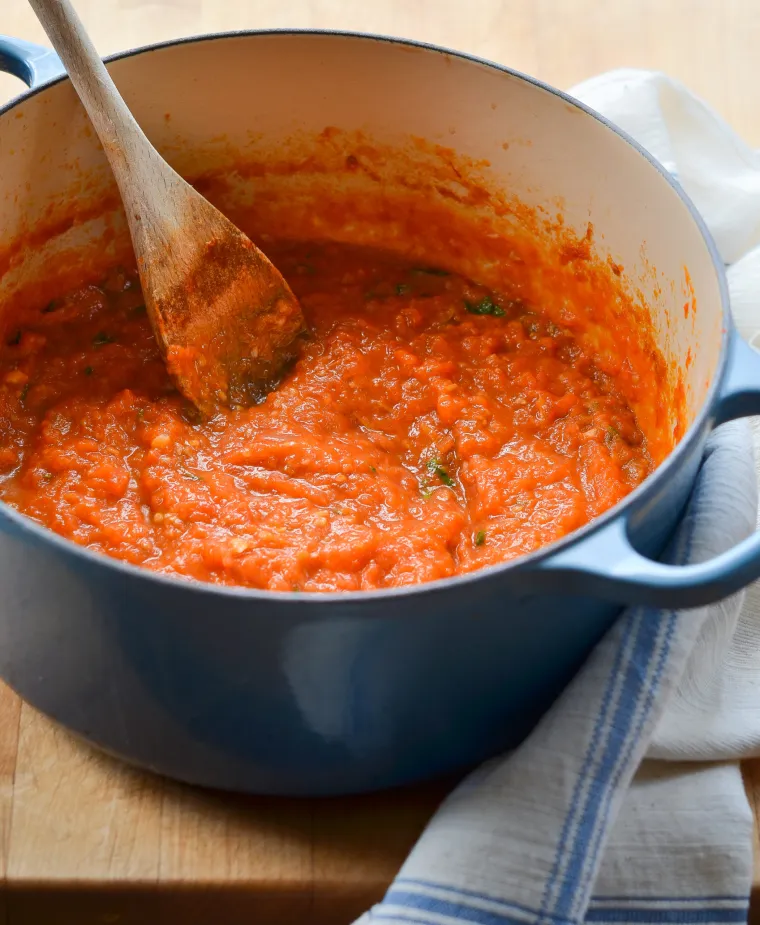
Homemade Tomato Sauce
Based on Marcella Hazan’s famous recipe, this is a simple and rich homemade tomato sauce. I admit that I have an entire shelf in my pantry devoted to my favorite jarred tomato sauce, but when tomatoes are in season and I’ve got a little extra time, I love to make tomato sauce from scratch. It’s so delicious and always makes me wonder how I can ever eat that run-of-the-mill jarred stuff! My go-to recipe is based on cookbook author Marcella Hazan’s famously simple tomato butter sauce, although I’ve tweaked it over the years to make it my own. It’s such a rich and flavorful sauce, it doesn’t even need Parmesan cheese when tossed with pasta. If fresh tomatoes aren’t in season or you want to save time, feel free to use canned whole peeled tomatoes; just avoid canned diced tomatoes, as they are treated with a chemical that prevents them from fully breaking down. What you’ll need to make Homemade tomato sauce Step-By-Step Instructions Begin by scoring the tomatoes with an X on one end. Don’t cut too deep – about 1/4 inch is good. Place the tomatoes in boiling water and cook for 1 to 2 minutes, until the skins start to peel back. Be careful not to cook too long, or the tomatoes will become soft and difficult to handle. Plunge the tomatoes into an ice-cold water bath to stop the cooking process. Transfer the tomatoes to a cutting board and peel the skins off. Cut the tomatoes into 1/2-inch chunks. Place the chopped tomatoes, along with all of their seeds and juices, into a large Dutch oven or saucepan, along with the butter, olive oil, onions, garlic, salt and sugar. Bring to a gentle boil. Reduce the heat to low and simmer, uncovered, for 1-1/2 to 2-1/2 hours, until the sauce is no longer watery. Remove the onion and discard. Use a wooden spoon or potato masher to smash any large chunks of tomatoes or garlic to make a slightly chunky and thick sauce. Before serving, stir in the basil. The sauce will keep in the refrigerator for about 4 days, or can be frozen in an airtight container for up to 3 months. Note: This recipe has been written by Jenn Segal and republished on MudMatter with Author’s Permission. Please find the original link here – Homemade Tomato Sauce.
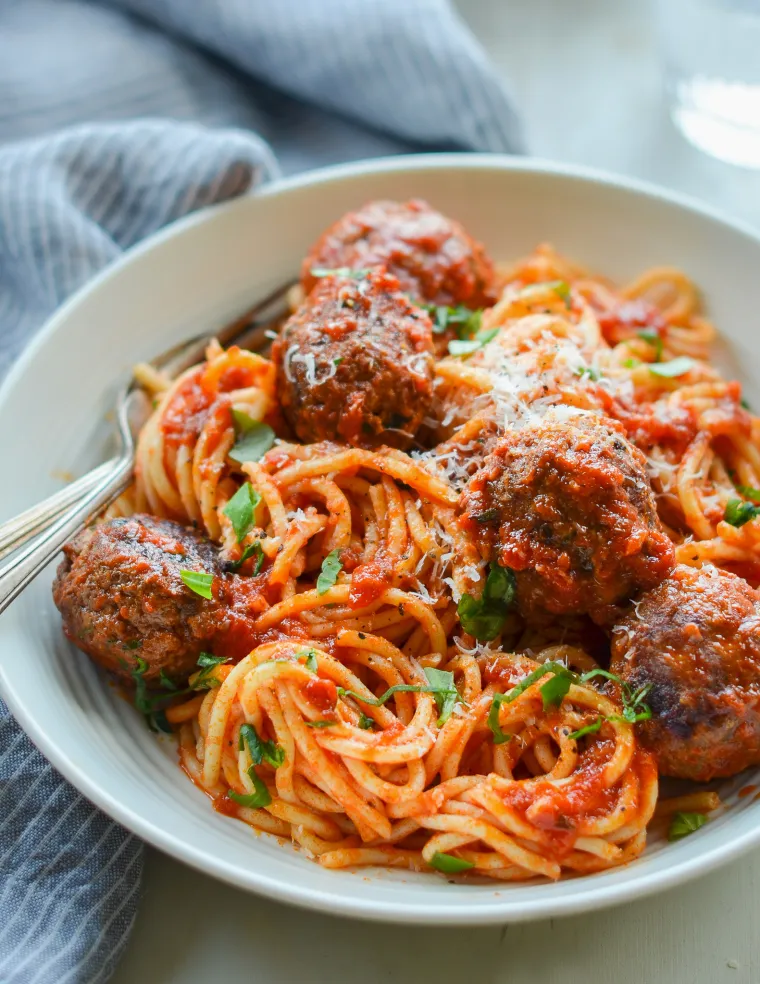
Spaghetti and Meatballs
This spaghetti and meatball recipe is the ultimate weeknight family dinner — quick, easy, and picky eater-approved! This is my go-to recipe for spaghetti and meatballs. With a quick 45-minute cook time, it’s perfect for busy weeknights and sure to please even the pickiest eaters. The meatballs are juicy and packed with flavor, with a fork-tender texture that keeps everyone coming back for more. To make things easy and save on mess, I brown the meatballs in the oven on a sheet pan instead of pan-frying them on the stovetop. I also use a good quality store-bought marinara sauce to save time, but feel free to use homemade tomato sauce if you have some on hand. What You’ll Need To Make Spaghetti and Meatballs For the most flavorful meatballs (or meatloaf), I recommend using equal parts beef, veal, and pork; at most supermarkets, this blend is labeled “meatloaf mix.” If your market doesn’t carry the blend, you can use half beef and half pork (since ground veal isn’t readily available). For the cheese, be sure to use the real-deal imported Parmigiano-Reggiano from Italy; domestic Parmesan pales in comparison. You can always tell if it’s authentic by looking at the rind, which is embossed with the name over and over. If the cheese is already grated, it should be labeled “Parmigiano-Reggiano,” not “Parmesan.” Step-by-Step Instructions Begin with the meatballs: In a large bowl, combine the egg, basil, parsley, oregano, salt, pepper, garlic and water; whisk well. Add the meat, breadcrumbs and Parmigiano Reggiano. meatball recipe Mix with your hands until just combined. Roll the mixture into golf ball-sized meatballs, and place on an ungreased baking sheet. Bake for about 10 minutes, then remove the baking sheet from the oven and use a metal spatula or tongs to turn the meatballs (they will stick a bit but should release easily when you scrape under them with the spatula). Put the meatballs back in the oven and cook for another 10 minutes, until they are nicely browned and almost cooked through. In the meantime, bring the marinara sauce to a simmer in a large skillet. Taste it and adjust the seasoning if necessary (I usually add a healthy pinch of sugar and some freshly ground black pepper). Transfer the browned meatballs to the marinara sauce, leaving the fat behind. Cover loosely with a lid or foil and simmer for about 10 minutes, until the flavors marry and the meatballs are cooked through. Keep warm until ready to toss with pasta. While the meatballs are cooking, bring a large pot of well-salted water to a boil. Add the spaghetti and cook until al dente. Drain, then toss with the sauce and meatballs. Transfer the spaghetti and meatballs to serving bowls and top with fresh chopped basil and more grated cheese. Note: This recipe has been written by Jenn Segal and republished on MudMatter with Author’s Permission. Please find the original link here – Spaghetti and Meatballs.
Pesto Sauce
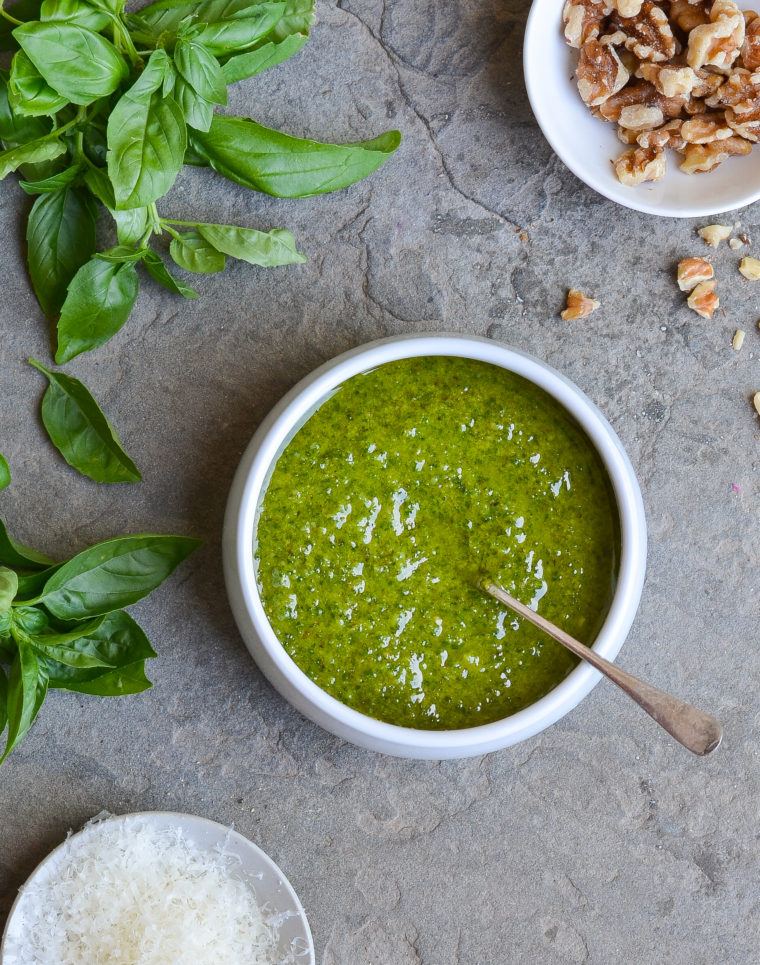
Homemade pesto sauce is easy to make, and it’s good on just about everything, from pastas to pizzas to salads. One of my favorite things about summer cooking is stepping out my back door to pick fresh herbs from my potted herb garden. It always amazes me how the tiny seedlings I plant in May grow into more herbs than I can possibly use up in August. Right now, my basil plant is overflowing, which means it’s time to make pesto sauce. Pesto, or pesto alla genovese, is a vibrant, garlicky green sauce that originated in Genoa, Italy. It’s traditionally made with a mortar and pestle, but most modern versions call for using a food processor. Pesto is a versatile sauce that can be used on just about everything, from pastas to sandwiches to salads. It freezes well, too. What You’ll Need To Make Pesto Sauce Traditional pesto is made with garlic, nuts, salt, basil leaves, Parmigiano-Reggiano, and extra-virgin olive oil. It’s important to use top-quality ingredients, as the flavors really shine through. For the cheese, be sure to use authentic Parmigiano-Reggiano from Italy; domestic Parmesan is not the same thing. You can always tell if the cheese is authentic by looking at the rind, which is embossed with the name over and over. If the cheese is already grated, it should be labeled “Parmigiano-Reggiano,” not “Parmesan.” For the nuts, I use walnuts instead of the more traditional pine nuts for a few reasons. First, I always seem to have walnuts in the house (pine nuts can be very pricey). Second, in recent years an increasing number of people, including me, have fallen prey to a bizarre problem with pine nuts called Pine Mouth Syndrome, a bitter, metallic taste in the mouth that develops a day or two after eating pine nuts. It can last for weeks and make eating or drinking anything very unpleasant. (You can use pecans or almonds, too.) Step-by-Step Instructions To begin, combine the walnuts and garlic in the bowl of a food processor and pulse until coarsely chopped. Add the basil leaves, salt, and pepper. Process until finely chopped. Then, with the food processor running, add the olive oil through the feed tube in a steady stream. Add the Parmigiano-Reggiano. Process again until smooth, and that’s your pesto sauce. How To Store & Freeze Pesto Use the pesto immediately or store it in a tightly sealed jar or air-tight plastic container, covered with a thin layer of olive oil (this seals out the air and prevents the sauce from oxidizing, which would turn it an ugly brown color). It will keep in the refrigerator for about a week. Pesto can also be frozen in an airtight container for up to 6 months. I suggest dividing it into the compartments of an ice cube tray and freezing. Once frozen, remove the cubes from the tray and put in a sealable plastic bag or airtight container. You can add the defrosted cubes to summer vegetable soup, pasta salad with pesto, zucchini noodles, pesto pizza, eggs, sandwiches, and baked potatoes. Note: This recipe has been written by Jenn Segal and republished on MudMatter with Author’s Permission. Please find the original link here – Pesto Sauce.
Shakshuka
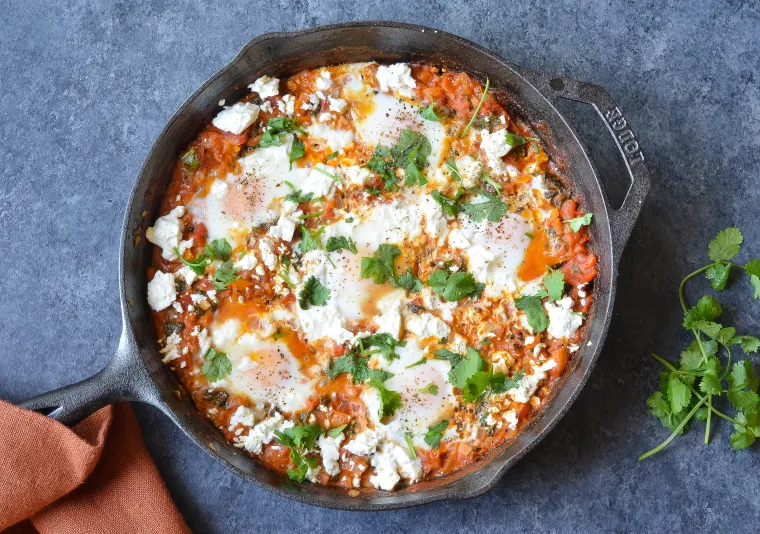
Shakshuka is a one-skillet dish of eggs poached in a smoky, spicy, vegetable-laden tomato sauce. Popular throughout the Middle East, particularly in Israel (where it ranks right up there with falafel and hummus as one of Israel’s most-loved dishes), shakshuka is one-skillet dish of eggs gently poached in a smoky, spicy tomato and vegetable sauce. The dish was brought to Israel by Jewish immigrants from North Africa and variations abound. One popular version called green shakshuka replaces the tomato sauce with a rich spinach and cream sauce loaded with green vegetables. My version is traditional, with a few small tweaks that take it up a notch. I add a splash of heavy cream to marry the acidity of the tomatoes with the richness of the eggs – it makes all the difference – and I also sprinkle crumbled feta on top. Shakshuka is traditionally made in a cast iron pan and is simple to prepare. You start by making the sauce on the stovetop, then you gently crack the eggs into wells in the sauce and cook briefly before finishing the dish under the broiler. It’s the ultimate breakfast-for-dinner dish, but it can be served any time of day. Toasted buttered bread for mopping up the sauce and runny yolks is a must. What You’ll Need To Make Shakshuka Step-by-Step Instructions Begin by chopping the onions, peppers, and garlic. Be sure not to chop the garlic too finely or it will burn. In a large skillet, heat the oil over medium heat. Add the onions, garlic and bell pepper. Cook, uncovered, for about 8 minutes, until softened. Add the smoked paprika, cumin, coriander, red pepper flakes, 1-1/4 teaspoons of the salt, sugar, and tomatoes. Cook, uncovered, stirring occasionally, for about 10 minutes, or until the sauce is slightly thickened. While the sauce cooks, chop the greens. Add the chopped greens and heavy cream to the sauce, and continue cooking, uncovered, until the greens are soft and wilted, about 10 minutes more. Turn off (or remove the pan from) the heat. Then, using a spoon, make 6 wells/indentations in the sauce. Carefully crack an egg into each well, then spoon a bit of the sauce over the egg whites (this will contain them and also help them cook a bit faster than the yolks), being careful not to disturb the yolks. Sprinkle the eggs with the remaining 1/4 teaspoon salt. And then sprinkle the feta around the eggs. Set the pan on the stove over low heat and cover with a lid. Cook until the egg whites are mostly set but still translucent on top, 5 to 7 minutes. Transfer the pan to the oven and broil until the eggs are cooked to your liking, 1 minute or less for runny yolks. Remove the pan from the oven and sprinkle the cilantro over top. Serve hot with bread. Note: This recipe has been written by Jenn Segal and republished on MudMatter with Author’s Permission. Please find the original link here – Shakshuka.
Pasta Bolognese
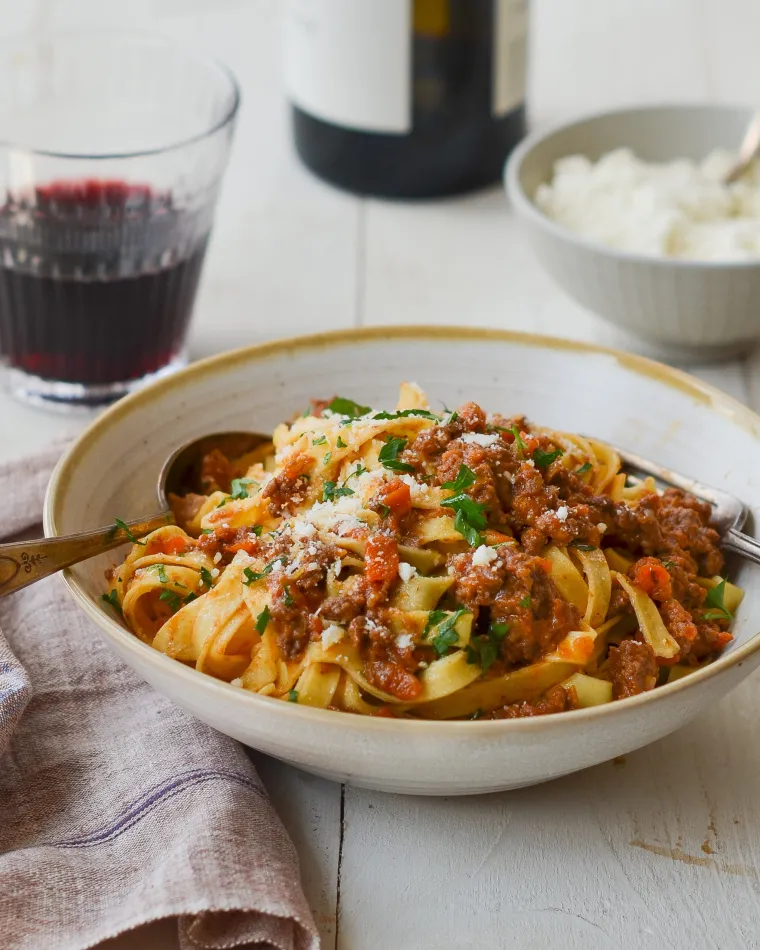
Fresh fettuccine pasta in a richly-flavored meat sauce, this pasta Bolognese is a family favorite. Pasta Bolognese, or pasta in a tender and richly-flavored meat and vegetable sauce, is one of my favorite Sunday night family suppers. The sauce simmers on the stove for several hours, making the house smell delicious and inviting — and it’s one of those dishes that just tastes like it was made with love. I prefer fresh fettuccine here, which you can find in the refrigerator case at most supermarkets, but it’s good with dried fettuccine, rigatoni or anything, really. What You’ll Need To Make Pasta Bolognese Before we get to the step-by-step instructions, a few notes about the ingredients: Pancetta is simply Italian bacon. Instead of being smoked like American bacon, it is cured with salt and spices and then dried. You can find it in the deli at most supermarkets or precut and packaged in the refrigerated gourmet foods aisle, which is a great time saver. For the wine, use any dry red (Pinot Noir, Merlot, Cabernet Sauvignon, etc.) that is inexpensive but still good enough to drink. How To Make Pasta Bolognese Place onions in bowl of food processor fitted with metal blade. Pulse until very finely chopped but not puréed. Transfer the onions to a bowl, then add carrots and celery to the food processor. Pulse until finely chopped. Heat the olive oil in large heavy pot over medium-high heat, and add the onion and vegetable mixture. Cook, stirring frequently, until soft, about 8 minutes. Lower the heat if vegetables start to brown. Add the ground beef, pancetta, salt and pepper. Cook over medium-high heat, breaking up meat with a wooden spoon, until meat is no longer pink, 5 to 10 minutes. Add red wine and cook until liquid is almost dissolved, 1 to 2 minutes. Add the broth, crushed tomatoes and oregano. Bring to a gentle boil, then reduce heat to low. Cover with the lid slightly ajar and simmer for 1 hour and 30 minutes. Stir in the milk. Cover with the lid slightly ajar and simmer until milk is absorbed, about 35 minutes. If the sauce looks greasy, use a soup spoon to skim the fat off of the top. Cover to keep warm while you make the pasta. Cook pasta according to package instructions. Drain, reserving 1 cup of the pasta water. Toss the pasta with the sauce, adding the reserved pasta water little by little if the pasta seems dry. Taste and adjust seasoning with salt and pepper if necessary. Divide the pasta into serving bowls and sprinkle with fresh herbs, if using. Pass the grated Parmigiano Reggiano at the table. Note: This recipe has been written by Jenn Segal and republished on MudMatter with Author’s Permission. Please find the original link here – Pasta Bolognese.
Summer Pasta Primavera
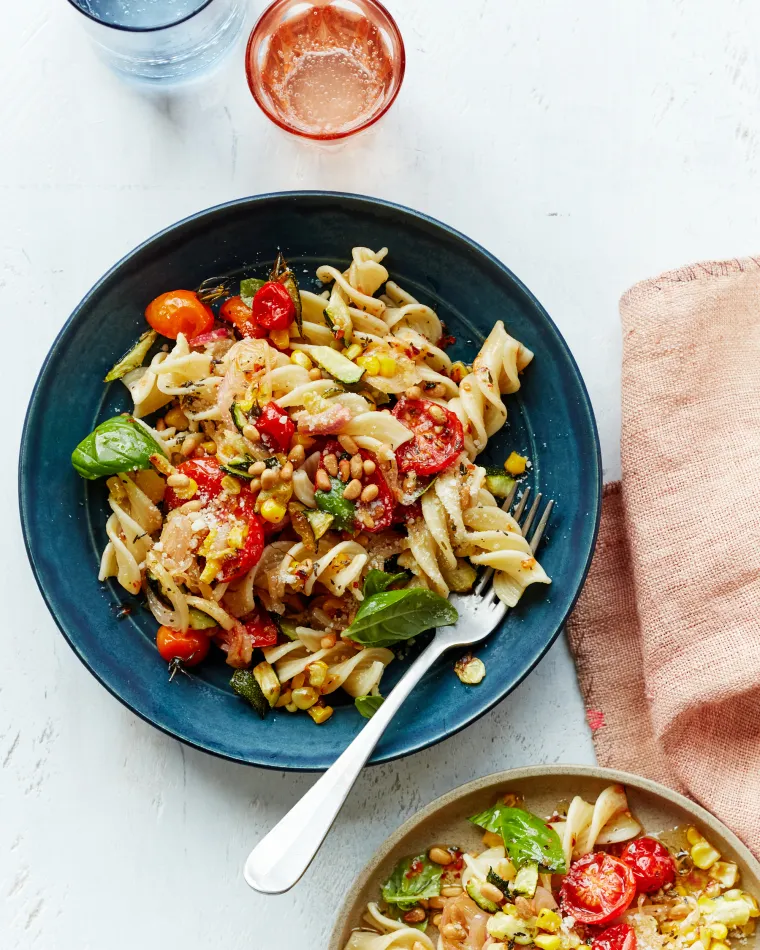
With roasted tomatoes, zucchini, and corn, this pasta primavera is an ode to summer. I realize the title of this dish is a bit of an oxymoron — the word “primavera” means springtime in Italian. But, generally, when we think of pasta primavera, we think of pasta with a chorus of vegetables from any season. With roasted tomatoes, corn, and zucchini, this pasta primavera is an ode to summer. It is a modern version of the classic pasta primavera made popular in the 1970s by Le Cirque restaurant in New York City that a NYT food columnist called “by far, the most talked-about dish in Manhattan.” The dish rich in flavor so I serve it as a main course, but it also makes a fantastic side to grilled Italian sausage. What you’ll need To Make Summer Pasta Primavera Classic pasta primavera is made with heavy cream, but this version gets its richness from a combination of olive oil, butter, and pecorino romano cheese. Toasted pine nuts add more rich flavor and crunch. For the pasta, most short noodle shapes will work – good options include fusilli, penne, farfalle, gemelli, or campanelle. Step-by-Step Instructions To begin, combine the tomatoes, shallots, garlic, olive oil, salt, and sugar on the prepared baking sheet. Toss with your hands or a rubber spatula until the vegetables are evenly coated. Arrange the vegetables in a single layer and roast at 450°F for about 20 minutes, or until the tomatoes are starting to brown. Remove the pan from the oven and add the zucchini and corn. Toss with a rubber spatula (the tomatoes will collapse; that’s okay) and spread into an even layer. Roast for 5 minutes more, until the zucchini and corn are tender-crisp. Meanwhile, cook the pasta in salted water until al dente and drain. Add the pasta back to the pan, along with the roasted vegetables and all their juices. Add the butter, herbes de Provence, red pepper flakes, pecorino Romano, basil, and pine nuts. Toss well, then taste and adjust seasoning if necessary. Spoon into pasta bowls and drizzle with olive oil, if desired. Serve with more grated cheese. Enjoy! Note: This recipe has been written by Jenn Segal and republished on MudMatter with Author’s Permission. Please find the original link here – Summer Pasta Primavera.
Understanding Clean Architecture
Understanding Clean Architecture is crucial for building maintainable and scalable software. Let’s provide a concise explanation of Clean Architecture: Clean Architecture: A Brief Explanation Clean Architecture is a software architecture pattern that emphasizes the separation of concerns and the independence of the application’s business logic from external concerns like frameworks, databases, and user interfaces. It was popularized by Robert C. Martin (Uncle Bob) and aims to create a maintainable and flexible codebase that can withstand changes over time. Key Concepts: Separation of Concerns: Clean Architecture promotes dividing the application into distinct layers, each with its specific responsibilities. This separation enables changing one part of the system without affecting the other parts. Dependency Rule: The inner layers should not depend on the outer layers. Business logic and core functionality reside in the innermost layer, which should have no knowledge of external frameworks or technologies. Dependency Inversion Principle (DIP): High-level modules should not depend on low-level modules; both should depend on abstractions. This principle fosters a flexible and maintainable codebase by decoupling concrete implementations from abstractions. Entities: Core domain models representing business entities exist at the heart of the architecture. They are independent of the external layers and encapsulate core business rules. Use Cases (Interactors): Use cases represent application-specific operations or business workflows. They contain the application’s business logic and orchestrate interactions between entities and external layers. Interface Adapters: These adapters convert data between the use cases and external components, such as databases, web services, or user interfaces. They allow the use cases to remain independent of external technologies. Frameworks and Drivers: The outermost layer is responsible for interacting with external frameworks, databases, and user interfaces. It should not contain business logic but should adapt the data to and from the use cases. Benefits of Clean Architecture: Maintainability: The separation of concerns makes it easier to maintain and modify the application over time, as changes in one part don’t affect the others. Testability: Clean Architecture promotes testability by allowing isolated testing of use cases and business rules without involving external dependencies. Flexibility: The architecture’s decoupling allows for easy replacement of technologies or frameworks without significant changes to the core application. Scalability: The modular structure of Clean Architecture facilitates scaling the application by adding or modifying modules as needed. Focus on Business Logic: Clean Architecture helps developers focus on implementing core business rules rather than being bogged down by external concerns. Sample Structure of the Clean Architecture Project: ├── src │ ├── Core # Contains the core business logic and domain models, view models, etc. │ │ ├── Entities # Contains domain models/entities │ │ │ ├── Product.cs # Sample domain model (can have more entities) │ │ │ └── ... │ │ ├── Services # Contains business logic services │ │ │ ├── IProductService.cs # Sample service interface │ │ │ ├── ProductService.cs # Sample service implementation │ │ │ └── ... │ │ └── ... │ ├── Infrastructure # Contains infrastructure concerns such as data access, external services, etc. │ │ ├── Data # Contains data access related classes │ │ │ ├── ApplicationDbContext.cs # Sample DbContext class │ │ │ ├── ProductRepository.cs # Sample repository implementation │ │ │ └── ... │ │ ├── ExternalServices # Contains code for external services integration │ │ │ ├── EmailService.cs # Sample external service integration │ │ │ └── ... │ │ └── ... │ └── UI # Contains the user interface layer, including controllers, views, and extensions, etc. │ ├── Controllers # Contains controllers for handling HTTP requests and responses │ │ ├── ProductController.cs # Sample controller │ │ └── ... │ ├── Views # Contains views for rendering UI components │ │ ├── Product # Folder for Product-related views │ │ │ ├── Index.cshtml # Sample view for displaying products │ │ │ ├── Create.cshtml # Sample view for creating a new product │ │ │ ├── Edit.cshtml # Sample view for editing an existing product │ │ │ └── ... │ │ └── ... │ └── ... ├── UnitTest │ ├── Core.Tests # Contains unit tests for the core layer │ │ ├── ProductServiceTests.cs # Sample unit test for ProductService │ │ └── ... │ ├── Infrastructure.Tests # Contains unit tests for the infrastructure layer │ │ ├── ProductRepositoryTests.cs # Sample unit test for ProductRepository │ │ └── ... │ ├── UI.Tests # Contains unit tests for the UI layer │ │ ├── ProductControllerTests.cs # Sample unit test for ProductController │ │ └── ... │ └── ... └── README.md # Project documentation Please note that this is a simplified representation of the project structure, and in a real-world application, you may have more folders and files based on your specific requirements. The above structure adheres to the Clean Architecture principles, with a clear separation of concerns between the core domain logic, infrastructure concerns (data access and external services), and the user interface layer. The tests folder contains separate test projects for each layer, allowing you to write unit tests to ensure the functionality of each component. Core: Contains the core business logic, including domain models and services. This layer represents the heart of the application, encapsulating the essential business rules and entities. ├── Core │ ├── Entities # Domain entities representing business objects │ │ └── User.cs # Example entity class representing a user │ ├── Services # Business logic and services │ │ └── UserService.cs # Example service class for user-related operations │ └── .. Example Code: // Core/Entities/User.cs namespace Core.Entities { public class User { public int Id { get; set; } public string Name { get; set; } public string Email { get; set; } // Other properties and methods relevant to the user entity } } // Core/Services/UserService.cs using Core.Entities; using System.Threading.Tasks; namespace Core.Services { public class UserService { public async Task<User> GetUserByIdAsync(int userId) { // Logic to retrieve user from data source (e.g., database) } // Other methods for user-related operations } } Infrastructure: Contains infrastructure concerns such as data access and external services. Repository implementations and database context reside here. ├── Infrastructure │ ├── Data # Data access layer │ │ ├── Repositories # Repository implementations │ │ │ └── UserRepository.cs # Example repository for user entity │ │ └── AppDbContext.cs # Entity Framework Core database context │ └── ... Example Code: // Infrastructure/Data/Repositories/UserRepository.cs using Core.Entities; using Core.Interfaces; using Microsoft.EntityFrameworkCore; using System.Collections.Generic; using System.Threading.Tasks; namespace Infrastructure.Data.Repositories { public class UserRepository : IRepository<User> { private readonly AppDbContext _context; public UserRepository(AppDbContext context) { _context = context; } public async Task<IEnumerable<User>> GetAllUsersAsync() { return await _context.Users.ToListAsync(); } // Other CRUD methods for the user entity } } // Infrastructure/Data/AppDbContext.cs using Core.Entities; using Microsoft.EntityFrameworkCore; namespace Infrastructure.Data { public class AppDbContext : DbContext { public DbSet<User> Users { get; set; } public AppDbContext(DbContextOptions<AppDbContext> options) : base(options) { } } } API: Contains the API layer, including controllers and extensions. This layer exposes endpoints and handles HTTP requests. ├── API │ ├── Controllers # API controllers │ │ └── UserController.cs # Example controller for user-related actions │ ├── Extensions # Extension methods for configuring services │ └── ... Example Code: // API/Controllers/UserController.cs using Core.Entities; using Core.Services; using Microsoft.AspNetCore.Mvc; using System.Collections.Generic; using System.Threading.Tasks; namespace API.Controllers { [ApiController] [Route("api/[controller]")] public class UserController : ControllerBase { private readonly UserService _userService; public UserController(UserService userService) { _userService = userService; } [HttpGet] public async Task<ActionResult<IEnumerable<User>>> GetUsers() { var users = await _userService.GetAllUsersAsync(); return Ok(users); } // Other CRUD actions for user entity } } Unit Testing: Core.Tests Contains unit tests for the core layer. These tests ensure the correctness of core business logic and services. Infrastructure.Tests Contains unit tests for the infrastructure layer. These tests validate data access and repository implementations. API.Tests Contains unit tests for the API layer. These tests verify the functionality of API controllers and endpoints. Conclusion: Clean Architecture is a powerful pattern that promotes code organization, testability, and maintainability. By following its principles, developers can create robust and adaptable software that stands the test of time and can accommodate future changes and enhancements with ease. Note: This article has been written by Kawser Hamid and republished on MudMatter with Author’s Permission. Please find the original link here – Understanding Clean Architecture.
Zucchini and Cheddar Frittata
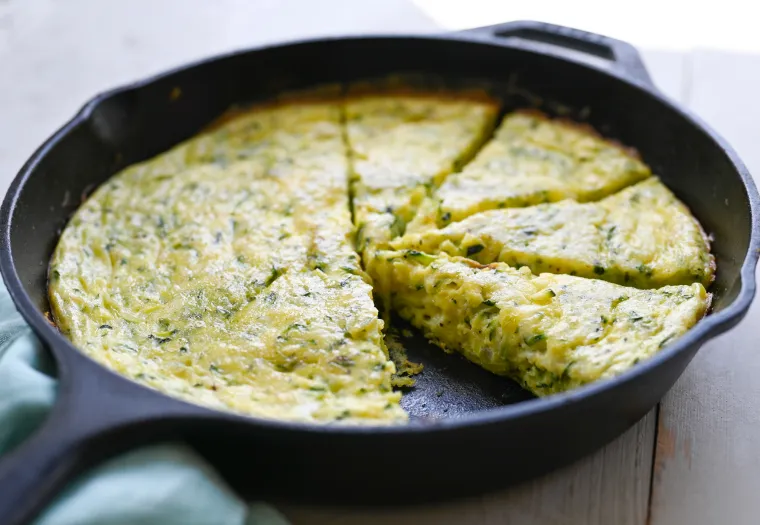
Filled with heaps of shredded zucchini and extra-sharp cheddar, this zucchini frittata is good for brunch, dinner, or anytime in between. I always love the idea of a frittata. You can throw one together in 30 minutes, and they’re great for using up any leftover veggies, meat, or hunks of cheese you might have languishing in the fridge. Problem is, they’re usually dry, rubbery, and just not that good. For same calories, I’d rather have quiche! This zucchini frittata, however, is delicate and creamy, almost like a crustless quiche. There are three secrets to success: 1) squeeze as much water as possible out of the zucchini; 2) add some heavy cream and lots of cheese to the egg mixture; and 3) bake the frittata in a low-temperature oven, instead of the traditional stovetop-to-broiler method, so the eggs cook gently into a custard without scrambling. Ingredients For zucchini frittata Step-by-Step Instructions Begin by grating the zucchini by hand or in a food processor. It’s best to use small zucchini, as they contain less water. Once grated, place the zucchini on several layers of paper towels and squeeze out as much water as possible. Depending on how much water is in the zucchini, you may need to repeat this step. Next, melt a few tablespoons of butter in a 10-inch cast iron or oven-proof nonstick pan. Add the shallots, zucchini, and 1/2 teaspoon salt. Cook for 7 to 8 minutes, until the zucchini is tender and cooked down. Meanwhile, combine the eggs, remaining salt, pepper and heavy cream in a large bowl. Whisk to combine. Add the cooked zucchini and grated cheese to the egg mixture and stir. Pour the frittata mixture back into the pan. Bake for about 25 to 30 minutes, or until just set. Serve the frittata warm or room temperature. Note: This recipe has been written by Jenn Segal and republished on MudMatter with Author’s Permission. Please find the original link here – Zucchini and Cheddar Frittata.
