Articles contributed by the community, curated for your enjoyment and reading.
Filters
Reset
Join Our Talent Pool: Explore Various Job Opportunities!
The open positions as of today 07 Feb 2025 are (How to apply is mentioned below): Client: Infosys Position Name: Oracle OAF Experience: 5 years Location: Remote Rate: Contact for rate and payment terms Position Name: Oracle E-Business Suite ERP Developer Experience: 5 years Skills Required: Minimum 5 years of role experience as Oracle EBS Techno Functional consultant. Experience in designing and developing financial solutions on Oracle eBusiness Suite R12 platform, with focus on Procure to Pay (P2P), Record to Report (R2R), and AR modules and global rollouts. Extensive hands-on development and functional experience and proficiency in SQL and PL/SQL, Oracle Workflow, BI publisher, AME, Oracle Forms, Oracle Reports, UNIX Shell scripts, Java, and OA Framework. Experience in system integration and familiarity with enterprise application integration (EAI) technologies. Experience and knowledge of Oracle modules, Apache/IIS, WebLogic application server, and other middleware platforms would be a plus. Experience in SAP Concur and Ariba application would be a plus. Extensive development knowledge of Oracle eBusiness Suite R12 (Account Receivable, Purchasing, Payables, Payments, EBTax, Cash Management, Fixed Assets, General Ledger, Sub ledger Accounting, XML Gateway, System Administration, TCA Architecture) and related systems. Experience in and understanding of the software development lifecycle and methodologies and Finance operations (accounts payable, sourcing, accounting, financial internal controls) business process knowledge in a global setting. Location: Bangalore Rate: Contact for rate and payment terms Position Name: Big Data Engineer with Airflow, Python Experience: 5+ years Location: Bengaluru Rate: Contact for rate and payment terms Position Name: Oracle E-Business Suite (ERP) Test Engineer Experience: 5+ years Skills Required: ERP Software Test Engineer will play a key role to partner with the application Support and Development teams for SAP Ariba, SAP Concur, and Oracle ERP (Oracle eBusiness Suite R12- Purchasing, Accounts Payables, General Ledger, EBTax, Fixed Assets, and Accounts Receivables) and other Finance applications. ERP Software Test Engineer will be performed against global initiatives, enhancements, and day-to-day operational Production defects. Tasks include creation of Test Plans, Test Case Creation, Test Data Creation, Manual Testing, Issue Management Resolution, and Documentation. Ability to comprehend complex Business requirements and technical solutions, mapping into Test Cases, and Test Scripts. Manage defects from identification to completion. Assist to standardize reporting and metrics on deliverables by the QA team, including defect logging and status reporting. ERP Software Test Engineer is expected to create SQL queries against database to troubleshoot, create ad-hoc reporting as needed. Work with limited direction, usually within a complex environment, to drive delivery of solutions and meet service levels. Able to work on multiple projects and initiatives with different/competing timelines and demands. Location: Remote Rate: Contact for rate and payment terms Position Name: Database & Middleware Engineer/Administrator Experience: 4+ years Skills Required: Provide administration support for various databases, including MS SQL Server, MySQL, and Postgres, ensuring smooth operation and quick issue resolution. Assist in the support and maintenance of Applications/Middleware and Platforms, including troubleshooting, patching, backups & recovery, and system updates. Regularly perform system maintenance tasks, including provisioning, installing, patching, securing, and auditing databases, middleware, and platforms to ensure optimal performance and compliance. Location: Remote Rate: Contact for rate and payment terms Position Name: Identity and Access Management (IAM) Consultant Experience: 5+ years Skills Required: This role will require technical knowledge on automation of application IAM data / Access Control List (ACL) into our IAM Governance tool (setting up automated IAM datafeeds through direct database connectivity, proxy sFTP service, other third-party data aggregator tools, etc.). This role requires a deep understanding of the IAM related risks and the relevant mitigating/compensating IAM controls and policies, including control attestation, control testing, and control artifact validations. This position is specialized in providing the end-to-end IAM life cycle including but not limited to the technical application enrollment into the centralized IAM Governance infrastructure, IAM services (weekly access data load into SailPoint, Access provisioning, access deprovisioning, rogue access remediation, orphaned access remediation, Separation of Duties (SOD) remediation, transfer/mover user access reviews, user access revalidation, non-user account credential rotation governance, etc.). Act as the IAM point of contact for a set of assigned applications and manage the enterprise end-to-end IAM lifecycle for these applications. This role will also require analytic skillsets on big data analytics, dashboarding, database query, etc. Location: Remote Rate: Contact for rate and payment terms Position Name: Data Platform Engineer Experience: 6+ years Skills Required: Cloud data platform engineer who designs, builds, and manages data storage and workflows in cloud environments. They ensure that data is secure, accessible, and processed efficiently. Data Platform Management and Optimization - designs, builds, and manages data storage and workflows/compute in cloud environments. Location: Remote Rate: Contact for rate and payment terms Position Name: Java Developer with Spring Boot & Microservices Experience: Total: 8+ years; Relevant: 5+ years Skills Required: Experience in the development of production-grade applications and services in Java. Hands-on development experience in Java 8, Spring Boot, Microservices. Good knowledge of Java 8 features - Collections, Generics, Authentication, Rest API, multi-threading. Location: Bangalore Rate: Contact for rate and payment terms Position Name: Oracle XStore Experience: 10 years with 7 years relevant Skills Required: Oracle DB, SQL, Core Java, Oracle Xstore Suite, XML Location: Pune, Chennai Rate: Contact for rate and payment terms Position Name: Java Developer with SpringBoot & Microservices Experience: 6+ years (Relevant Experience) Location: Chennai Rate: Contact for rate and payment terms Position Name: Java Developer with SpringBoot, Microservices, Kafka, SQL Experience: 6+ years (Relevant Experience) Location: Chennai, Bangalore, Hyderabad Rate: Contact for rate and payment terms Position Name: Scala Developer (pure Scala profile) Skills Required: Programming Language: They primarily use Scala, a language that combines functional and object-oriented programming paradigms. Responsibilities: Design application architecture, write clean Scala code, debug issues, test applications, optimize performance, collaborate with other developers, and ensure application scalability. Typical Applications: Big data processing, distributed systems, web applications, financial systems requiring high-performance transaction processing. Location: Pune, Kolkata, Hyderabad Rate: Contact for rate and payment terms Position Name: Python Lead Experience: 8+ years (relevant 7+ years) Location: Pune, Bangalore Rate: Contact for rate and payment terms Client: Cybage Position Name: Python + DevOps (SRE) Experience: 4-9 years Skills Required: Working experience & knowledge in Python along with SRE; familiarity with Jenkins/CloudBuild, Ansible, and Cloud Computing platforms. Familiar working with containerization technologies such as Docker and Kubernetes. Location: Pune-Hybrid Rate: Contact for rate and payment terms Client: QIncline Position Name: Sr. Automation Test Engineer (Java with Selenium) Experience: 8-9 years Location: Bangalore Rate: Contact for rate and payment terms Position Name: Oracle BRM Experience: 5-6 years Skills Required: Legacy to Target Mapping to BRM (OCS) - Prepaid System BRM Loading Mechanisms and previous experience worked on pin_bulk_loader (CMT Tool). Real-Time Data Loading. Fallout Scenarios: Scenario how to fix in case of Data failure, System Performance Issue, Synchronization Issues, TPS limit or any metrics to be followed based on previous migration experience, Data export method to follow for Reconciliation, Retry Mechanisms, Error Correction Frameworks, Performance Tuning, Backup and Recovery (Restore) DB. Location: Bangalore/Remote Rate: Contact for rate and payment terms I hope this format works better for you! Let me know if you need any further adjustments. How to apply I have strong relationships with many staffing companies and will be posting multiple job openings daily. Please sign up to receive daily alerts for new job postings. While we are currently developing an online application process, you can follow the steps below to apply in the meantime: Visit my LinkedIn profile: Mayur Lohite LinkedIn Send me a Invite or direct message (DM) with the name of the position you are interested in. Or post your linkedin link in comment so I will send you invite. I will connect you with the respective staffing agency. If LinkedIn didn't worked then just visit our contact page and write position name in first line and send us a message -> Contact Us Thank you for your interest, and I look forward to helping you find your next career opportunity!


Exploring the Zip Method in LINQ: A Game-Changer for Merging Sequences
Ever heard of the Zip method in LINQ? It's a powerful tool for merging sequences, and it's something every developer should have in their toolkit. Let's dive into how this method can simplify your coding life, especially with the enhancements introduced in .NET 6. What is the Zip Method? The Zip method in LINQ allows you to merge two or more sequences into one. Starting from .NET 6, you can combine up to three collections at once. The resulting sequence will match the length of the shortest collection, ensuring a neat and tidy merge. Why Use the Zip Method? Simplifies Code: The Zip method reduces the need for multiple foreach loops, making your code cleaner and more readable. Customizable Pairing: You can use a result selector to customize how the elements are paired together, giving you flexibility in how you merge your data. Efficiency: By merging sequences in a single step, you can improve the efficiency of your code. A Practical Example Let's look at a simple example using .NET Core: static void Main() { var numbers = new[] { 1, 2, 3 }; var words = new[] { "one", "two", "three" }; var zipped = numbers.Zip(words, (n, w) => $"{n} - {w}"); foreach (var item in zipped) { Console.WriteLine(item); } } In this example, we have two arrays: numbers and words. The Zip method combines these arrays into a single sequence where each element is a combination of an element from numbers and an element from words. The result is a sequence of strings like "1 - one", "2 - two", and "3 - three". Real-world Scenario Imagine you're working on a project that involves merging data from different sources, like combining sales figures with product names. The Zip method can be your go-to solution. It's like making a perfect masala chai, where each ingredient blends seamlessly to create something wonderful. Conclusion The Zip method in LINQ is a versatile and powerful tool that can make your coding tasks easier and more efficient. Whether you're working on a small project or a large-scale application, this method can help you merge sequences with ease. Feel free to share your thoughts in the comments below. If you found this post useful, follow me for more tech insights and don't hesitate to share this with your network! 🚀
A Short tip to boost Your C# Skills with Named Tuples
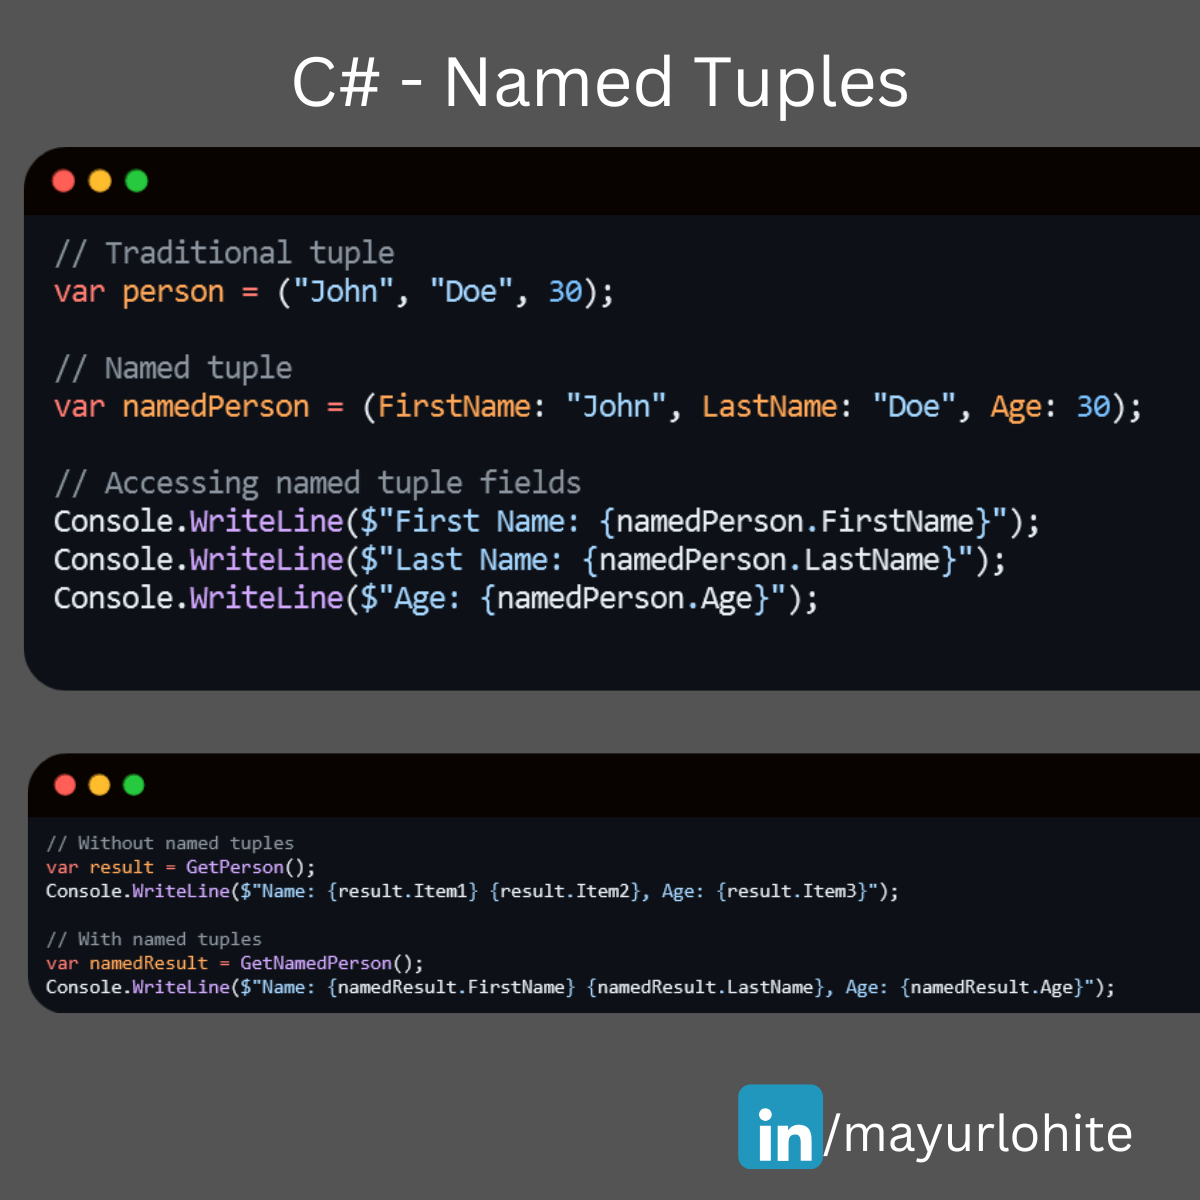
Hey Mudmatter community! 👋 Are you looking to make your C# code more readable and maintainable? Named tuples might be just what you need! They allow you to create lightweight, self-descriptive data structures without the overhead of defining a full class. What are Named Tuples? Named tuples in C# provide a way to create a tuple with named fields, making your code more intuitive and easier to understand. Why Use Named Tuples? Readability: Named fields make it clear what each value represents. Convenience: No need to define a separate class or struct for simple data grouping. Immutability: Tuples are immutable by default, ensuring data integrity. Example - Traditional // Traditional tuple var person = ("John", "Doe", 30); // Named tuple var namedPerson = (FirstName: "John", LastName: "Doe", Age: 30); // Accessing named tuple fields Console.WriteLine($"First Name: {namedPerson.FirstName}"); Console.WriteLine($"Last Name: {namedPerson.LastName}"); Console.WriteLine($"Age: {namedPerson.Age}"); Benefits in Action, Improved Code Clarity: // Without named tuples var result = GetPerson(); Console.WriteLine($"Name: {result.Item1} {result.Item2}, Age: {result.Item3}"); // With named tuples var namedResult = GetNamedPerson(); Console.WriteLine($"Name: {namedResult.FirstName} {namedResult.LastName}, Age: {namedResult.Age}"); //Simplified Data Handling: // Method returning a named tuple (string FirstName, string LastName, int Age) GetNamedPerson() { return ("John", "Doe", 30); } Named tuples are a fantastic feature to enhance your C# projects. Give them a try and see how they can simplify your code! Happy coding! 💻✨
Boost your EF Core performance with bulk updates using ExecuteUpdate
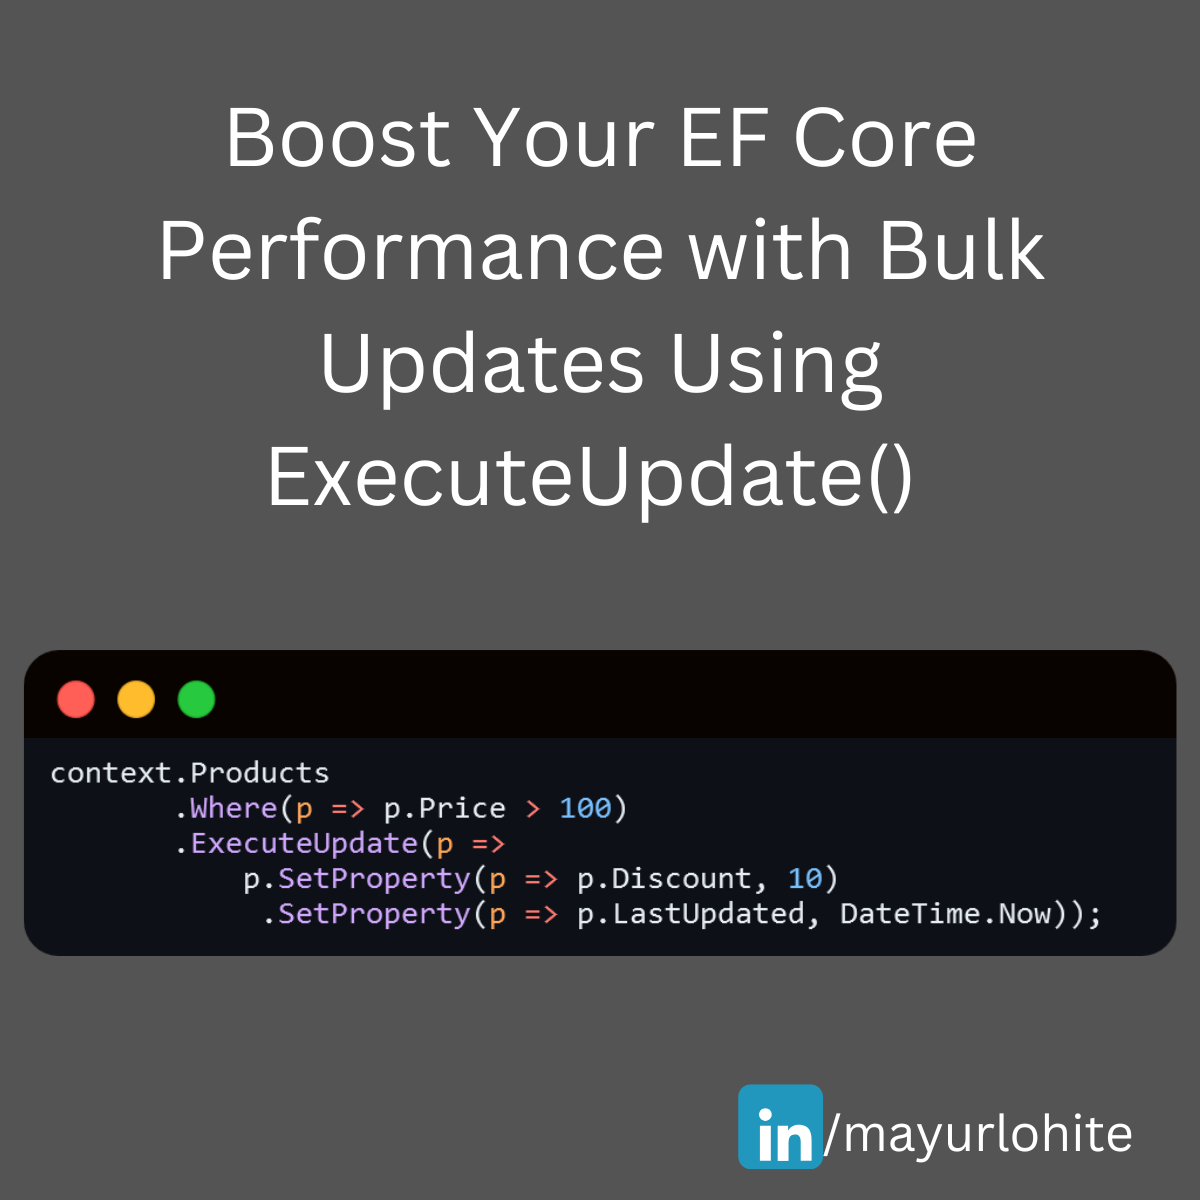
🚀 Exciting News for EF Core Users! 🚀 The latest version of Entity Framework Core (EF Core 7) introduces a powerful new feature: Bulk Update! This feature significantly enhances performance when updating multiple records in your database. Let's dive into how it works and see a sample in action. What is Bulk Update? Bulk Update allows you to perform update operations on multiple entities directly in the database without loading them into memory. This is achieved using the new ExecuteUpdate method, which can be a game-changer for applications dealing with large datasets. Why Use Bulk Update? Performance: Reduces the number of database round-trips. Efficiency: Updates multiple records in a single SQL statement. Simplicity: Cleaner and more readable code. Sample Code Here's a quick example to illustrate how you can use the Bulk Update feature: context.Products .Where(p => p.Price > 100) .ExecuteUpdate(p => p.SetProperty(p => p.Discount, 10) .SetProperty(p => p.LastUpdated, DateTime.Now)); Improved Performance: Executes a single SQL update statement. Reduced Memory Usage: No need to load entities into memory. Cleaner Code: More concise and easier to maintain. Conclusion The Bulk Update feature in EF Core 7 is a fantastic addition for developers looking to optimize their data operations. Give it a try and see the performance improvements in your applications!
Supercharge Your EF Core Performance with BulkInsertAsync
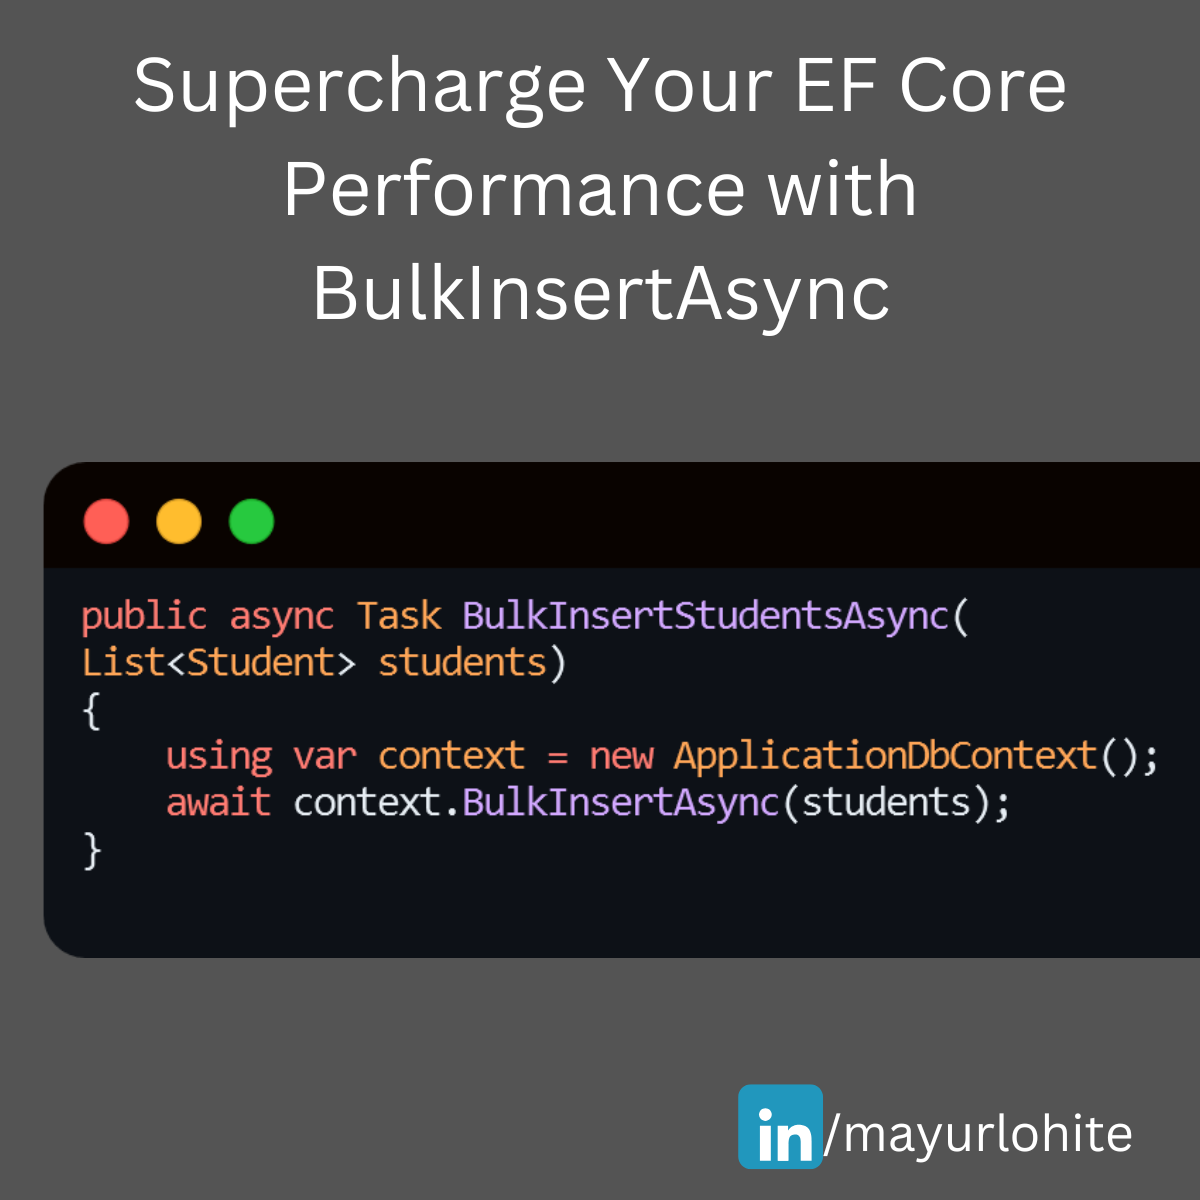
🚀 Supercharge Your EF Core Performance with BulkInsertAsync! 🚀 Struggling with large data insertions in your .NET applications? EF Core’s BulkInsertAsync can be a game-changer. Just install EFCore.BulkExtensions from nuget. Here’s a quick guide to help you get started: Why Use BulkInsertAsync? 1. Efficiency: Inserts multiple records in a single database round trip. 2. Performance: Significantly reduces the time taken for bulk operations. 3. Simplicity: Easy to implement with minimal code changes. Example Let’s say we have a Student entity and we want to insert a large list of students into the database. using EFCore.BulkExtensions; using Microsoft.EntityFrameworkCore; using System.Collections.Generic; using System.Threading.Tasks; public class Student { public int StudentId { get; set; } public string FirstName { get; set; } public string LastName { get; set; } public string Branch { get; set; } } public class ApplicationDbContext : DbContext { public DbSet<Student> Students { get; set; } } public async Task BulkInsertStudentsAsync(List<Student> students) { using var context = new ApplicationDbContext(); await context.BulkInsertAsync(students); } EF Core SaveChangesAsync: 1,000 records: 18 ms 10,000 records: 203 ms 100,000 records: 2,129 ms EF Core BulkInsertAsync: 1,000 records: 8 ms 10,000 records: 76 ms 100,000 records: 742 ms1 With BulkInsertAsync, you can handle large data operations efficiently and keep your application running smoothly. Give it a try and see the difference!
Simplify Your API Calls with Refit in C# .NET Core!
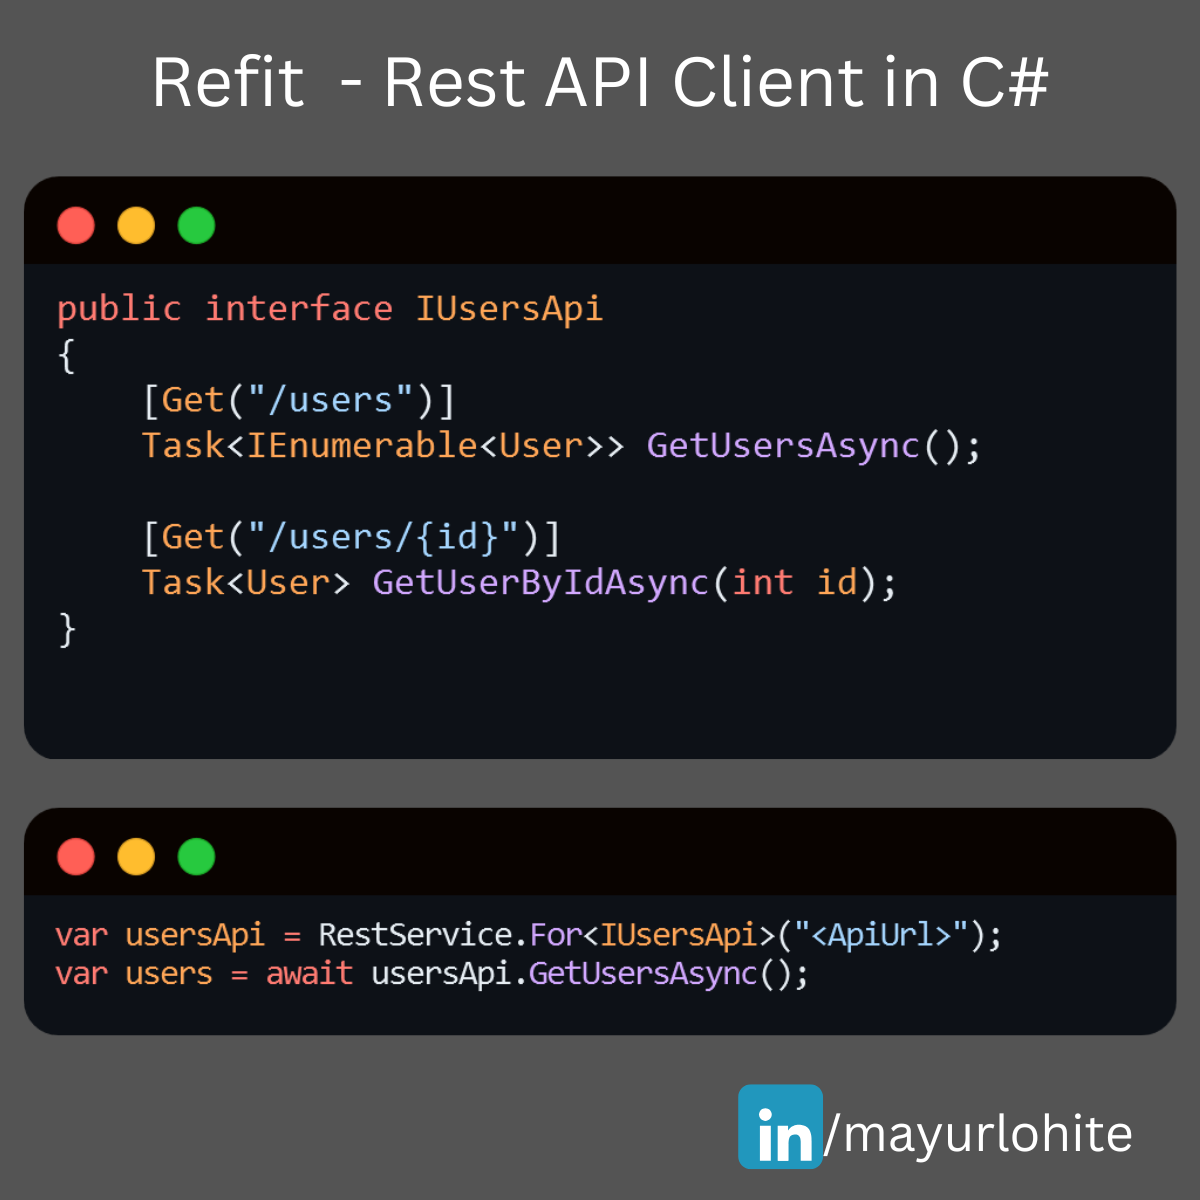
🚀 Simplify Your API Calls with Refit in C# .NET Core! 🚀 Are you tired of writing boilerplate code for HTTP clients in your .NET Core applications? Meet Refit – a type-safe REST library that turns your API into a live interface! 🎉 With Refit, you can define your API endpoints using interfaces and attributes, making your code cleaner and more maintainable. Here’s a quick example: public interface IUsersApi { [Get("/users")] Task<IEnumerable<User>> GetUsersAsync(); [Get("/users/{id}")] Task<User> GetUserByIdAsync(int id); } var usersApi = RestService.For<IUsersApi>("https://lnkd.in/dn7QrR5D"); var users = await usersApi.GetUsersAsync();
CSharp C# Clean Coding Practice
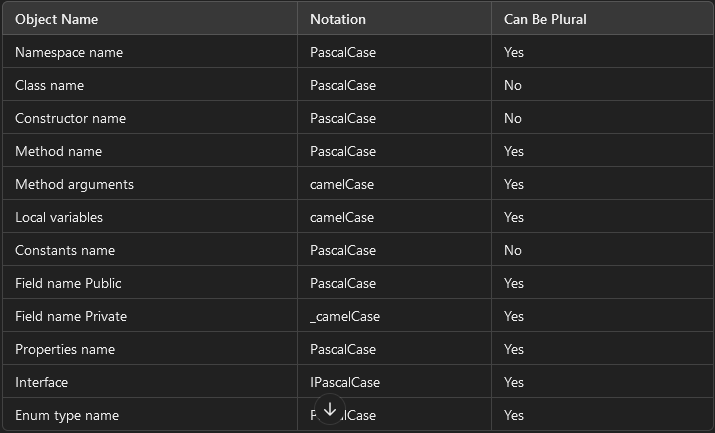
🚀 C# Clean Coding Practice 💡 🎯 Use Proper Naming Conventions Naming your variables, classes, and methods effectively is crucial for writing clean and maintainable code. Following coding conventions not only enhances readability but also serves several key purposes: ✔ Ensures consistency in code layout, allowing readers to focus on the content, not formatting. ✔ Helps others (and yourself!) understand the code more quickly based on familiar patterns. ✔ Simplifies the process of copying, modifying, and maintaining code. ✔ Promotes adherence to C# best practices. Check out the table below for standardized C# naming conventions to follow when writing code. Let's keep our code clean and efficient! 💻✨ Object Name Notation Can Be Plural Namespace name PascalCase Yes Class name PascalCase No Constructor name PascalCase No Method name PascalCase Yes Method arguments camelCase Yes Local variables camelCase Yes Constants name PascalCase No Field name Public PascalCase Yes Field name Private _camelCase Yes Properties name PascalCase Yes Interface IPascalCase Yes Enum type name PascalCase Yes
Building a Basic open source E-Commerce Website with ASP.NET Core 8
Building a Basic eCommerce Website with ASP.NET Core 8: A Complete Guide to MLCart The evolution of eCommerce has transformed the way businesses operate and interact with customers. As companies continue to move their operations online, the demand for dynamic, scalable, and secure web applications has increased. ASP.NET Core 8, Microsoft's open-source web framework, is designed to meet these needs, allowing developers to build high-performance and feature-rich applications that can power online businesses. In this blog, we’ll explore how to build a basic eCommerce website using ASP.NET Core 8. We will use MLCart, an open-source project available on GitHub, to demonstrate key features and how to get started with building your own eCommerce platform. Table of Contents Introduction to ASP.NET Core 8 Overview of MLCart: Features and Architecture Setting Up the Development Environment Cloning and Running the MLCart Application Key Components of an eCommerce Website Product Management Shopping Cart Functionality User Authentication Payment Integration Exploring the Codebase of MLCart Models, Views, and Controllers Entity Framework Integration Customizing MLCart for Your Business Needs Adding Custom Features Improving the UI/UX Performance Optimization Best Practices for eCommerce Websites in ASP.NET Core Conclusion and Next Steps 1. Introduction to ASP.NET Core 8 ASP.NET Core 8 is the latest iteration of Microsoft’s web development framework. It is cross-platform, allowing developers to build applications for Windows, macOS, and Linux. ASP.NET Core is known for its performance, scalability, and the flexibility to integrate various tools and libraries. Key features that make ASP.NET Core 8 a strong choice for eCommerce platforms include: High Performance: ASP.NET Core has built-in performance optimization, making it one of the fastest web frameworks. Cross-Platform Support: Applications built with ASP.NET Core can run on multiple platforms, allowing businesses to deploy their websites on various operating systems. Built-in Security Features: ASP.NET Core offers built-in tools for authentication, authorization, and data protection, ensuring secure eCommerce transactions. Integration with Modern Frontend Frameworks: ASP.NET Core allows seamless integration with frontend technologies like Angular, React, and Vue.js. Scalability: The framework is designed to handle high traffic and complex workloads, making it perfect for growing eCommerce businesses. 2. Overview of MLCart: Features and Architecture MLCart is an open-source eCommerce project built using ASP.NET Core 8 and made available by the developer Mayur Lohite on GitHub. MLCart provides a basic structure for an online store with essential features like product listing, shopping cart management, and user authentication. Key Features of MLCart: Product Catalog: Displays available products with detailed descriptions and images. User Authentication: Implements user registration, login, and account management functionalities. Shopping Cart: Enables users to add products to their cart and manage the cart’s content. Order Processing: Manages order placement and history. Admin Dashboard: Provides an interface for administrators to manage products, categories, and user orders. Architecture Overview: MLCart follows the traditional Model-View-Controller (MVC) architecture of ASP.NET Core: Models: Represent the business logic and data structure of the eCommerce platform. Views: Define the user interface for both customers and admins. Controllers: Handle user requests and interactions, connecting the Models and Views. This modular architecture allows developers to easily extend the functionality of MLCart by adding new features or modifying existing ones. 3. Setting Up the Development Environment Before diving into the MLCart project, you need to set up your development environment to run ASP.NET Core 8 applications. Prerequisites: Install .NET SDK (Version 8): Download and install the latest version of the .NET SDK from the official website. Install Visual Studio: You can download Visual Studio 2022 or later. Ensure you select the ".NET Core cross-platform development" workload during installation. Install SQL Server: Since MLCart uses SQL Server for database management, ensure you have SQL Server installed. Alternatively, you can use SQL Server Express for local development. Cloning the MLCart Repository: Once the environment is set up, you can clone the MLCart repository from GitHub: git clone https://github.com/mayurlohite/MLCart.git After cloning the repository, open the solution in Visual Studio and restore the NuGet packages. 4. Cloning and Running the MLCart Application Once you have the MLCart repository cloned, follow these steps to run the application: Build the Project: Open the MLCart solution file (.sln) in Visual Studio and click on the "Build" option from the top menu. Configure the Database: MLCart uses SQL Server for the database. You may need to configure the connection string found in the appsettings.json file to point to your local SQL Server instance. Here’s an example of the configuration: "ConnectionStrings": { "DefaultConnection": "Server=YOUR_SERVER_NAME;Database=MLCartDb;Trusted_Connection=True;MultipleActiveResultSets=true" } Run Database Migrations: In the Package Manager Console, run the following command to create the necessary tables in the database: Update-Database Run the Application: After the database setup is complete, you can run the project by pressing F5 or clicking "Start" in Visual Studio. Once the application is running, you can access it in your browser at http://localhost:5000 (or the configured port). 5. Key Components of an eCommerce Website An eCommerce website needs several core features to function effectively. Let’s explore these features within the context of MLCart and how they are implemented using ASP.NET Core 8. Product Management Products are the heart of any eCommerce store. MLCart allows admins to add, edit, and manage product listings. Products are displayed in the frontend for customers to browse. Models: The Product model in MLCart defines the product’s attributes such as Name, Description, Price, ImageUrl, and Category. Controllers: The ProductController handles the business logic for managing products, including fetching products from the database and serving them to the views. Views: Razor views display product listings and details to users in an attractive and responsive layout. Shopping Cart Functionality The shopping cart is crucial for managing customer orders. In MLCart, the cart functionality is built into the CartController, allowing users to add, remove, and update product quantities. Cart Sessions: MLCart uses session storage to keep track of the items a user has added to their cart until they proceed to checkout. Order Summary: Once a user is ready to checkout, the order summary is generated and displayed, showing the total price and product details. User Authentication MLCart supports user authentication out of the box, enabling users to create accounts, log in, and manage their profiles. ASP.NET Core Identity is used to handle registration, authentication, and authorization. Identity Models: ASP.NET Core Identity provides predefined models for users, roles, and claims. Authentication Middleware: MLCart uses middleware to handle user sessions, authentication cookies, and role-based access control. Payment Integration While MLCart doesn’t include payment integration by default, adding it is straightforward with ASP.NET Core 8. Common payment gateways like Stripe or PayPal can be integrated using third-party libraries or APIs. 6. Exploring the Codebase of MLCart Let’s dive deeper into the MLCart codebase to understand how it’s structured and how you can modify it to suit your needs. Models, Views, and Controllers (MVC Pattern) MLCart follows the MVC pattern, which separates the application logic into three interconnected components: Models: Represent the data and business logic. For example, the Product model defines the properties of a product. Views: Razor Views (.cshtml files) display data to the user and collect input. Controllers: Handle user requests and interact with models to serve data to views. For instance, the OrderController processes customer orders and saves them in the database. Entity Framework Integration MLCart uses Entity Framework Core (EF Core) for database management. EF Core is an Object-Relational Mapping (ORM) framework that simplifies data access by allowing developers to work with databases using .NET objects. DbContext: The ApplicationDbContext class is the bridge between the database and the application. It defines the data models and configures database behavior. Migrations: EF Core migrations are used to update the database schema over time. 7. Customizing MLCart for Your Business Needs One of the major advantages of using an open-source project like MLCart is
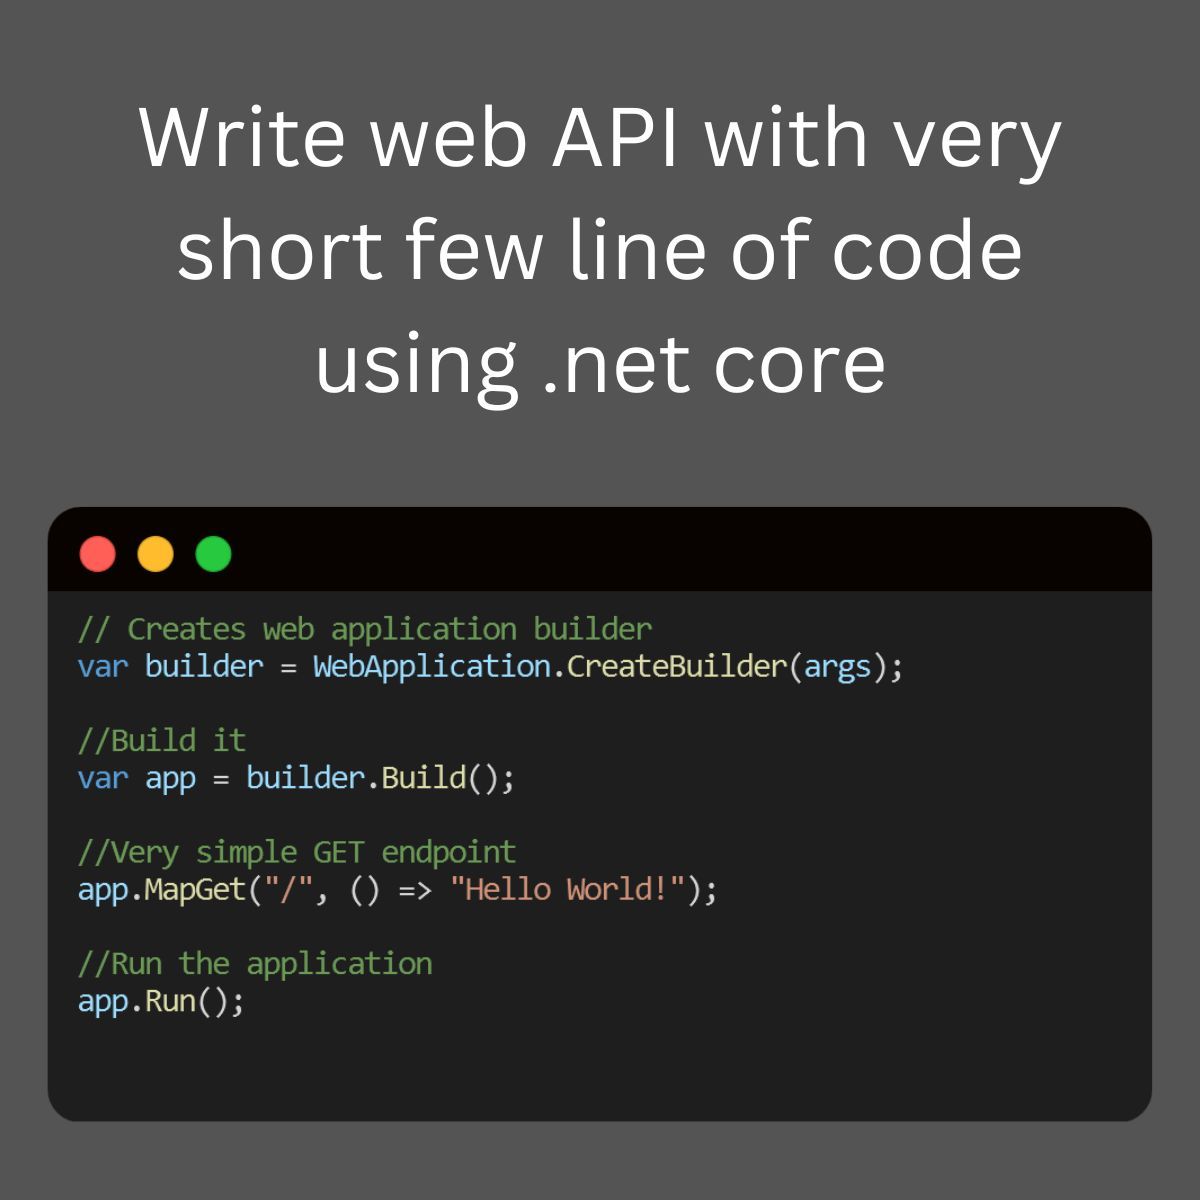
NET Core Minimal API, write a very short line of code
Write Web API with very short lines of code using .NET Core Minimal API. Github - https://github.com/mayurlohite/MinimalApiCore What if I tell you that you can build a full web API with just a few lines of code? Yes, you can do it with the new Minimal API feature of ASP. NET Core 6.0 and greater. From this minimal API, you can build a complete web API with all the features that you need. Just one file, you can build a full web API. Helpful for Micro-services. Find out working example of - ASP.NET Core 8.0 - Minimal API Example - Expenses API implementation using ASP.NET Core Minimal API, Entity Framework Core, SQL Server and Swagger UI. Github - https://github.com/mayurlohite/MinimalApiCore Would you like to implement this into your project? Feel free to share your thoughts!

Mac and Cheese
Good homemade baked mac and cheese begins with al dente noodles and a rich sauce made from butter, flour, milk, and loads of shredded cheese. The noodles are tossed with the cheesy sauce, transferred to a baking dish, topped with crispy breadcrumbs, and then baked until bubbling and golden. Since I find most homemade mac and cheese recipes to be a bit dry, I developed this version to be ultra-creamy. The crispy panko and herb topping is inspired by the delicious mac and cheese served at Maple Ave, a little gem of a restaurant near my hometown – it absolutely makes the dish! The recipe serves four as a main dish and six as a side; if you’d like to double it for a crowd, bake the mac and cheese in a 9×13-inch dish and increase the cooking time to 30 to 35 minutes. What you’ll need to make mac and cheese I use three different kinds of cheese in this recipe: Gruyère, extra-sharp Cheddar, and Parmigiano-Reggiano. Using more than one type of cheese adds dimension to the dish. Be sure to use an authentic Swiss-made Gruyère that bears the AOP (Appellation d’Origine Protégée) seal, which shows that the cheese is made according to government-mandated quality standards. Similarly, it’s important to use authentic Parmigiano-Reggiano, which has a lot more flavor than domestic Parmesan. You can tell if it’s the real deal by the rind, which should be embossed with the name over and over. (If the cheese is already grated, it should be labeled “Parmigiano-Reggiano,” not “Parmesan.”) I go the traditional route with the pasta and use elbow macaroni, but any pasta that has lots of nooks and crannies will work nicely. Step-by-Step Instructions Step 1: Boil the Noodles Bring a large pot of salted water to a boil. Add the pasta and cook until al dente, or just slightly underdone. (It will continue to cook in the oven so you don’t want it fully cooked.) Drain well and rinse with cold water. Step 2: Make the Cheese Sauce Meanwhile, melt 3 tablespoons of the butter in a medium (2-quart) pot over low heat and add the flour. Stir with a whisk until the flour is combined. This mixture is called a roux. Continue cooking, whisking constantly, for 2 minutes. The roux will look foamy. While whisking constantly, pour in the milk. Bring to a boil, then reduce the heat to low and cook for a few minutes more, until thickened and smooth. This French “mother sauce” is known as béchamel, or a sauce made from a white roux and milk. Off the heat, add the Gruyere, Cheddar, 1/4 cup Parmigiano-Reggiano, salt, pepper, and nutmeg. Whisk until the cheese is completely melted; if necessary, place the pan back over low heat but do not boil. The finished cheese sauce is known as Mornay sauce, or a béchamel sauce to which shredded or grated cheese is added. Step 3: Combine the Noodles with the Sauce Add the cooked pasta to the sauce. Stir to combine. It will seem way too soupy and creamy – that’s okay, that’s what you want! Pour into a buttered 2-quart baking dish and set aside. Step 4: Prepare the Crispy Topping In a small sauté pan over medium heat, melt the remaining tablespoon of butter and add the panko. Cook, stirring often, until golden brown, and then stir in the herbes de Provence or thyme. This step of browning the panko may seem unnecessary — you’d think it would brown in the oven — but I find it needs a head start on the stove to get really golden and crispy. Step 5: Bake Sprinkle the toasted panko over the pasta and cheese sauce, followed by the remaining 2 tablespoons Parmigiano-Reggiano. Bake for 25 to 30 minutes, or until bubbly and golden brown. Serve warm out of the oven and enjoy. (Note: this recipe was originally posted on the blog in 2009 and updated in November of 2018. To download the original recipe, click here.) Please find original recipe here.