Articles contributed by the community, curated for your enjoyment and reading.
Filters
Reset
Shakshuka
Shakshuka is a one-skillet dish of eggs poached in a smoky, spicy, vegetable-laden tomato sauce. Popular throughout the Middle East, particularly in Israel (where it ranks right up there with falafel and hummus as one of Israel’s most-loved dishes), shakshuka is one-skillet dish of eggs gently poached in a smoky, spicy tomato and vegetable sauce. The dish was brought to Israel by Jewish immigrants from North Africa and variations abound. One popular version called green shakshuka replaces the tomato sauce with a rich spinach and cream sauce loaded with green vegetables. My version is traditional, with a few small tweaks that take it up a notch. I add a splash of heavy cream to marry the acidity of the tomatoes with the richness of the eggs – it makes all the difference – and I also sprinkle crumbled feta on top. Shakshuka is traditionally made in a cast iron pan and is simple to prepare. You start by making the sauce on the stovetop, then you gently crack the eggs into wells in the sauce and cook briefly before finishing the dish under the broiler. It’s the ultimate breakfast-for-dinner dish, but it can be served any time of day. Toasted buttered bread for mopping up the sauce and runny yolks is a must. What You’ll Need To Make Shakshuka Step-by-Step Instructions Begin by chopping the onions, peppers, and garlic. Be sure not to chop the garlic too finely or it will burn. In a large skillet, heat the oil over medium heat. Add the onions, garlic and bell pepper. Cook, uncovered, for about 8 minutes, until softened. Add the smoked paprika, cumin, coriander, red pepper flakes, 1-1/4 teaspoons of the salt, sugar, and tomatoes. Cook, uncovered, stirring occasionally, for about 10 minutes, or until the sauce is slightly thickened. While the sauce cooks, chop the greens. Add the chopped greens and heavy cream to the sauce, and continue cooking, uncovered, until the greens are soft and wilted, about 10 minutes more. Turn off (or remove the pan from) the heat. Then, using a spoon, make 6 wells/indentations in the sauce. Carefully crack an egg into each well, then spoon a bit of the sauce over the egg whites (this will contain them and also help them cook a bit faster than the yolks), being careful not to disturb the yolks. Sprinkle the eggs with the remaining 1/4 teaspoon salt. And then sprinkle the feta around the eggs. Set the pan on the stove over low heat and cover with a lid. Cook until the egg whites are mostly set but still translucent on top, 5 to 7 minutes. Transfer the pan to the oven and broil until the eggs are cooked to your liking, 1 minute or less for runny yolks. Remove the pan from the oven and sprinkle the cilantro over top. Serve hot with bread. Note: This recipe has been written by Jenn Segal and republished on MudMatter with Author’s Permission. Please find the original link here – Shakshuka.

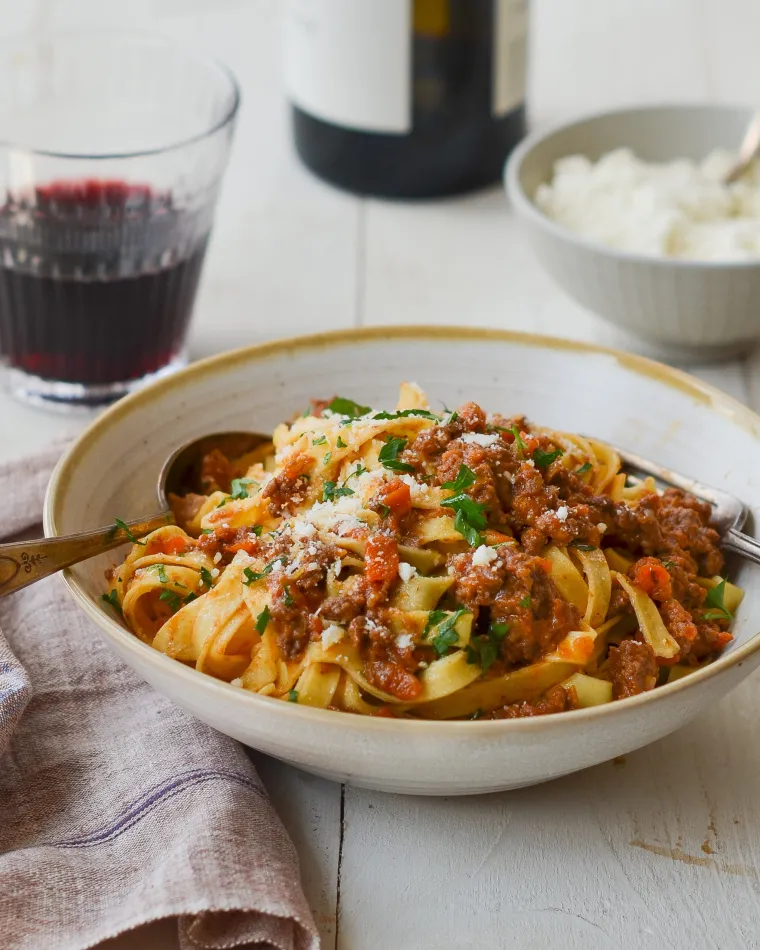
Pasta Bolognese
Fresh fettuccine pasta in a richly-flavored meat sauce, this pasta Bolognese is a family favorite. Pasta Bolognese, or pasta in a tender and richly-flavored meat and vegetable sauce, is one of my favorite Sunday night family suppers. The sauce simmers on the stove for several hours, making the house smell delicious and inviting — and it’s one of those dishes that just tastes like it was made with love. I prefer fresh fettuccine here, which you can find in the refrigerator case at most supermarkets, but it’s good with dried fettuccine, rigatoni or anything, really. What You’ll Need To Make Pasta Bolognese Before we get to the step-by-step instructions, a few notes about the ingredients: Pancetta is simply Italian bacon. Instead of being smoked like American bacon, it is cured with salt and spices and then dried. You can find it in the deli at most supermarkets or precut and packaged in the refrigerated gourmet foods aisle, which is a great time saver. For the wine, use any dry red (Pinot Noir, Merlot, Cabernet Sauvignon, etc.) that is inexpensive but still good enough to drink. How To Make Pasta Bolognese Place onions in bowl of food processor fitted with metal blade. Pulse until very finely chopped but not puréed. Transfer the onions to a bowl, then add carrots and celery to the food processor. Pulse until finely chopped. Heat the olive oil in large heavy pot over medium-high heat, and add the onion and vegetable mixture. Cook, stirring frequently, until soft, about 8 minutes. Lower the heat if vegetables start to brown. Add the ground beef, pancetta, salt and pepper. Cook over medium-high heat, breaking up meat with a wooden spoon, until meat is no longer pink, 5 to 10 minutes. Add red wine and cook until liquid is almost dissolved, 1 to 2 minutes. Add the broth, crushed tomatoes and oregano. Bring to a gentle boil, then reduce heat to low. Cover with the lid slightly ajar and simmer for 1 hour and 30 minutes. Stir in the milk. Cover with the lid slightly ajar and simmer until milk is absorbed, about 35 minutes. If the sauce looks greasy, use a soup spoon to skim the fat off of the top. Cover to keep warm while you make the pasta. Cook pasta according to package instructions. Drain, reserving 1 cup of the pasta water. Toss the pasta with the sauce, adding the reserved pasta water little by little if the pasta seems dry. Taste and adjust seasoning with salt and pepper if necessary. Divide the pasta into serving bowls and sprinkle with fresh herbs, if using. Pass the grated Parmigiano Reggiano at the table. Note: This recipe has been written by Jenn Segal and republished on MudMatter with Author’s Permission. Please find the original link here – Pasta Bolognese.
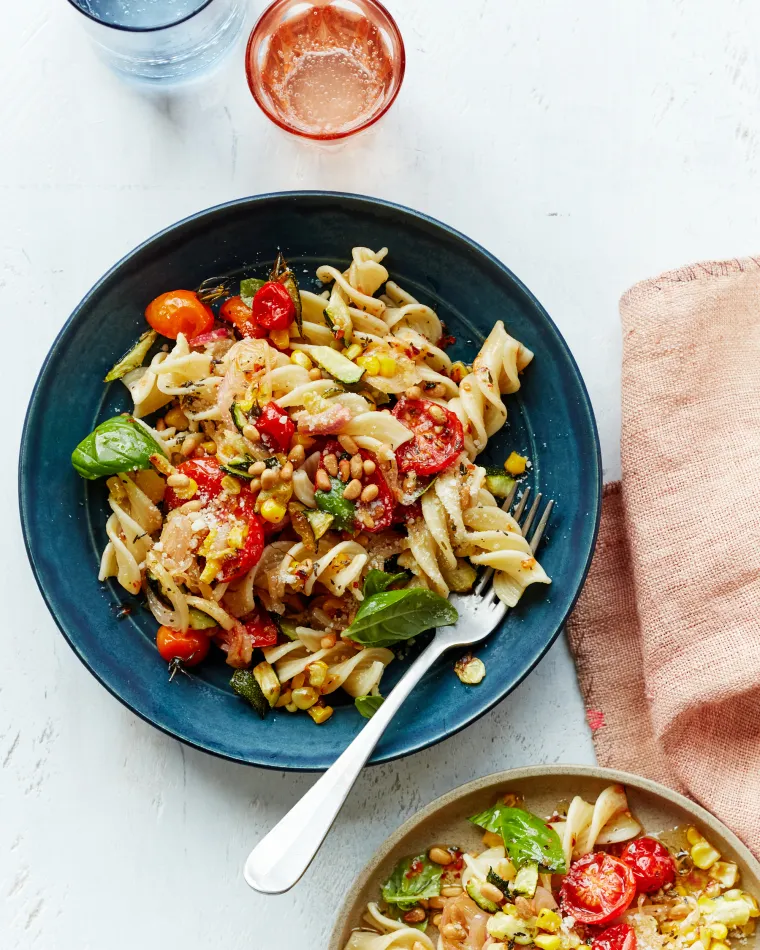
Summer Pasta Primavera
With roasted tomatoes, zucchini, and corn, this pasta primavera is an ode to summer. I realize the title of this dish is a bit of an oxymoron — the word “primavera” means springtime in Italian. But, generally, when we think of pasta primavera, we think of pasta with a chorus of vegetables from any season. With roasted tomatoes, corn, and zucchini, this pasta primavera is an ode to summer. It is a modern version of the classic pasta primavera made popular in the 1970s by Le Cirque restaurant in New York City that a NYT food columnist called “by far, the most talked-about dish in Manhattan.” The dish rich in flavor so I serve it as a main course, but it also makes a fantastic side to grilled Italian sausage. What you’ll need To Make Summer Pasta Primavera Classic pasta primavera is made with heavy cream, but this version gets its richness from a combination of olive oil, butter, and pecorino romano cheese. Toasted pine nuts add more rich flavor and crunch. For the pasta, most short noodle shapes will work – good options include fusilli, penne, farfalle, gemelli, or campanelle. Step-by-Step Instructions To begin, combine the tomatoes, shallots, garlic, olive oil, salt, and sugar on the prepared baking sheet. Toss with your hands or a rubber spatula until the vegetables are evenly coated. Arrange the vegetables in a single layer and roast at 450°F for about 20 minutes, or until the tomatoes are starting to brown. Remove the pan from the oven and add the zucchini and corn. Toss with a rubber spatula (the tomatoes will collapse; that’s okay) and spread into an even layer. Roast for 5 minutes more, until the zucchini and corn are tender-crisp. Meanwhile, cook the pasta in salted water until al dente and drain. Add the pasta back to the pan, along with the roasted vegetables and all their juices. Add the butter, herbes de Provence, red pepper flakes, pecorino Romano, basil, and pine nuts. Toss well, then taste and adjust seasoning if necessary. Spoon into pasta bowls and drizzle with olive oil, if desired. Serve with more grated cheese. Enjoy! Note: This recipe has been written by Jenn Segal and republished on MudMatter with Author’s Permission. Please find the original link here – Summer Pasta Primavera.

Understanding Clean Architecture
Understanding Clean Architecture is crucial for building maintainable and scalable software. Let’s provide a concise explanation of Clean Architecture: Clean Architecture: A Brief Explanation Clean Architecture is a software architecture pattern that emphasizes the separation of concerns and the independence of the application’s business logic from external concerns like frameworks, databases, and user interfaces. It was popularized by Robert C. Martin (Uncle Bob) and aims to create a maintainable and flexible codebase that can withstand changes over time. Key Concepts: Separation of Concerns: Clean Architecture promotes dividing the application into distinct layers, each with its specific responsibilities. This separation enables changing one part of the system without affecting the other parts. Dependency Rule: The inner layers should not depend on the outer layers. Business logic and core functionality reside in the innermost layer, which should have no knowledge of external frameworks or technologies. Dependency Inversion Principle (DIP): High-level modules should not depend on low-level modules; both should depend on abstractions. This principle fosters a flexible and maintainable codebase by decoupling concrete implementations from abstractions. Entities: Core domain models representing business entities exist at the heart of the architecture. They are independent of the external layers and encapsulate core business rules. Use Cases (Interactors): Use cases represent application-specific operations or business workflows. They contain the application’s business logic and orchestrate interactions between entities and external layers. Interface Adapters: These adapters convert data between the use cases and external components, such as databases, web services, or user interfaces. They allow the use cases to remain independent of external technologies. Frameworks and Drivers: The outermost layer is responsible for interacting with external frameworks, databases, and user interfaces. It should not contain business logic but should adapt the data to and from the use cases. Benefits of Clean Architecture: Maintainability: The separation of concerns makes it easier to maintain and modify the application over time, as changes in one part don’t affect the others. Testability: Clean Architecture promotes testability by allowing isolated testing of use cases and business rules without involving external dependencies. Flexibility: The architecture’s decoupling allows for easy replacement of technologies or frameworks without significant changes to the core application. Scalability: The modular structure of Clean Architecture facilitates scaling the application by adding or modifying modules as needed. Focus on Business Logic: Clean Architecture helps developers focus on implementing core business rules rather than being bogged down by external concerns. Sample Structure of the Clean Architecture Project: ├── src │ ├── Core # Contains the core business logic and domain models, view models, etc. │ │ ├── Entities # Contains domain models/entities │ │ │ ├── Product.cs # Sample domain model (can have more entities) │ │ │ └── ... │ │ ├── Services # Contains business logic services │ │ │ ├── IProductService.cs # Sample service interface │ │ │ ├── ProductService.cs # Sample service implementation │ │ │ └── ... │ │ └── ... │ ├── Infrastructure # Contains infrastructure concerns such as data access, external services, etc. │ │ ├── Data # Contains data access related classes │ │ │ ├── ApplicationDbContext.cs # Sample DbContext class │ │ │ ├── ProductRepository.cs # Sample repository implementation │ │ │ └── ... │ │ ├── ExternalServices # Contains code for external services integration │ │ │ ├── EmailService.cs # Sample external service integration │ │ │ └── ... │ │ └── ... │ └── UI # Contains the user interface layer, including controllers, views, and extensions, etc. │ ├── Controllers # Contains controllers for handling HTTP requests and responses │ │ ├── ProductController.cs # Sample controller │ │ └── ... │ ├── Views # Contains views for rendering UI components │ │ ├── Product # Folder for Product-related views │ │ │ ├── Index.cshtml # Sample view for displaying products │ │ │ ├── Create.cshtml # Sample view for creating a new product │ │ │ ├── Edit.cshtml # Sample view for editing an existing product │ │ │ └── ... │ │ └── ... │ └── ... ├── UnitTest │ ├── Core.Tests # Contains unit tests for the core layer │ │ ├── ProductServiceTests.cs # Sample unit test for ProductService │ │ └── ... │ ├── Infrastructure.Tests # Contains unit tests for the infrastructure layer │ │ ├── ProductRepositoryTests.cs # Sample unit test for ProductRepository │ │ └── ... │ ├── UI.Tests # Contains unit tests for the UI layer │ │ ├── ProductControllerTests.cs # Sample unit test for ProductController │ │ └── ... │ └── ... └── README.md # Project documentation Please note that this is a simplified representation of the project structure, and in a real-world application, you may have more folders and files based on your specific requirements. The above structure adheres to the Clean Architecture principles, with a clear separation of concerns between the core domain logic, infrastructure concerns (data access and external services), and the user interface layer. The tests folder contains separate test projects for each layer, allowing you to write unit tests to ensure the functionality of each component. Core: Contains the core business logic, including domain models and services. This layer represents the heart of the application, encapsulating the essential business rules and entities. ├── Core │ ├── Entities # Domain entities representing business objects │ │ └── User.cs # Example entity class representing a user │ ├── Services # Business logic and services │ │ └── UserService.cs # Example service class for user-related operations │ └── .. Example Code: // Core/Entities/User.cs namespace Core.Entities { public class User { public int Id { get; set; } public string Name { get; set; } public string Email { get; set; } // Other properties and methods relevant to the user entity } } // Core/Services/UserService.cs using Core.Entities; using System.Threading.Tasks; namespace Core.Services { public class UserService { public async Task<User> GetUserByIdAsync(int userId) { // Logic to retrieve user from data source (e.g., database) } // Other methods for user-related operations } } Infrastructure: Contains infrastructure concerns such as data access and external services. Repository implementations and database context reside here. ├── Infrastructure │ ├── Data # Data access layer │ │ ├── Repositories # Repository implementations │ │ │ └── UserRepository.cs # Example repository for user entity │ │ └── AppDbContext.cs # Entity Framework Core database context │ └── ... Example Code: // Infrastructure/Data/Repositories/UserRepository.cs using Core.Entities; using Core.Interfaces; using Microsoft.EntityFrameworkCore; using System.Collections.Generic; using System.Threading.Tasks; namespace Infrastructure.Data.Repositories { public class UserRepository : IRepository<User> { private readonly AppDbContext _context; public UserRepository(AppDbContext context) { _context = context; } public async Task<IEnumerable<User>> GetAllUsersAsync() { return await _context.Users.ToListAsync(); } // Other CRUD methods for the user entity } } // Infrastructure/Data/AppDbContext.cs using Core.Entities; using Microsoft.EntityFrameworkCore; namespace Infrastructure.Data { public class AppDbContext : DbContext { public DbSet<User> Users { get; set; } public AppDbContext(DbContextOptions<AppDbContext> options) : base(options) { } } } API: Contains the API layer, including controllers and extensions. This layer exposes endpoints and handles HTTP requests. ├── API │ ├── Controllers # API controllers │ │ └── UserController.cs # Example controller for user-related actions │ ├── Extensions # Extension methods for configuring services │ └── ... Example Code: // API/Controllers/UserController.cs using Core.Entities; using Core.Services; using Microsoft.AspNetCore.Mvc; using System.Collections.Generic; using System.Threading.Tasks; namespace API.Controllers { [ApiController] [Route("api/[controller]")] public class UserController : ControllerBase { private readonly UserService _userService; public UserController(UserService userService) { _userService = userService; } [HttpGet] public async Task<ActionResult<IEnumerable<User>>> GetUsers() { var users = await _userService.GetAllUsersAsync(); return Ok(users); } // Other CRUD actions for user entity } } Unit Testing: Core.Tests Contains unit tests for the core layer. These tests ensure the correctness of core business logic and services. Infrastructure.Tests Contains unit tests for the infrastructure layer. These tests validate data access and repository implementations. API.Tests Contains unit tests for the API layer. These tests verify the functionality of API controllers and endpoints. Conclusion: Clean Architecture is a powerful pattern that promotes code organization, testability, and maintainability. By following its principles, developers can create robust and adaptable software that stands the test of time and can accommodate future changes and enhancements with ease. Note: This article has been written by Kawser Hamid and republished on MudMatter with Author’s Permission. Please find the original link here – Understanding Clean Architecture.
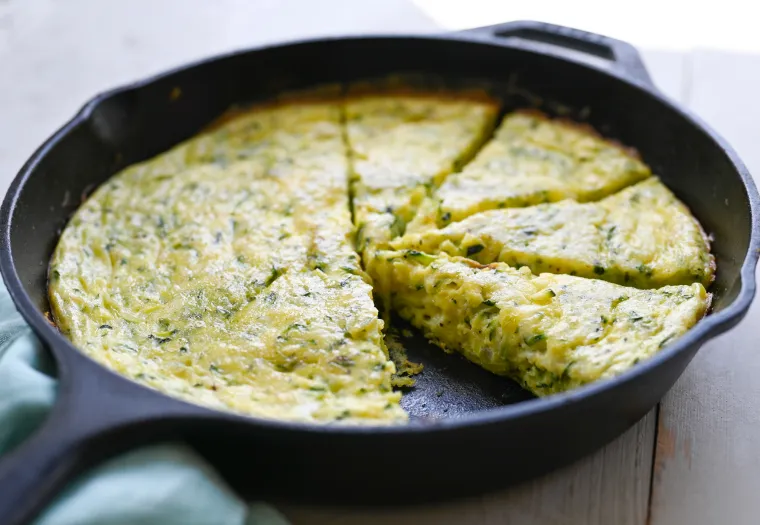
Zucchini and Cheddar Frittata
Filled with heaps of shredded zucchini and extra-sharp cheddar, this zucchini frittata is good for brunch, dinner, or anytime in between. I always love the idea of a frittata. You can throw one together in 30 minutes, and they’re great for using up any leftover veggies, meat, or hunks of cheese you might have languishing in the fridge. Problem is, they’re usually dry, rubbery, and just not that good. For same calories, I’d rather have quiche! This zucchini frittata, however, is delicate and creamy, almost like a crustless quiche. There are three secrets to success: 1) squeeze as much water as possible out of the zucchini; 2) add some heavy cream and lots of cheese to the egg mixture; and 3) bake the frittata in a low-temperature oven, instead of the traditional stovetop-to-broiler method, so the eggs cook gently into a custard without scrambling. Ingredients For zucchini frittata Step-by-Step Instructions Begin by grating the zucchini by hand or in a food processor. It’s best to use small zucchini, as they contain less water. Once grated, place the zucchini on several layers of paper towels and squeeze out as much water as possible. Depending on how much water is in the zucchini, you may need to repeat this step. Next, melt a few tablespoons of butter in a 10-inch cast iron or oven-proof nonstick pan. Add the shallots, zucchini, and 1/2 teaspoon salt. Cook for 7 to 8 minutes, until the zucchini is tender and cooked down. Meanwhile, combine the eggs, remaining salt, pepper and heavy cream in a large bowl. Whisk to combine. Add the cooked zucchini and grated cheese to the egg mixture and stir. Pour the frittata mixture back into the pan. Bake for about 25 to 30 minutes, or until just set. Serve the frittata warm or room temperature. Note: This recipe has been written by Jenn Segal and republished on MudMatter with Author’s Permission. Please find the original link here – Zucchini and Cheddar Frittata.
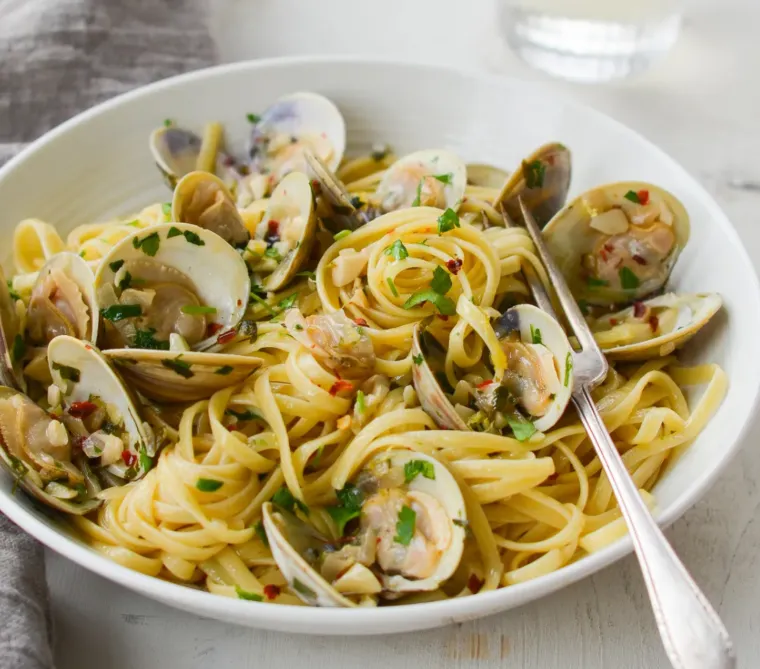
Linguine with Clams
Linguine with clams in a garlicky white wine sauce makes an easy and elegant Italian pasta dinner. Linguine with clams is a classic Italian restaurant dish, and it’s also one of the simplest, most affordable pasta dishes you can make at home. I know cooking shellfish, like clams and mussels, can be intimidating to the uninitiated, but I promise they are the easiest thing in the world to cook — and once you try it, you’ll wonder what took you so long! For this dish, you can do all of the prep and make the clam sauce in the time it takes to boil the pasta, so dinner is done in 30 minutes. To complete the meal, toss a salad, warm some crusty bread, and pour a few glasses of the same white wine used to make the sauce. Looking for more classic Italian restaurant pasta dishes? Try my penne all vodka, fettuccine bolognese, and lasagna. What you’ll need to make Linguine with clams HOW TO PREPARE THE CLAMS The recipe calls for Littleneck clams, which are readily available at most supermarkets. They are usually sold in a mesh bag because they are alive and need to breathe. If your fishmonger places them in a plastic bag, remove them from the bag immediately when you get home from the supermarket and place them in a bowl (uncovered) in the refrigerator. To prepare the clams, first, check that they are alive by making sure all of the shells are tightly closed. If any clams are open, gently tap them against the countertop; if they are alive, they will close their shells. Discard any clams that do not close their shells or that have cracked or chipped shells. Next, place all of the clams in a bowl and cover them with cool tap water. Let the clams sit for 20 minutes to an hour. During this time, the clams will expel sand from inside their shells. When you’re ready to cook, lift each clam from the water and rinse it, scrubbing if necessary, to get rid of any grit from the surface. (Note that most supermarkets sell farm-raised clams, which are already quite clean, so you may not find a lot of grit or sand.) How To Make Linguine with Clams In a large pot over high heat, bring 4 quarts of water and 2 tablespoons of kosher salt to a boil. Add the linguine and cook according to package directions until just shy of al dente. (The pasta should still be firm to the bite since it will cook another minute or two in the sauce). Meanwhile, prep all of the ingredients for the sauce. In a very large sauté pan over medium-high heat, heat the olive oil until hot but not smoking. Add the shallots and garlic and sauté until just golden, about 30 seconds. Add the wine, red pepper flakes, 3/4 teaspoon kosher salt, and 1/4 cup of the parsley. Toss in the clams, then bring to a simmer. Cook, covered, until the clams open, 6 to 8 minutes. Discard any unopened clams. Reserving 1/2 cup of the cooking water, drain the linguine in a colander (do not rinse). Add the pasta to the sauté pan with the clams. (If you don’t have room for everything in one pan, transfer the clams to a plate and cover to keep warm. When ready to serve, add them back to the pasta on a serving platter). Increase the heat to medium and cook the linguine with the clams, tossing occasionally, until the pasta absorbs most of the sauce and is just tender, 1 to 2 minutes. If necessary, add some of reserved cooking water to keep moist. Remove the pan from the heat. Add the butter, lemon zest, lemon juice, and the remaining 2 tablespoons of parsley; toss to coat. Taste and adjust the seasoning with more salt, lemon zest and/or lemon juice, if necessary. Transfer the linguini with clams to a serving dish or bowls and serve. Note: This recipe has been written by Jenn Segal and republished on MudMatter with Author’s Permission. Please find the original link here – Linguine with Clams.
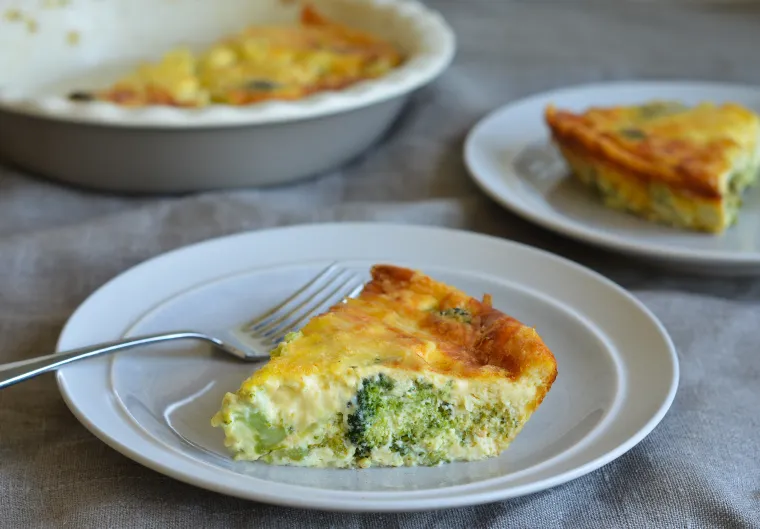
Crustless Broccoli Quiche
Omitting the crust in this crustless broccoli quiche cuts down on prep time, cook time, and carbs — and the cheesy custard is the best part anyway. There really is no other way to put it: this crustless broccoli quiche is insanely delicious. Whether you serve it for brunch, dinner, or any time in between, it’s worth every single calorie. Doing away with the crust cuts down on prep time, cook time, and carbs — and everyone knows the cheesy custard is the best part anyway. To hold the quiche together, I spread the broccoli out on the bottom of the quiche to create a crust-like layer, making the quiche sturdy and easy to serve. If you’d like to substitute other vegetables, like asparagus or mushrooms, feel free but keep the ratio of veggies to custard the same – and, of course, always cook and season the vegetables before adding them. As with any quiche, the oven temperature is key. Quiche should be cooked at 325°F (not 350°F as most recipes direct) for the creamiest, silkiest custard. Eggs like to be cooked gently, and those 25 degrees really do make a difference. Finally, this quiche reheats beautifully so don’t hesitate to make it ahead of time and warm up as needed. What you’ll need To Make Crustless Broccoli Quiche How To Make Crustless Broccoli Quiche To begin, melt the butter in a large sauté pan over medium-low heat. Add the shallots and cook until soft and translucent, about 4 minutes. Do not brown. Add the broccoli, 1/4 teaspoon of the salt, and 1/3 cup water. Increase the heat to medium and cook, stirring occasionally, until the broccoli is al dente and the water has evaporated, 3-4 minutes more. Set aside. In a large bowl, whisk the eggs with the cream, nutmeg, remaining 3/4 teaspoon salt, and cayenne pepper. Spread the broccoli and shallots evenly over the bottom of the prepared pie plate. Sprinkle the cheese over top. I think Gruyère is perfect here — it melts nicely and has a nutty, earthy flavor — but Comté, Beaufort or Cheddar would also work well. Then pour the egg mixture over the cheese. Bake for about an hour, or until the custard is set and the top is golden brown. Let cool for about 10 minutes, then slice into wedges and serve. For more quiche recipes, check out my spinach quiche and my leek and parmesan quiche. Enjoy! Note: This recipe has been written by Jenn Segal and republished on MudMatter with Author’s Permission. Please find the original link here – Crustless Broccoli Quiche.
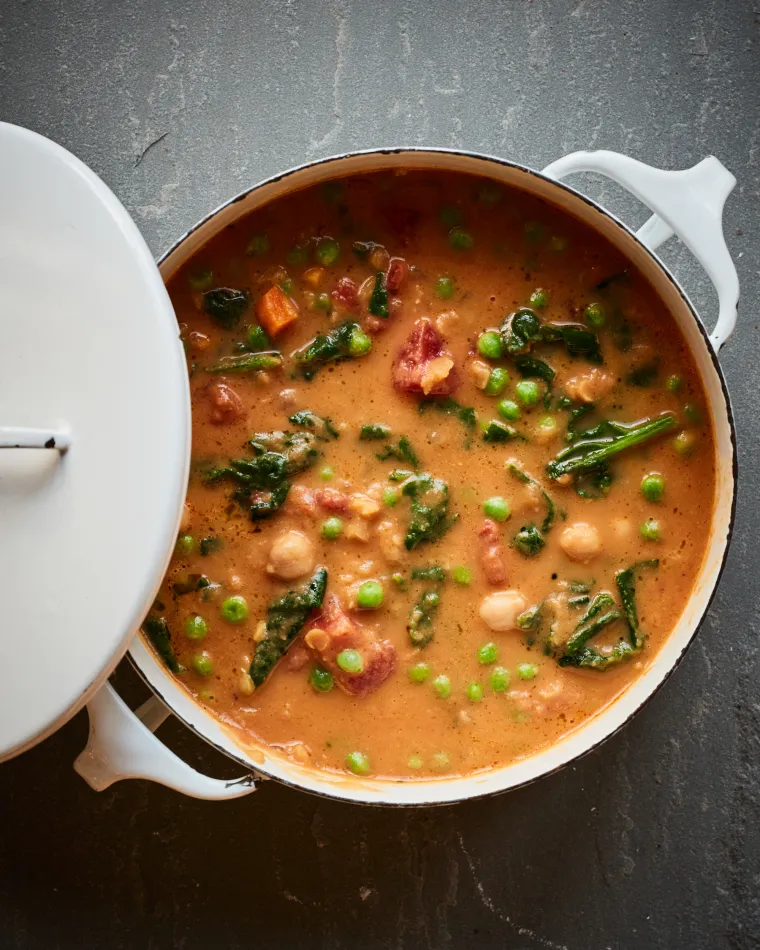
Smoky Chickpea, Red Lentil & Vegetable Soup
This warming, satisfying lentil and vegetable soup comes together in just 30 minutes. For a vegetarian recipe made almost entirely from pantry staples (and I mean true staples, not staples from some well-stocked dream kitchen), this vegetable soup is surprisingly delicious. It’s thickened by pureeing a portion of the soup and then stirring it back into the pot. The soup takes just 30 minutes to come together, start to finish, yet tastes like you spent all day in the kitchen, and it’s good for you, too. For the cooked vegetables, feel free to use any quick-cooking, frozen, or leftover vegetables you have on hand. The recipe is extremely flexible and very hearty! What you’ll need to make Chickpea, lentil and vegetable soup Before we get started, a few words about the ingredients. It’s important to use red lentils, as opposed to another variety: they cook quickly, add wonderful flavor and thicken the soup nicely. The recipe only calls for a third of a cup; don’t be tempted to add more or your soup will turn to sludge. As for the green vegetables, I like to use frozen peas and green beans but you can use any quick cooking, frozen or leftover vegetables you have on hand. The recipe is very flexible! Step-by-Step Instructions Begin by cooking the onions in olive oil until soft. Add the carrots, garlic, smoked paprika and cumin and cook until fragrant, a few minutes. Add the broth, tomatoes, lentils, thyme, bay leaves, salt, and pepper. Bring to a boil, then reduce the heat and simmer for 10 minutes. Add the chickpeas and continue cooking 10 minutes more. Remove a few cups of the soup and place in a blender or food processor. Purée until smooth. Pour the puréed soup back into the pot. Stir and taste; if you want the soup to be thicker, purée a bit more. Add the vegetables. Bring the soup back to a simmer and serve. Note: This recipe has been written by Jenn Segal and republished on MudMatter with Author’s Permission. Please find the original link here – Smoky Chickpea, Red Lentil & Vegetable Soup.
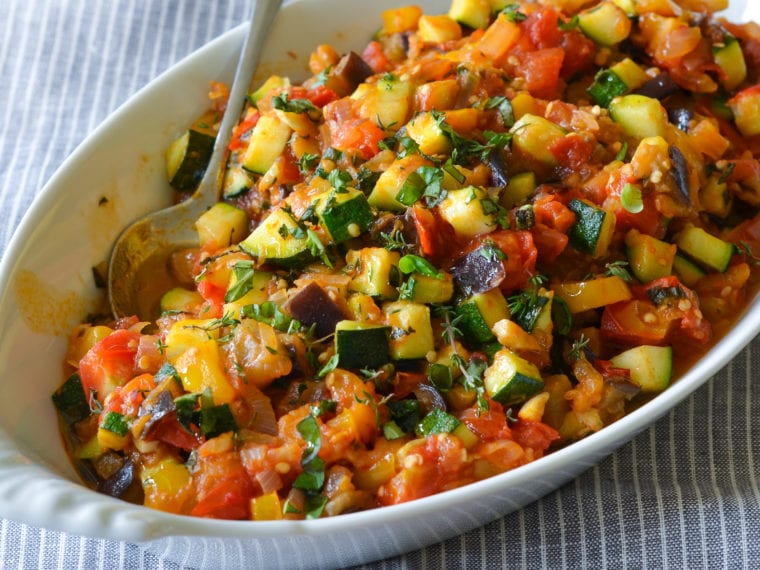
Ratatouille
Ratatouille is a bright and chunky summer vegetable stew, rich with olive oil and fragrant with garlic and herbs. Hailing from Provence, a region in the south of France near the Mediterranean Sea, ratatouille is a bright and chunky summer vegetable stew made with eggplant, zucchini, bell peppers, and tomatoes. It is rich with the flavor of olive oil, garlic, and fresh herbs. Making it properly takes a bit of time, so I suggest cooking a big batch over the weekend. That way, you’ll have a tasty and colorful base for meals throughout the week. With a little imagination, there are endless ways to use ratatouille, such as: As a vegetarian main course over grains or polenta Alongside roasted or grilled meats and fish Shakshuka-style with poached eggs Tossed with pasta Folded into omelets or frittatas Dolloped over crostini with goat cheese Straight from the fridge as a snack (it’s delicious cold) What You’ll Need To Make Ratatouille Step-by-Step Instructions Begin by heating 3 tablespoons of oil in a large nonstick pan over medium heat. Add the eggplant and season with 1/4 teaspoon salt. Cook, stirring frequently, until soft and starting to brown, 10 to 12 minutes. Transfer to a plate and set aside. Add another tablespoon of oil to the pan (no need to clean it). Add the zucchini and cook, stirring frequently, until tender-crisp, 3 to 4 minutes. Season with 1/4 teaspoon salt and transfer to a plate; set aside. Add two more tablespoons of oil to the pan and add the onion and bell pepper. Cook, stirring frequently, for about 5 minutes. Add the garlic and continue cooking for about 3 minutes more. Do not brown. Next, add the tomatoes, tomato paste, thyme, sugar, crushed red pepper flakes (if using) and 3/4 teaspoon salt. Cook, stirring occasionally, until the tomatoes are broken down into a sauce, 8 to 10 minutes. Add the cooked eggplant to the pan; bring to a gentle boil, then reduce the heat to low, and simmer, uncovered, for about 10 minutes or until the eggplant is soft. Add the zucchini and cook for 1 to 2 minutes more, or until just warmed through. Taste and adjust seasoning, if necessary. Sprinkle with fresh basil and thyme, drizzle with a little olive oil if desired, and serve warm or chilled. How To Make Ahead & Freeze Ratatouille If possible, you should make ratatouille at least a day ahead of time — like most stews, the taste improves after the flavors have a chance to mingle in the refrigerator. Leftovers can be stored in the refrigerator in an airtight container for up to 5 days or frozen for up to 3 months for a taste of summer once the cooler weather arrives. Enjoy! Note: This recipe has been written by Jenn Segal and republished on MudMatter with Author’s Permission. Please find the original link here – Ratatouille.
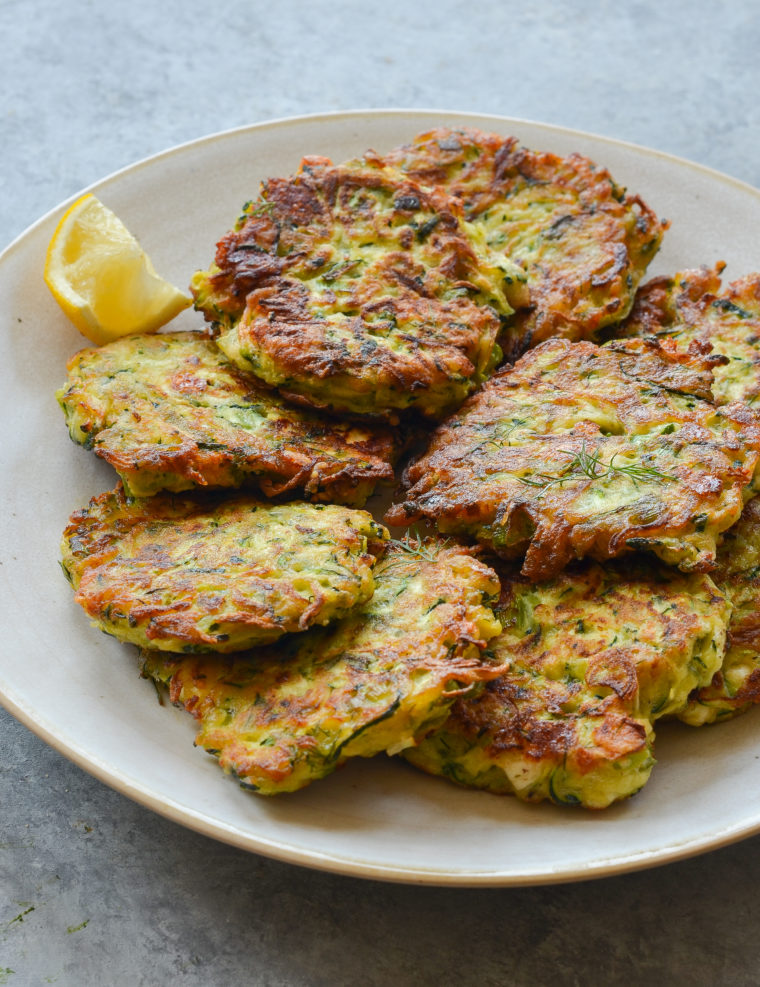
Zucchini Fritters with Feta and Dill
These crispy zucchini fritters make a wonderful starter or side dish, and they’re a delicious way to use up your summer zucchini. The word fritter usually conjures up something heavy and deep-fried, but these zucchini fritters are as light as can be. Serve them as a light vegetarian meal or mezze (small plate) with tzatziki and a Greek salad, or as a side dish to my chicken kabobs, grilled chicken or or Greek-style lamb burgers. What you’ll need to make Zucchini Fritters How to make Zucchini Fritters Begin by shredding the zucchini on a box grater or in a food processor. Transfer the zucchini to a fine mesh strainer, then toss with the salt to draw out the liquid. Let the shredded zucchini sit for about ten minutes, and then use your hands to squeeze out as much liquid as possible. As you can see, there will be a lot of liquid. Whisk the eggs in a medium mixing bowl. Add the zucchini, scallions, dill, feta, garlic, and pepper. Mix well. Sprinkle the flour (or corn starch) and baking powder over top. Stir again until evenly mixed. Heat the olive oil in a large non-stick skillet, and then drop the batter into the pan. Pan-fry until golden brown on both sides. Drain the zucchini fritters on paper towels. Serve warm or room temperature with lemon wedges. Note: This recipe has been written by Jenn Segal and republished on MudMatter with Author’s Permission. Please find the original link here – Zucchini Fritters with Feta and Dill.