Articles contributed by the community, curated for your enjoyment and reading.
Filters
ResetClean Structured Project – ASP.NET Core
This template is for a clean structured ASP.NET Core web project, follows the Clean Architecture principles, SOLID design principles, implements the Dependency Injection, Repository, and Unit of Work design pattern, and utilizes Entity Framework Core for data access. It provides a standardized structure and organization for building robust and maintainable ASP.NET Core web applications with complete CRUD (Create, Read, Update, Delete) operations. Project Structure The project structure is designed to promote separation of concerns and modularity, making it easier to understand, test, and maintain the application. ├── src │ ├── Core # Contains the core business logic and domain models, view models, etc. │ ├── Infrastructure # Contains infrastructure concerns such as data access, external services, etc. │ └── UI # Contains the user interface layer, including controllers, views, and extensions, etc. ├── tests │ ├── Core.Tests # Contains unit tests for the core layer │ ├── Infrastructure.Tests # Contains unit tests for the infrastructure layer │ └── UI.Tests # Contains unit tests for the UI layer └── README.md # Project documentation (you are here!) Getting Started To use this project template, follow the steps below: Ensure the .NET 7 SDK is installed on your machine. Clone or download this repository to your local machine. Open the solution in your preferred IDE (e.g., Visual Studio, Visual Studio Code). Build the solution to restore NuGet packages and compile the code. Configure the necessary database connection settings in the appsettings.json file of the Infrastructure project. Open the Package Manager Console, select Project.Infrastructure project and run the Update-Database command to create the database Run the application by starting the Project.UI project. Project Features This project template includes the following features: Clean Architecture: The project is structured according to the principles of Clean Architecture, which promotes the separation of concerns and a clear division of responsibilities. SOLID Design Principles: The code adheres to SOLID principles (Single Responsibility, Open-Closed, Liskov Substitution, Interface Segregation, and Dependency Inversion), making it easier to maintain and extend. Repository Pattern: The repository pattern abstracts the data access layer and provides a consistent interface for working with data. Unit of Work Pattern: The unit of work pattern helps manage transactions and ensures consistency when working with multiple repositories. Entity Framework Core: The project utilizes Entity Framework Core as the ORM (Object-Relational Mapping) tool for data access. ASP.NET Core Web: The project includes an ASP.NET Core web project that serves as the user interface layer, handling HTTP requests and responses. CRUD Operations: The project template provides a foundation for implementing complete CRUD (Create, Read, Update, Delete) operations on entities using Entity Framework Core. Dependency Injection: The project utilizes the built-in dependency injection container in ASP.NET Core, making it easy to manage and inject dependencies throughout the application. Unit Testing: The solution includes separate test projects for unit testing the core, infrastructure, and UI layers. Usage The project template provides a starting point for implementing CRUD operations on entities using Entity Framework Core. You can modify and extend the existing code to suit your specific application requirements. Here’s an overview of the key components involved in the CRUD operations: Models: The Core project contains the domain models representing the entities you want to perform CRUD operations on. Update the models or add new ones according to your domain. Repositories: The Infrastructure project contains repository implementations that handle data access operations using Entity Framework Core. Modify the repositories or create new ones to match your entity models and database structure. Services: The Core project contains services that encapsulate the business logic and orchestrate the operations on repositories. Update or create new services to handle CRUD operations on your entities. Controllers: The UI project contains controllers that handle HTTP requests and responses. Update or create new controllers to expose the CRUD endpoints for your entities. Make sure to update the routes, validation, and error-handling logic to align with your application requirements and best practices. Note: This article has been written by Kawser Hamid and republished on MudMatter with Author’s Permission. Please find the original link here – Clean Structured Project – ASP.NET Core.
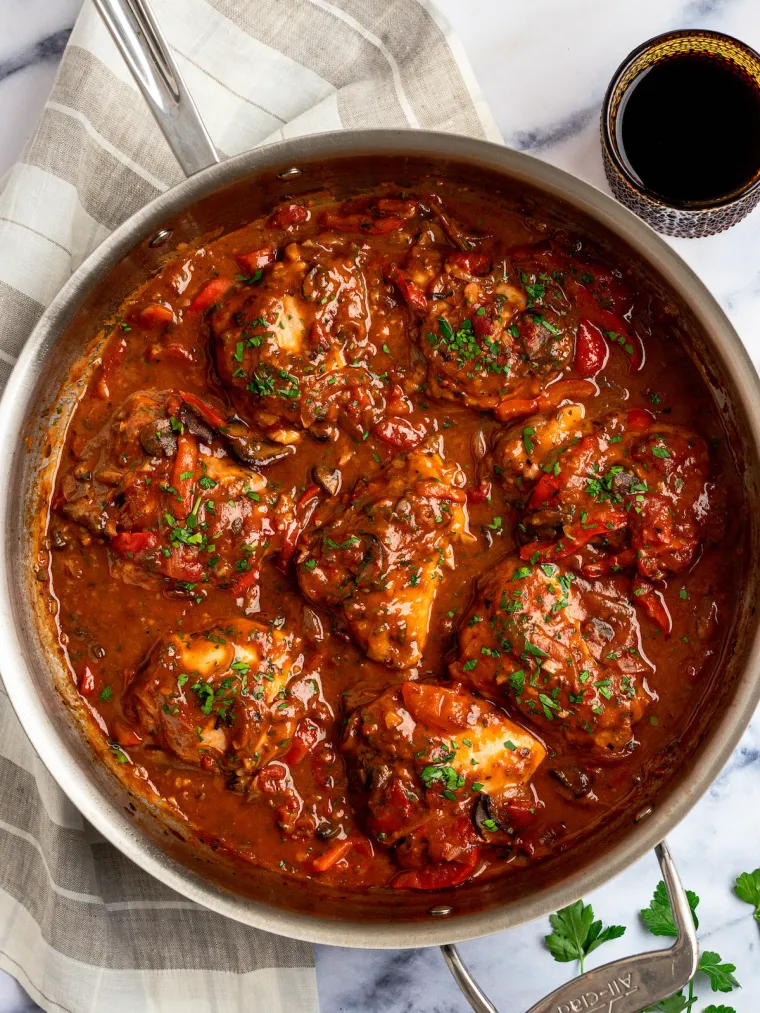
Chicken Cacciatore
A rustic, slow-cooked dish of tender chicken and vegetables in a hearty sauce, chicken cacciatore makes a soul-satisfying meal. Chicken Cacciatore, also known as Hunter’s Chicken, is a classic Italian dish that’s packed with rich, bold flavors. The name “cacciatore” comes from the Italian word for hunter, and it is said to have originated with Italian hunters who would prepare it over an open fire using ingredients they had on hand, such as tomatoes, onions, garlic, and peppers. This recipe calls for chicken thighs to be slow-cooked with these veggies, along with fragrant herbs, red wine, and broth to create a hearty sauce that’s perfect for spooning over creamy polenta or mashed potatoes. Chicken cacciatore takes about 2 hours to cook, so make it on a leisurely day when you’ve got some time to putter around the kitchen. It’s also a wonderful dish to make ahead of time, as the flavors develop and deepen as it sits. What You’ll Need To Make Chicken Cacciatore Step-by-Step Instructions Blot the chicken with a paper towel to remove any excess moisture. Season the chicken all over with 1½ teaspoons salt and ½ teaspoon pepper. Place the flour on a large plate. Dredge the chicken pieces in the flour, coating all over. Heat the oil in a large (5 or 6-qt) Dutch oven or heavy-bottomed, high-sided large skillet over medium-high heat. Brown half the chicken in a single layer, skin side down, until golden and crispy, 5 to 7 minutes. Flip and brown on the other side for 1 to 2 minutes more. Using tongs, transfer the chicken to a large plate; set aside. Repeat with the remaining chicken. Pour off all but about 2 tablespoons of the fat. Return the pot to the stove and reduce the heat to medium-low. Add the onions to the pot and cook, stirring occasionally, until they are softened and just starting to brown, about 5 minutes. Add the garlic and cook, stirring constantly, until fragrant, about 1 minute. Do not brown. Add the mushrooms and peppers and increase the heat to medium. Cook for 5 minutes, stirring occasionally until the veggies just begin to soften. Add the wine and bring to a boil over high heat. Cook, stirring to scrape the brown bits from the bottom of the pan, until the wine has mostly evaporated, 5 to 6 minutes. Add the chicken broth, diced tomatoes, tomato paste, sage, rosemary, oregano, honey, and the remaining 1 teaspoon salt. Bring to a boil, then reduce the heat to medium-low and gently simmer, uncovered, for 10 minutes. Add the chicken and any accumulated juices from the plate back to the pot and spoon some of the sauce over it. Bring to a simmer, then cover and cook over medium-low heat for about 35 minutes, until the chicken is cooked through or registers 165°F – 170°F on a meat thermometer. Using a slotted spoon, transfer the cooked chicken to a plate. Using a fork and knife, pull the skin off of the chicken and discard. Gently simmer the sauce for a few minutes, or until it is thickened to your liking. Taste and adjust seasoning, if necessary. Add the chicken and any accumulated juices back to the pot and simmer, uncovered, for a few minutes, spooning the thickened sauce over the chicken. Garnish with parsley, if using, and serve. How To Make Chicken Cacciatore Ahead of Time Let the chicken cool to room temperature and then store it in the refrigerator for up to 3 days, or freeze in an airtight container for up to 3 months. Before serving, defrost in the refrigerator for 24 hours if necessary, and then reheat on the stovetop over medium-low heat until hot. Enjoy! Note: This recipe has been written by Jenn Segal and republished on MudMatter with Author’s Permission. Please find the original link here – Chicken Cacciatore.
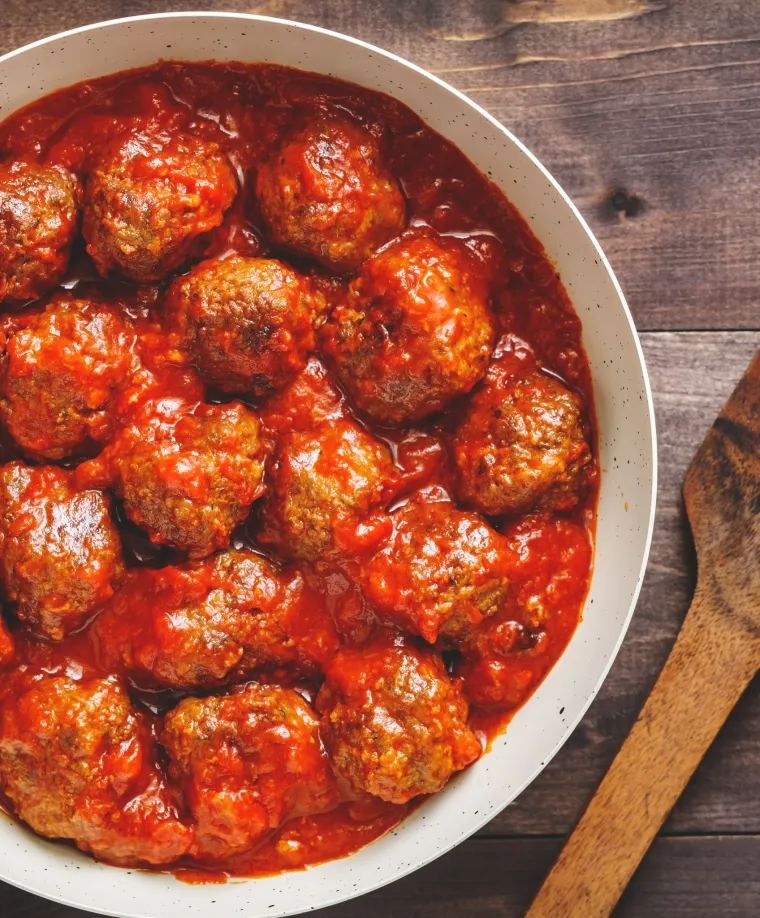
Turkey Meatballs in Marinara Sauce
A weeknight dinner winner, these turkey meatballs are tender and full of flavor – and cleanup is a snap! These turkey meatballs are a lighter alternative to my classic Italian meatballs made with beef, pork, and veal. They are tender and flavorful despite the lean turkey, thanks to the addition of garlic, onions, basil, and grated pecorino Romano cheese. Pan-frying the meatballs in a bit of olive oil also adds flavor – and since you only need one skillet for the meatballs and sauce, cleanup is a breeze. If you have a good homemade sauce on hand, go ahead and use it, but for those busy weeknights, a good quality jar of marinara sauce, such as Rao’s, gets the job done deliciously. Serve the meatballs over spaghetti or polenta, beside a roasted vegetable, or stuffed into a hoagie roll for a meatball sandwich. They hit the spot no matter how you eat them! What You’ll Need To Make Turkey Meatballs Step-by-Step Instructions In a medium bowl, combine the egg, basil, salt, pepper, oregano, garlic, and water. Mix together until well-combined. Add the onion, turkey, bread crumbs, and cheese. Mix with your hands until the mixture is uniform. Lightly wet your hands with water and form the mixture into balls just slightly larger than golf balls. In a large nonstick skillet, heat the oil over medium heat until shimmering. Add the meatballs in a single layer. Brown on all sides, 7 to 8 minutes total. Pour the marinara sauce over the meatballs and bring to a boil. Reduce the heat to low, cover tightly with a lid, and simmer until the meatballs are cooked through, about 15 minutes. Sprinkle with more basil, if desired, and serve. Note: This recipe has been written by Jenn Segal and republished on MudMatter with Author’s Permission. Please find the original link here – Turkey Meatballs in Marinara Sauce.
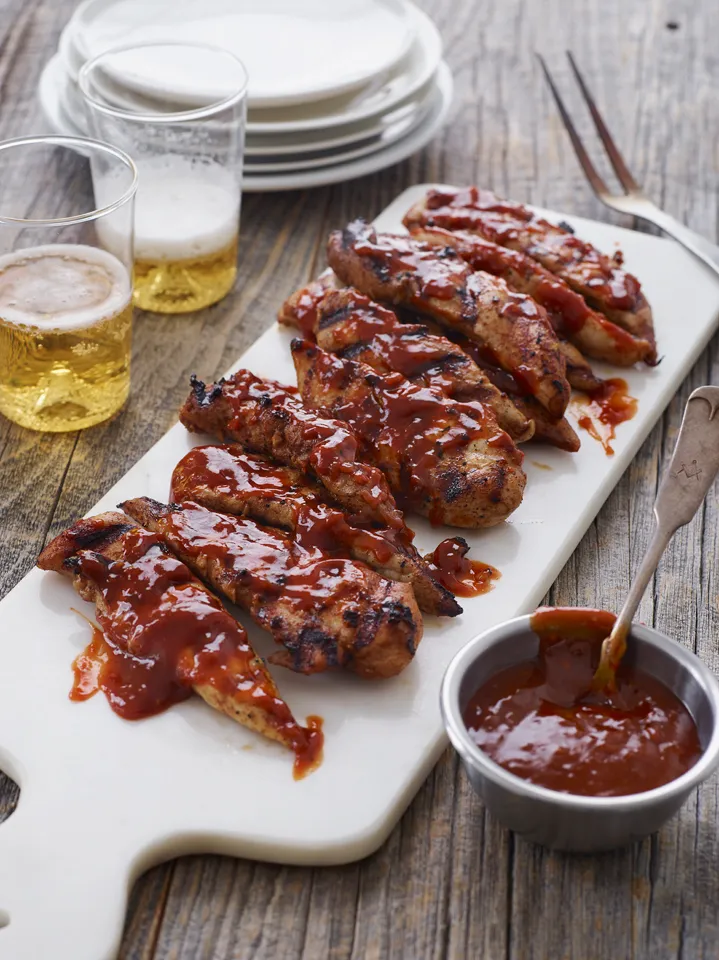
Grilled BBQ Chicken
This easy BBQ chicken is absolutely loaded with smoky barbecue flavor. We have a running joke about chicken in my family. Whenever I say we’re having chicken for dinner, my husband says, “Chicken again?” and then rattles off a seemingly endless list of chicken dinners his mother used to make: “Chicken Parm, chicken cutlets, chicken stir-fry, chicken casserole, chicken pot pie” and so on. The kids jump right on the bandwagon, groaning about all my chicken dinners. What they don’t realize is that this only makes me even more determined to change their minds about chicken. You could almost say I’m on a Chicken Crusade! Luckily, these BBQ chicken breasts always win everybody over. They are absolutely loaded with smoky barbecue flavor. I guarantee clean plates all around. Winner, winner chicken dinner! What You’ll Need To Make BBQ Chicken For this recipe, you can use chicken tenderloins or boneless skinless chicken breasts. If using chicken breasts, it’s important to pound them to an even 1/2-inch thickness before marinating. This both tenderizes the breasts and ensures they cook evenly. (Pounding is not necessary if using tenderloins, as tenderloins are naturally very tender.) Step-by-Step Instructions In a large bowl, combine the oil, garlic, salt, brown sugar, smoked paprika, cumin, chili powder, and cayenne pepper. Whisk to combine. Add the chicken to the bowl and toss with tongs until evenly coated. Cover the bowl and place in the refrigerator to marinate for at least 6 hours or up to 24 hours. Preheat the grill to high and oil the grates. Grill the chicken, covered, for 2 to 3 minutes. Flip the chicken, and then brush with some of the barbecue sauce. Cook for 2 to 3 minutes more. Transfer the chicken to a serving platter and serve with remaining barbecue sauce alongside. Note: This recipe has been written by Jenn Segal and republished on MudMatter with Author’s Permission. Please find the original link here – Grilled BBQ Chicken.
Arroz con Pollo
Arroz con pollo is a much-loved Latin American dish that combines seasoned rice, tender chicken, and vegetables in one big pot, making it the perfect meal to feed a crowd or enjoy with family. Arroz con pollo, which means “rice with chicken” in Spanish, is a beloved Latin American dish that’s similar to paella. My version is simple to make: start by seasoning and searing bone-in chicken pieces until golden brown, then sauté onions and bell peppers until fragrant and tender. Next, add rice, garlic, and tomato paste and toast everything before covering it with chicken broth, olives, and spices. Return the chicken to the pot and let everything cook in the oven until the rice is tender and the chicken is fully cooked. Finally, mix in peas and fresh cilantro. To serve, you can shred the chicken and mix it in with the rice for a more cohesive dish or leave it whole for a prettier presentation (my family prefers it shredded). Arroz con pollo is a comforting and satisfying meal perfect for feeding a hungry crowd. Serve it with a big salad and a traditional Latin American dessert like flan to complete the meal. What You’ll Need To Make Arroz con Pollo Step-by-Step Instructions Step 1: Season and Brown the Chicken Preheat the oven to 350°F and set an oven rack in the middle position. In a small bowl, mix together 1½ teaspoons salt, pepper, and 1 teaspoon of the cumin. Cut off any excessive fat on the chicken (leaving the skin intact). Blot the chicken with a paper towel and season both sides with the spice mixture. Heat the oil in a large (5 to 6-qt) Dutch oven or heavy-bottomed, high-sided oven-safe skillet over medium-high heat. Working in two batches, brown the chicken in a single layer until golden and crispy. For thighs, place the chicken skin side down, and sear until golden and crispy, 5 to 7 minutes. Flip and brown on the other side, 1 to 2 minutes more. For drumsticks, sear for 2 to 3 minutes on each side, turning to brown evenly all over. Using tongs, transfer the chicken to a large plate and set aside aside. Step 2: Sauté the Vegetables and Rice If there is a lot of oil left in the pan, pour off all but about 2 tablespoons of the fat. Return the pot to the stove and reduce the heat to medium-low. Add the onion and bell pepper to the pot and cook, stirring occasionally, until softened, 6 to 8 minutes. As you stir, scrape up any brown bits from the bottom of the pan and mix it into the vegetables. Add the rice, garlic, tomato paste, and remaining 1 teaspoon of cumin; cook, stirring constantly, until fragrant, another 2 to 3 minutes. Step 3: Add the Broth, Seasoning and Browned Chicken To The Pot Add the chicken broth, oregano, turmeric, sugar, olives, bay leaves, and remaining 1¼ teaspoons salt. Nestle the chicken on top of this mixture and pour any remaining chicken drippings into the pan as well, and bring to a boil. Step 4: Bake Cover the pot with a lid and immediately transfer to the oven to bake for 35 minutes, or until the chicken registers 175°F on a meat thermometer. Remove the pan from the oven and let sit, covered, on a wire rack or on the stovetop for 10 minutes. Uncover the pan, and use tongs to transfer the chicken to a plate. Remove the bay leaves, and fluff the rice. Mix the peas and cilantro, if using, into the rice. Return the chicken pieces to the top of the rice. Alternatively, remove the skin, pull the meat off of the bones, shred into bite-sized chunks, and mix in with the rice (discard the skin and bones). Serve or cover the pan to keep warm until ready to serve. Note: This recipe has been written by Jenn Segal and republished on MudMatter with Author’s Permission. Please find the original link here – Arroz con Pollo.
Grilled Turkey Burgers
With only 5 ingredients, you can throw these flavorful and juicy turkey burgers together in minutes. Most turkey burgers are dry and tasteless and leave you yearning for the real deal. Not these! I’ve added Italian turkey sausage – a trick often used with meatballs – which amps up the flavor and makes them incredibly juicy. The best part is that you can throw them together in a matter of minutes; only five ingredients and no chopping, slicing or dicing required. What You’ll Need To Make Grilled Turkey Burgers Step-by-Step Instructions Remove the sausage meat from the casings. The best way is to use kitchen shears to cut through the casings and then peel them away from meat. Add the ground turkey, pepper, Worcestershire sauce and Dijon mustard. Use your hand to mix together until well combined. Form the meat into 8 even patties about ½-inch thick, and place them on a foil-lined baking sheet. Clean the grill and preheat to high. To grease the grill, lightly dip a wad of paper towels in vegetable oil and, using tongs, carefully rub over the grates several times until glossy and coated. Place the turkey burgers on the grill and cook for five minutes, covered, until nice grill marks form. Flip and continue to cook, covered, for 3-5 minutes more. Heat the buns on the grill, assemble the burgers, and serve. Note: This recipe has been written by Jenn Segal and republished on MudMatter with Author’s Permission. Please find the original link here – Grilled Turkey Burgers.
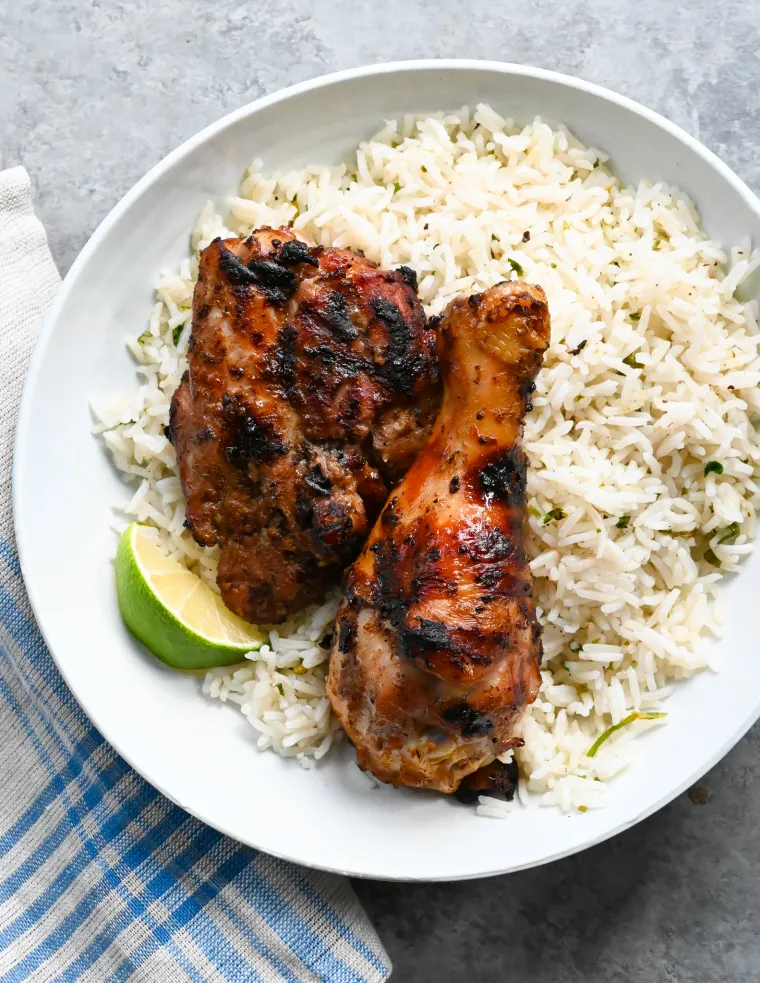
Grilled Jerk Chicken
Spicy, smoky and aromatic, Jerk chicken is Jamaica’s most iconic dish. Jerk is a style of cooking native to Jamaica. Some people believe the term comes from the word charqui, a Spanish term for jerked or dried meat, which eventually became jerky in English; others claim it’s related to the constant turning or jerking of the meat to load it with the spice blend and cook it thoroughly. The ingredients for jerk chicken marinade – soy sauce, allspice, nutmeg, Chinese 5-spice powder, and Scotch bonnet peppers – exemplify Caribbean cooking, which is a distinct blend of African, European, Indian, and Asian flavors. This grilled jerk chicken recipe, adapted from Food & Wine, is my go-to recipe. It’s spicy, but you can tone down the heat level by removing the seeds and membranes from the hot peppers. For best results, marinate the chicken overnight. The marinade is also great on beef, pork, or shrimp (although for shrimp, marinate for only 30 minutes to 1 hour), so feel free to double and freeze it for other uses. If you don’t have a grill (or grilling weather), the chicken can be roasted in the oven instead. What You’ll Need To Make Jerk Chicken Before we get to the step-by-step instructions, a few notes on the ingredients: I recommend using bone-in chicken thighs and drumsticks over bone-in breasts for this recipe; the flavor is better and they are easier to grill without drying out. If you’d like to use bone-in chicken breasts, look for smaller ones so they won’t burn on the outside before the inside is fully cooked. Or, start them on the grill and finish them in the oven. The recipe calls for either Scotch bonnet or habanero peppers. These two peppers are varieties of the same chili pepper species, and they have a similar flavor and level of heat. Scotch bonnet peppers are native to the Caribbean and are used to make authentic jerk chicken, but they can be hard to find; habanero peppers, grown primarily in Mexico, make a great substitute. The heat comes from the seeds and membranes, so throw in the whole peppers for spicy jerk chicken. For a milder dish, remove the seeds and membranes from one or both of the peppers. Be very careful when working with hot peppers. If you touch your eyes while handling them, it will be very painful. It’s a good idea to wear disposable gloves or wash your hands very well when you’re done. Step-by-Step Instructions Begin by making the marinade. Combine all of the ingredients except for the chicken in a food processor. Process until the vegetables are finely pureed. Place the chicken and marinade in a Ziploc freezer bag and let it marinate in the refrigerator at least eight hours or overnight. Preheat the grill to medium heat (about 350°F). Clean and oil the cooking grate. Place the chicken, skin side up, on the cooler side of the grill and cook, covered, turning and moving occasionally to prevent burning and flare-ups, for 35 to 40 minutes. If the skin is not yet crispy, move the chicken, skin side down, to the hotter side of the grill; cook, keeping a close watch to prevent burning, until the skin is rendered and crisp, a few minutes. If the skin is not yet crispy, move the chicken, skin side down, to the hotter side of the grill; cook, keeping a close watch to prevent burning, until the skin is rendered and crisp, a few minutes. How To Cook Jerk Chicken In The Oven As mentioned above, jerk chicken can be roasted in the oven if a grill is unavailable. Preheat the oven to 425°F and set an oven rack in the middle position. Line a baking sheet with aluminum foil for easy clean-up, and set an oven-proof rack on top. Spray the rack with nonstick cooking spray. Place the chicken on the rack, skin side up, and roast until lightly browned and cooked through, 40 to 45 minutes. Turn on broiler (leave the pan on the middle rack), and cook 1 to 3 minutes more, or until the skin is golden brown and crispy. If you happen to have leftover chicken, it’s delicious in tacos, wraps, quesadillas, or burrito bowls. Note: This recipe has been written by Jenn Segal and republished on MudMatter with Author’s Permission. Please find the original link here – Grilled Jerk Chicken.
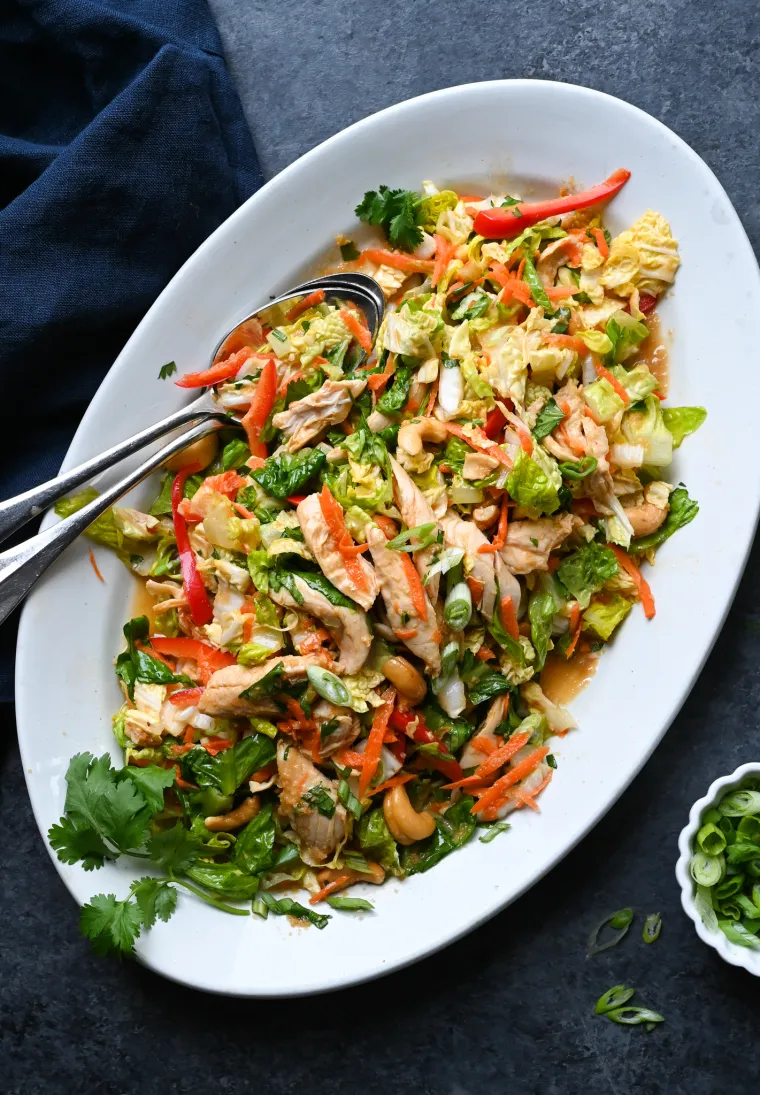
Chinese Chicken Salad
Make a restaurant-quality Chinese chicken salad at home with this easy recipe featuring crisp veggies and tender chicken tossed in a delicious sesame-ginger dressing. Chinese chicken salad is a California-style dish that perfectly blends the flavors of Chinese and American cuisine. Although it was a trendy restaurant menu item in the 1990s, for me, it’s a timeless favorite that will never go out of style. In fact, I would happily eat a salad like this every night of the week if I didn’t have a family to feed! The combination of fresh veggies, like Napa cabbage, crunchy carrots, and crisp bell peppers, combined with tender chicken and a sesame-ginger dressing make for a light and refreshing meal that always leaves you feeling satisfied. In this version, I’ve swapped out the traditional fried wonton strips with nuts to make the salad a bit healthier. However, if you prefer the crispy crunch of wontons, go ahead and add them in! The recipe is very easy to throw together, especially if you use leftover or rotisserie chicken instead of cooking your own — give it a try to see why it’s one of my all-time favorites! What You’ll Need To Make Chinese Chicken Salad Step-by-Step Instructions Make the dressing: In a food processor or blender, combine all of the dressing ingredients. Blend until smooth. Assemble the salad: Combine all of the salad ingredients in a large bowl. Add dressing, little by little, and toss to combine, until the salad is dressed to your liking. Taste and adjust seasoning if necessary. Serve immediately. Note: This recipe has been written by Jenn Segal and republished on MudMatter with Author’s Permission. Please find the original link here – Chinese Chicken Salad.
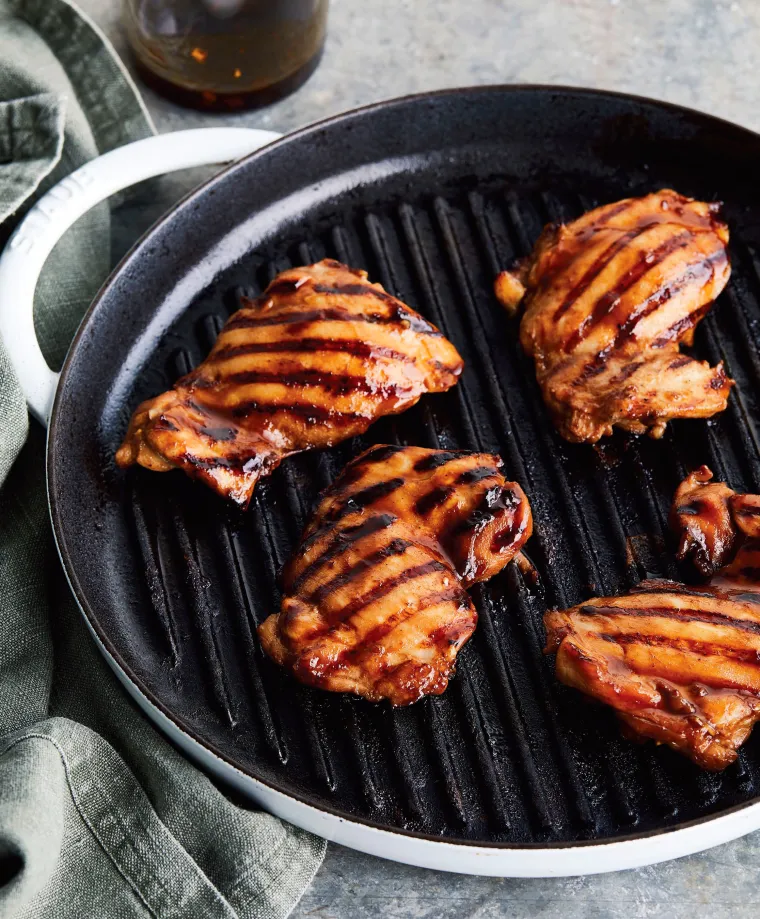
Char Siu Chicken
Andrea Nguyen’s savory-sweet char siu chicken is easy to make and hard to resist. This easy char siu chicken recipe comes from Vietnamese Food Any Day: Simple Recipes for True, Fresh Flavors by Andrea Nguyen. Nguyen writes, “Savory-sweet and garlicky Chinese barbecued pork, called char siu in Cantonese and xá xíu in Vietnamese, is hard to resist. Since the classic porky version requires a good hour (better yet, overnight) to marinate, my weeknight approach is to make it with chicken thighs and grill it for a wonderful old-school flavor…Enjoy char siu chicken for dinner with rice and a quick stir-fried vegetable or a salad. Use leftovers (or make a double batch) for banh mi, a noodle soup, or fried rice.” My only tweak to the recipe was to increase the quantities and double the sauce because it’s that good. What You’ll Need To Make Char Siu Chicken The nice thing about this recipe is that very little prep is required; most of the ingredients come out of bottles and jars. The most time-consuming part of the recipe is trimming the chicken thighs (I find it easiest to use sharp kitchen shears). If you don’t want to use dark meat, go ahead and use chicken tenderloins. Just keep in mind that they’ll cook in half the time and you’ll need slightly less since they don’t need to be trimmed. How To Make Char Siu Chicken In a large bowl, stir together the garlic, five-spice powder, honey, hoisin, soy sauce, ketchup, and sesame oil. Remove about half the marinade and set aside for glazing the chicken. Add the chicken to the bowl, coating the pieces well. Cover with plastic wrap and marinate at room temperature for 30 minutes, or refrigerate up to 24 hours (return to room temperature before cooking). Lightly oil a cast-iron stove-top grill pan and set over medium-high heat. Add the chicken and cook for 6 to 10 minutes, turning several times. To test for doneness, pierce the flesh with the tip of a knife; the chicken is cooked when clear juices flow out. During the last 2 minutes, when the chicken feels firmish, baste with the reserved marinade to freshen flavor and add sheen. Alternatively, prepare a medium charcoal fire or preheat a gas grill to medium and cook the chicken for 10 to 12 minutes, basting during the last 3 minutes. Transfer to a platter and let rest for 5 to 10 minutes before serving. Note: This recipe has been written by Jenn Segal and republished on MudMatter with Author’s Permission. Please find the original link here – Char Siu Chicken.
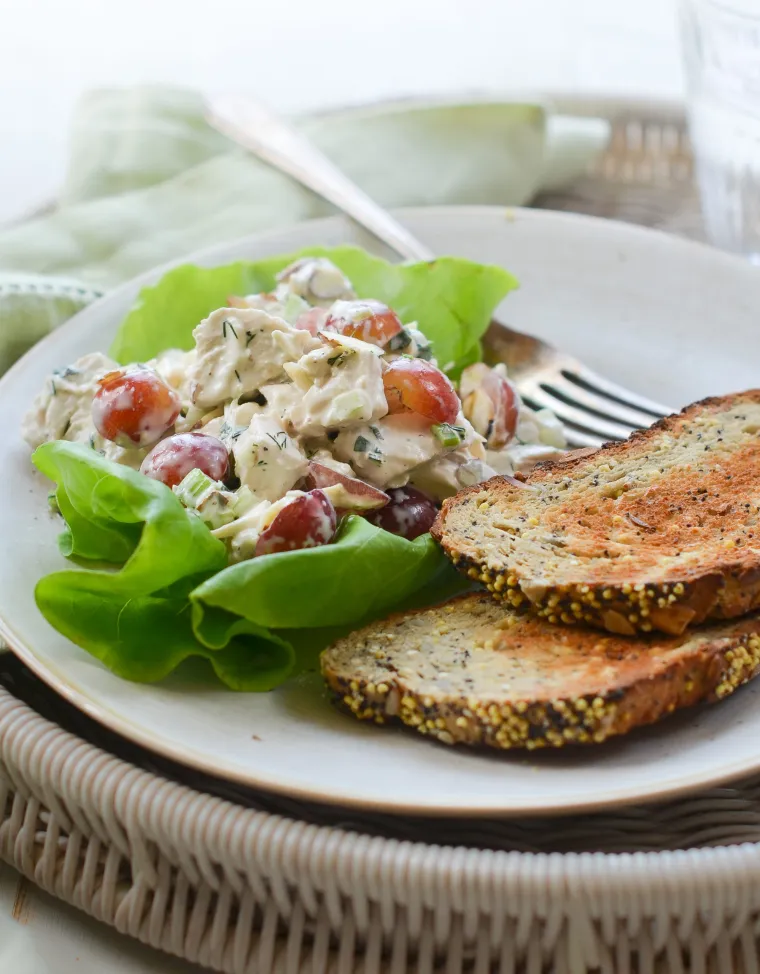
Chicken Salad with Grapes and Almonds
This savory-sweet chicken salad is delicious in a sandwich, scooped over greens, or eaten straight from the bowl. Back in May, The Kitchn published a fun chicken salad showdown by Amelia Rampe, pitting recipes from The New York Times, Southern Living, Ina Garten, and The Pioneer Woman against one another in the name of finding the best chicken salad on the internet. Each recipe uses a different method for cooking the chicken, different mix-ins, and different dressings. The Pioneer Woman’s savory-sweet chicken salad with grapes, almonds, and dill was crowned the winner, with Ina Garten’s recipe coming in a very close second. I loved both recipes, so I took what I liked from each, added a few touches of my own, and combined them into a version that’s delicious on a sandwich, scooped over greens, or eaten straight from the bowl. This is the fun of cooking! What You’ll Need To Make Chicken Salad with Grapes and Almonds Step-by-Step Instructions Preheat the oven to 425°F and set an oven rack in the middle position. Line a baking sheet with aluminum foil. Rub the chicken with the oil and sprinkle with 1 teaspoon salt and 1/2 teaspoon pepper. Roast for 25 to 30 minutes, or until or until a thermometer inserted into the thickest part of the breast reads between 160°F and 165°F (the temperature will continue to rise about 5 degrees as it cools). It’s important not to overcook the chicken or the salad will be dry. I highly recommend using a meat thermometer with a remote probe (affiliate link) so that you can monitor the temperature of the chicken without ever opening your oven. It takes all of the guesswork out of it. When the chicken is cool, remove the meat from the bones and discard the skin and bones. Dice the chicken into a 1/2-inch pieces. In a large mixing bowl, combine the mayonnaise, sour cream, lemon juice, mustard, sugar, 1 scant teaspoon salt, and 1/2 teaspoon pepper. Whisk to combine. Add the diced chicken, celery, scallions, grapes, almonds, and herbs to the dressing. Toss until well combined. Taste and adjust seasoning, if necessary. Chill the salad in the refrigerator for a few hours. Before serving, taste and adjust seasoning again, if necessary. Note: This recipe has been written by Jenn Segal and republished on MudMatter with Author’s Permission. Please find the original link here – Chicken Salad with Grapes and Almonds.


