
Suggested for you
Sachin Tendulkar
@sachin_rt
Sachin Tendulkar
@sachin_rt
Sachin Tendulkar
@sachin_rt
Sachin Tendulkar
@sachin_rt
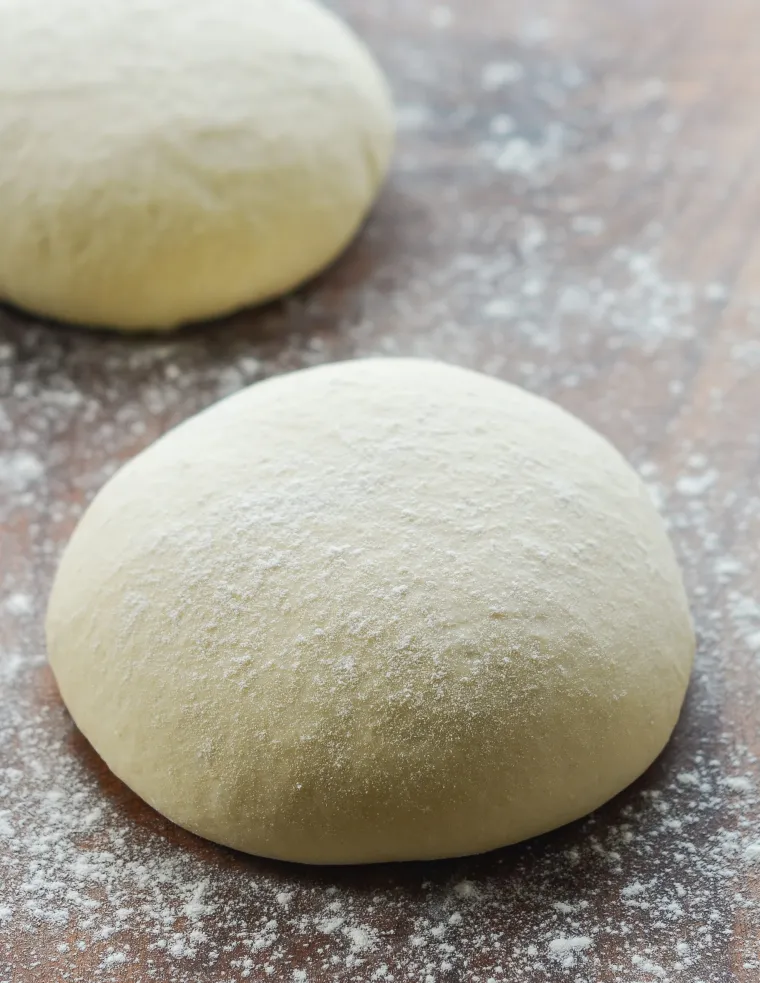
Take your homemade pizzas to the next level with this easy and delicious pizza dough recipe, made with only five simple ingredients.
For a perfect crust on your homemade pizza, stromboli, or calzones, making your own pizza dough is the best choice. This simple process requires just five key ingredients: flour, salt, yeast, oil, and water. The dough takes only 10 minutes to mix and knead. Once combined, let the dough rise for at least 90 minutes in a warm, draft-free area before using it. This recipe yields 2 pounds of dough, enough for two large pizzas, four individual pizzas, two stromboli, or four calzones. You can prepare the dough up to two days ahead of time, and it also freezes well for later use.
What you’ll need to make pizza dough
Olive Oil: Adds richness to the dough and helps it crisp up beautifully in the oven.
Salt: Provides essential flavor for the dough.
Cornmeal: Used to dust the baking sheet, preventing the dough from sticking while baking, and adds a bit of extra crispiness and flavor to the crust.
Yeast: Essential for making the dough rise. Instant yeast (also known as rapid-rise, quick-rise, or bread machine yeast) works best, though active dry yeast can also be used. If using active dry yeast, expect the rising time to take about 50% longer. You can activate it by rehydrating it in liquid before use (see the recipe for detailed instructions).
Step-By-Step Instructions
Mix the Dough
To begin, combine the flour, yeast, and salt in the bowl of a stand mixer.
Stir with a spoon to combine, and then add the oil and warm water.
Stir until the dough comes together into a shaggy mass.
Knead the Dough
Fit the mixer with the dough hook and knead on medium-low speed until the dough is smooth and elastic, 5 to 7 minutes. (Alternatively, you can knead the dough by hand.)
Let the Dough Rise
Transfer the dough to a lightly oiled large bowl.
Cover the bowl with plastic wrap or a damp kitchen towel, and let the dough rise in a warm place until it has doubled in size, 1 to 2 hours.
There are a number of options that will work as places to let your dough rise: a sunny spot in your house, next to a heating vent (during colder months), or even on top of a kitchen appliance that generates a bit of heat as it runs (like your fridge). If you’re lucky enough to have a proof setting in your oven, use that. If not, but you’d like to use your oven, switch on the oven’s internal light; it will generate enough warmth to provide a good environment for the dough to rise.
After the dough has risen, punch it down.
Place the dough on a lightly floured surface. Cut the dough in half and roll each piece into a ball. If you’re not using the pizza dough right away, lightly coat the dough ball(s) with olive oil. Place into freezer bag(s) and seal shut, squeezing out all the air. Refrigerate for up to 2 days. When ready to use, let the dough sit out on the countertop for 30 minutes to warm up before stretching.
Cover the dough with a damp kitchen towel and let it rest for 15 to 20 minutes.
As you can see, it will rise a bit.
Shape the Dough
When it comes time to shape the pizza dough for baking, you can stretch it into any shape, size, or thickness you like (just keep in mind that a thicker crust will take longer to bake). Simply press and stretch the dough using your hands, dusting with more flour if necessary.
General Baking Instructions
Every pizza recipe is a little different, but as a general guideline:
Preheat the oven to 500°F and set an oven rack in the bottom position. Dust a 13×18-inch baking sheet lightly with cornmeal.
Place the stretched dough on the baking sheet, and gently stretch it out again so that it maintains its shape.
Spread your sauce over the dough, leaving a 1/2-inch border around the edges. Slide the baking sheet into the oven and bake for 5 to 7 minutes, until the crust is partially cooked. Remove from the oven and scatter the cheese and toppings over the sauce. Slide the pan back into the oven and cook until the crust is golden brown and the cheese is melted and bubbling, 4 to 6 minutes more.
To Refrigerate or Freeze The Pizza Dough
If you’re not using the pizza dough right away, follow these steps for storing it. After the initial rise, lightly coat the dough ball(s) with olive oil. Place the dough into freezer bag(s), seal them shut, and remove as much air as possible. You can store the dough in the refrigerator for up to 2 days. When you're ready to use it, let the dough sit out on the countertop for about 30 minutes to warm up before stretching.
For longer storage, the dough can be frozen for up to 3 months. To use frozen dough, simply defrost it in the refrigerator overnight (or for at least 12 hours). After defrosting, let it sit on the countertop for about 30 minutes to warm up before stretching and continuing with your pizza recipe.
Note: This recipe was updated in January 2022 to make a slightly larger quantity. To see the original recipe, click here.
Please find the original link here – Pizza Dough.

Filled with meaty shiitakes, crunchy broccoli, and sweet bell peppers, this Chinese vegetable stir-fry always satisfies.
As much as I know it’s true, I’m always amazed by how quick and easy it is to make excellent Chinese food at home. This Chinese vegetable stir-fry is filled with meaty shiitake mushrooms, crunchy broccoli, and sweet bell peppers in a gingery, garlicky brown sauce. Go ahead and buy your veggies ready-cut if possible to minimize prep time. And, as with any stir-fry, be sure to have all of your ingredients ready before you start cooking because it comes together quickly. The dish easily serves four as a side but if you’re making it as a vegetarian main course, count on two or three servings.
What you’ll need to make a Chinese Vegetable Stir-Fry
Step-by-Step Instructions
Before you get started, chop the scallions, ginger, and garlic. You’ll need them at your fingertips once you start cooking.
Next, whisk the soy sauce, water, dry sherry, sesame oil, sugar, cornstarch, red pepper flakes and dry mustard in a small bowl. Set aside.
In a large nonstick skillet, bring 1 inch of water to a rapid boil. Add the broccoli and cook for 2-3 minutes, or until tender-crisp. (Blanching the broccoli ensures that it is perfectly cooked and bright green.)
Strain the broccoli in a colander and then run under cold water to stop the cooking process. Set aside and allow to fully drain.
Heat 2 tablespoons of vegetable oil in the skillet over high heat. Add the shiitake mushrooms and red peppers and cook, stirring occasionally, for 5-6 minutes, until the mushrooms are browned and the peppers are softened.
Add the garlic, light-colored scallions, and ginger and cook, stirring constantly, until fragrant, about 30 seconds.
Return the broccoli to the pan and cook until warmed through, about 1 minute.
Add the reserved sauce. Toss and cook until the sauce is slightly thickened and the vegetables are evenly coated, about 30 seconds.
Transfer to a serving dish and sprinkle with the dark green scallions. Serve with rice, if desired, and enjoy!
Note: This recipe has been written by Jenn Segal and republished on MudMatter with Author’s Permission. Please find the original link here – Chinese Vegetable Stir-Fry.
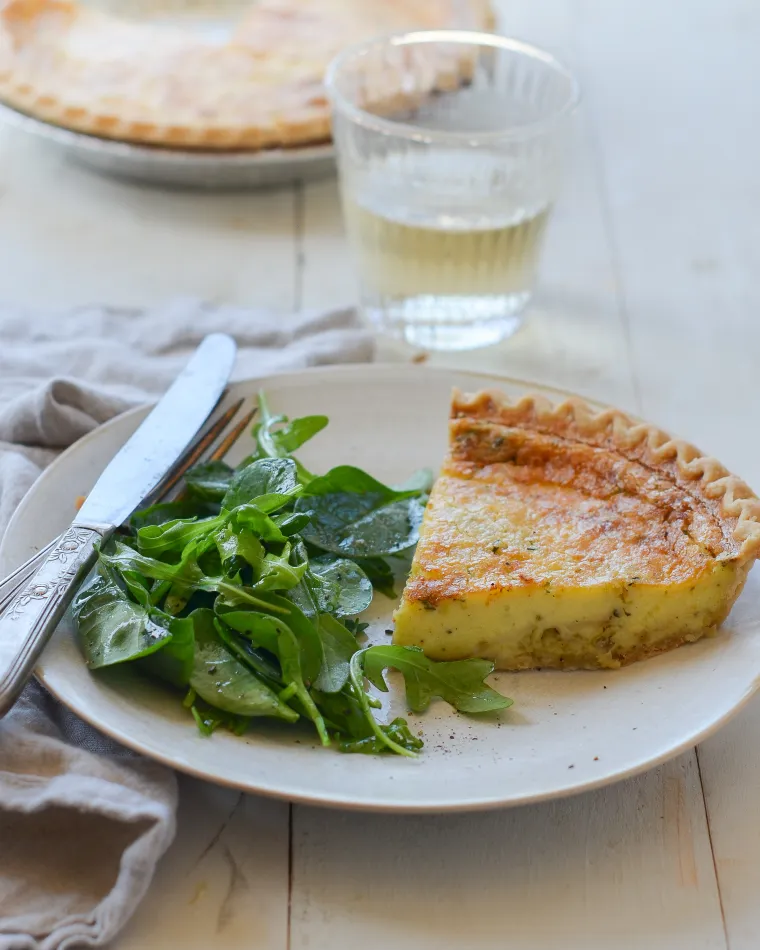
A variation on the classic French cheese quiche, this Parmesan and leek quiche is rich and flavorful.
When I was studying abroad in France, every day for lunch I would walk to the pastry shop near my university and treat myself to an individual quiche fromage — a delicious little habit that quickly cost me all my skinny jeans. Over 20 years later, it is still one of my favorite things to eat. This parmesan and leek quiche is a wonderful variation on the classic French cheese quiche; the leeks impart a mellow, almost sweet onion flavor while Parmesan cheese makes the custard filling extra flavorful.
What You’ll Need To Make Parmesan & Leek Quiche
I use a good-quality store-bought crust to save time but feel free to make your own if you prefer. The secret to success, whether you make the crust yourself or use pre-made, is to pre-bake it so it won’t be soggy.
For the cheese, it’s important to use authentic Parmigiano Reggiano cheese for this recipe. You can always tell if it’s authentic by looking at the rind, which is embossed with the name over and over. If the cheese is already grated, it should be labeled “Parmigiano Reggiano,” not “Parmesan.”
Leeks are part of the onion family, but they have a milder flavor. They’re notoriously sandy and dirty (and very good at hiding it) so it’s important to wash them well. To clean them, cut off and discard the root ends and thick dark green parts, then cut the leeks in half lengthwise. Rinse each half under cold water, pulling apart the layers to remove any grit that’s tucked inside.
How To Make Parmesan & Leek Quiche
To begin, preheat the oven to 400°F. Remove the pie shell from the freezer and thaw it until just soft enough to easily prick with a fork (10 to 20 minutes). Prick the bottom and sides all over with a fork and bake on the center rack until lightly golden, 10 to 15 minutes. Turn the oven down to 325°F.
While the crust bakes, melt the butter in small sauté pan over medium-low heat. Add the leeks and season with a bit of salt and pepper.
Cook over medium-low heat, stirring occasionally, until very soft, about 15 minutes. Do not brown. Taste and adjust seasoning (they should be well-seasoned). Set aside to cool.
In a medium bowl, combine the heavy cream, eggs, thyme, nutmeg, Parmigiano Reggiano cheese, 1/4 teaspoon salt and 1/4 teaspoon pepper.
Whisk well.
Spread the cooked leeks over the pre-baked pie shell, taking care not to puncture the crust.
Pour the egg mixture over top.
Bake at 325°F for 45 to 55 minutes, or until the custard is set and puffed.
The quiche will deflate as it cools. Slice into wedges and serve hot or warm.
Note: This recipe has been written by Jenn Segal and republished on MudMatter with Author’s Permission. Please find the original link here – Parmesan & Leek Quiche.

Stuffed with baby spinach and two kinds of cheese, this spinach frittata makes a lovely brunch, lunch, or light dinner.
Filled with heaps of baby spinach and two kinds of cheese, this spinach frittata tastes nutritious and rich, all at the same time. It’s silkier and more quiche-like than most frittatas, which are usually just glorified omelets with the fillings mixed in rather than stuffed inside. The key is adding heavy cream and lots of cheese to the egg mixture. It’s also important to bake the frittata in a low-temperature oven (as opposed to the traditional stovetop-to-broiler method), so the eggs cook gently into a custard without scrambling. This frittata can be served for brunch, lunch, or a light dinner – and since it’s good warm or at room temperature, leftovers can be packed for lunch or taken on a picnic.
What You’ll Need To Make Spinach Frittata
Step-by-Step Instructions
Heat the oil in a 10-inch ovenproof nonstick skillet over medium heat. Add the shallot and cook, stirring frequently, until softened, 3 to 4 minutes. Do not brown.
Add half of the spinach and cook until wilted down, about 1 minute.
Add the remaining spinach and 1/4 teaspoon of the salt and continue cooking until all of the spinach is wilted, 1 to 2 minutes more.
Meanwhile, in a large bowl, combine the eggs, heavy cream, pepper, and the remaining 1/4 teaspoon salt.
Whisk to combine.
Add the cooked spinach mixture, Cheddar, Parmigiano Reggiano, and basil to the egg mixture.
Stir to combine.
Pour the mixture back into the pan (no need to wash it).
Place the pan in the oven and bake until set, 20 to 23 minutes. Immediately place an oven mitt over the pan handle to remind yourself that it is hot (it’s easy to forget and burn your hand, and the handle stays hot for a long time).
Serve the frittata directly from the pan, or use a rubber spatula to loosen the edges and slide the frittata onto a serving platter.
Note: This recipe has been written by Jenn Segal and republished on MudMatter with Author’s Permission. Please find the original link here – Spinach Frittata.
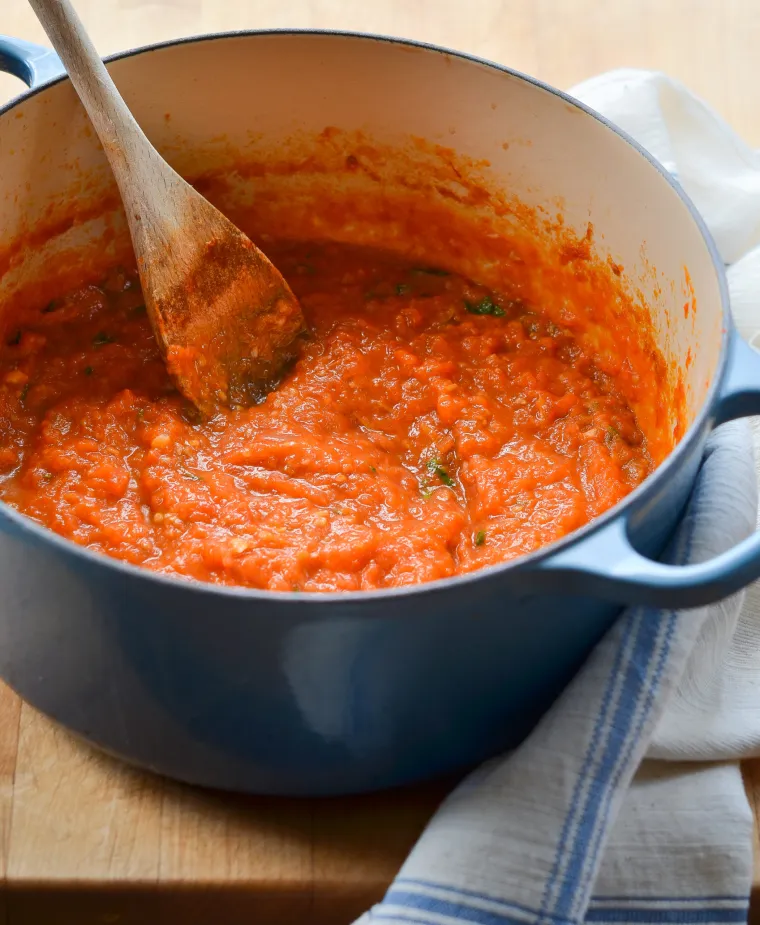
Based on Marcella Hazan’s famous recipe, this is a simple and rich homemade tomato sauce.
I admit that I have an entire shelf in my pantry devoted to my favorite jarred tomato sauce, but when tomatoes are in season and I’ve got a little extra time, I love to make tomato sauce from scratch. It’s so delicious and always makes me wonder how I can ever eat that run-of-the-mill jarred stuff! My go-to recipe is based on cookbook author Marcella Hazan’s famously simple tomato butter sauce, although I’ve tweaked it over the years to make it my own. It’s such a rich and flavorful sauce, it doesn’t even need Parmesan cheese when tossed with pasta. If fresh tomatoes aren’t in season or you want to save time, feel free to use canned whole peeled tomatoes; just avoid canned diced tomatoes, as they are treated with a chemical that prevents them from fully breaking down.
What you’ll need to make Homemade tomato sauce
Step-By-Step Instructions
Begin by scoring the tomatoes with an X on one end. Don’t cut too deep – about 1/4 inch is good.
Place the tomatoes in boiling water and cook for 1 to 2 minutes, until the skins start to peel back. Be careful not to cook too long, or the tomatoes will become soft and difficult to handle.
Plunge the tomatoes into an ice-cold water bath to stop the cooking process.
Transfer the tomatoes to a cutting board and peel the skins off.
Cut the tomatoes into 1/2-inch chunks.
Place the chopped tomatoes, along with all of their seeds and juices, into a large Dutch oven or saucepan, along with the butter, olive oil, onions, garlic, salt and sugar.
Bring to a gentle boil.
Reduce the heat to low and simmer, uncovered, for 1-1/2 to 2-1/2 hours, until the sauce is no longer watery.
Remove the onion and discard. Use a wooden spoon or potato masher to smash any large chunks of tomatoes or garlic to make a slightly chunky and thick sauce.
Before serving, stir in the basil.
The sauce will keep in the refrigerator for about 4 days, or can be frozen in an airtight container for up to 3 months.
Note: This recipe has been written by Jenn Segal and republished on MudMatter with Author’s Permission. Please find the original link here – Homemade Tomato Sauce.
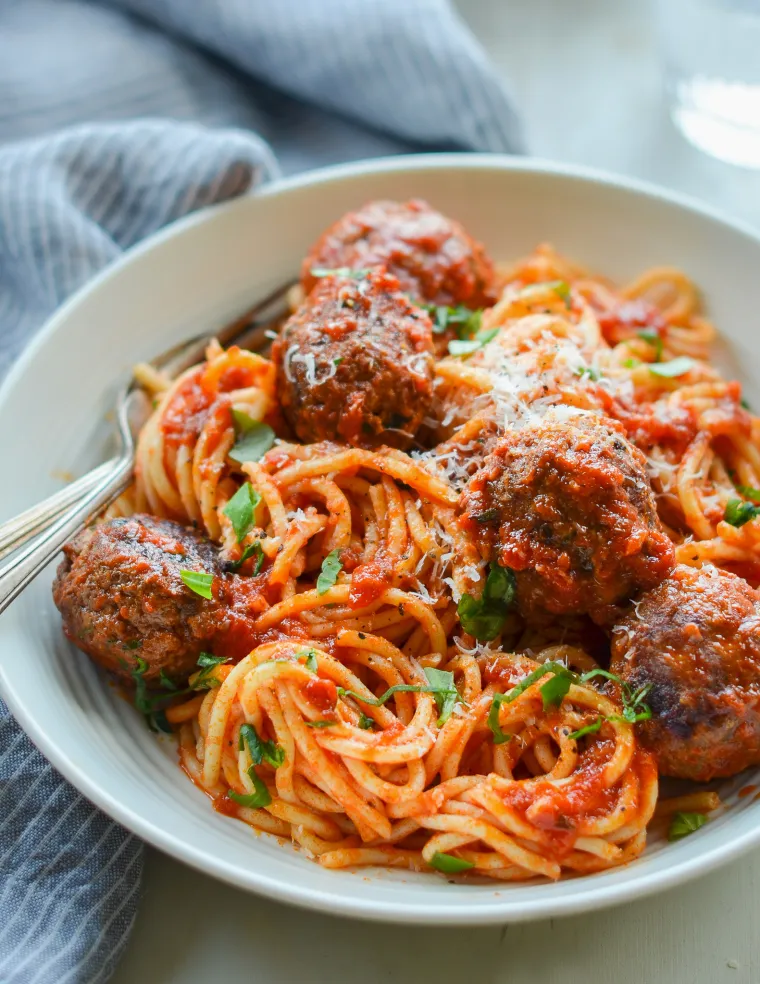
This spaghetti and meatball recipe is the ultimate weeknight family dinner — quick, easy, and picky eater-approved!
This is my go-to recipe for spaghetti and meatballs. With a quick 45-minute cook time, it’s perfect for busy weeknights and sure to please even the pickiest eaters. The meatballs are juicy and packed with flavor, with a fork-tender texture that keeps everyone coming back for more. To make things easy and save on mess, I brown the meatballs in the oven on a sheet pan instead of pan-frying them on the stovetop. I also use a good quality store-bought marinara sauce to save time, but feel free to use homemade tomato sauce if you have some on hand.
What You’ll Need To Make Spaghetti and Meatballs
For the most flavorful meatballs (or meatloaf), I recommend using equal parts beef, veal, and pork; at most supermarkets, this blend is labeled “meatloaf mix.” If your market doesn’t carry the blend, you can use half beef and half pork (since ground veal isn’t readily available).
For the cheese, be sure to use the real-deal imported Parmigiano-Reggiano from Italy; domestic Parmesan pales in comparison. You can always tell if it’s authentic by looking at the rind, which is embossed with the name over and over. If the cheese is already grated, it should be labeled “Parmigiano-Reggiano,” not “Parmesan.”
Step-by-Step Instructions
Begin with the meatballs: In a large bowl, combine the egg, basil, parsley, oregano, salt, pepper, garlic and water; whisk well.
Add the meat, breadcrumbs and Parmigiano Reggiano. meatball recipe
Mix with your hands until just combined.
Roll the mixture into golf ball-sized meatballs, and place on an ungreased baking sheet.
Bake for about 10 minutes, then remove the baking sheet from the oven and use a metal spatula or tongs to turn the meatballs (they will stick a bit but should release easily when you scrape under them with the spatula).
Put the meatballs back in the oven and cook for another 10 minutes, until they are nicely browned and almost cooked through.
In the meantime, bring the marinara sauce to a simmer in a large skillet. Taste it and adjust the seasoning if necessary (I usually add a healthy pinch of sugar and some freshly ground black pepper). Transfer the browned meatballs to the marinara sauce, leaving the fat behind. Cover loosely with a lid or foil and simmer for about 10 minutes, until the flavors marry and the meatballs are cooked through. Keep warm until ready to toss with pasta.
While the meatballs are cooking, bring a large pot of well-salted water to a boil.
Add the spaghetti and cook until al dente. Drain, then toss with the sauce and meatballs.
Transfer the spaghetti and meatballs to serving bowls and top with fresh chopped basil and more grated cheese.
Note: This recipe has been written by Jenn Segal and republished on MudMatter with Author’s Permission. Please find the original link here – Spaghetti and Meatballs.
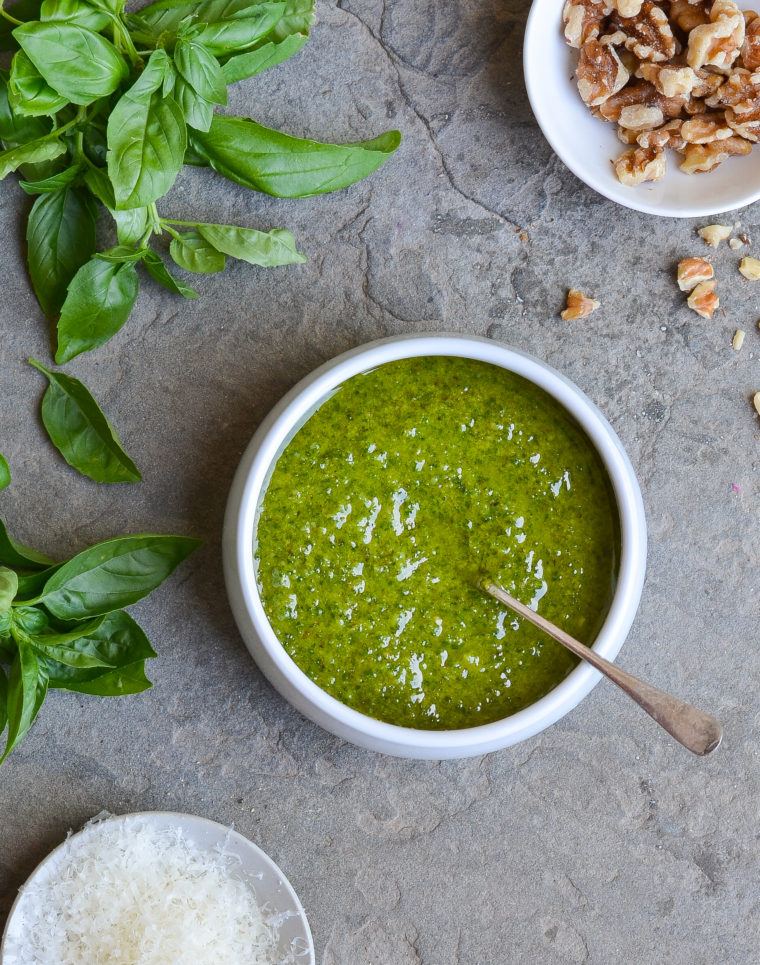
Homemade pesto sauce is easy to make, and it’s good on just about everything, from pastas to pizzas to salads.
One of my favorite things about summer cooking is stepping out my back door to pick fresh herbs from my potted herb garden. It always amazes me how the tiny seedlings I plant in May grow into more herbs than I can possibly use up in August. Right now, my basil plant is overflowing, which means it’s time to make pesto sauce. Pesto, or pesto alla genovese, is a vibrant, garlicky green sauce that originated in Genoa, Italy. It’s traditionally made with a mortar and pestle, but most modern versions call for using a food processor. Pesto is a versatile sauce that can be used on just about everything, from pastas to sandwiches to salads. It freezes well, too.
What You’ll Need To Make Pesto Sauce
Traditional pesto is made with garlic, nuts, salt, basil leaves, Parmigiano-Reggiano, and extra-virgin olive oil. It’s important to use top-quality ingredients, as the flavors really shine through.
For the cheese, be sure to use authentic Parmigiano-Reggiano from Italy; domestic Parmesan is not the same thing. You can always tell if the cheese is authentic by looking at the rind, which is embossed with the name over and over. If the cheese is already grated, it should be labeled “Parmigiano-Reggiano,” not “Parmesan.”
For the nuts, I use walnuts instead of the more traditional pine nuts for a few reasons. First, I always seem to have walnuts in the house (pine nuts can be very pricey). Second, in recent years an increasing number of people, including me, have fallen prey to a bizarre problem with pine nuts called Pine Mouth Syndrome, a bitter, metallic taste in the mouth that develops a day or two after eating pine nuts. It can last for weeks and make eating or drinking anything very unpleasant. (You can use pecans or almonds, too.)
Step-by-Step Instructions
To begin, combine the walnuts and garlic in the bowl of a food processor and pulse until coarsely chopped.
Add the basil leaves, salt, and pepper.
Process until finely chopped.
Then, with the food processor running, add the olive oil through the feed tube in a steady stream.
Add the Parmigiano-Reggiano.
Process again until smooth, and that’s your pesto sauce.
How To Store & Freeze Pesto
Use the pesto immediately or store it in a tightly sealed jar or air-tight plastic container, covered with a thin layer of olive oil (this seals out the air and prevents the sauce from oxidizing, which would turn it an ugly brown color). It will keep in the refrigerator for about a week.
Pesto can also be frozen in an airtight container for up to 6 months. I suggest dividing it into the compartments of an ice cube tray and freezing. Once frozen, remove the cubes from the tray and put in a sealable plastic bag or airtight container. You can add the defrosted cubes to summer vegetable soup, pasta salad with pesto, zucchini noodles, pesto pizza, eggs, sandwiches, and baked potatoes.
Note: This recipe has been written by Jenn Segal and republished on MudMatter with Author’s Permission. Please find the original link here – Pesto Sauce.

Shakshuka is a one-skillet dish of eggs poached in a smoky, spicy, vegetable-laden tomato sauce.
Popular throughout the Middle East, particularly in Israel (where it ranks right up there with falafel and hummus as one of Israel’s most-loved dishes), shakshuka is one-skillet dish of eggs gently poached in a smoky, spicy tomato and vegetable sauce. The dish was brought to Israel by Jewish immigrants from North Africa and variations abound. One popular version called green shakshuka replaces the tomato sauce with a rich spinach and cream sauce loaded with green vegetables. My version is traditional, with a few small tweaks that take it up a notch. I add a splash of heavy cream to marry the acidity of the tomatoes with the richness of the eggs – it makes all the difference – and I also sprinkle crumbled feta on top.
Shakshuka is traditionally made in a cast iron pan and is simple to prepare. You start by making the sauce on the stovetop, then you gently crack the eggs into wells in the sauce and cook briefly before finishing the dish under the broiler. It’s the ultimate breakfast-for-dinner dish, but it can be served any time of day. Toasted buttered bread for mopping up the sauce and runny yolks is a must.
What You’ll Need To Make Shakshuka
Step-by-Step Instructions
Begin by chopping the onions, peppers, and garlic. Be sure not to chop the garlic too finely or it will burn.
In a large skillet, heat the oil over medium heat. Add the onions, garlic and bell pepper.
Cook, uncovered, for about 8 minutes, until softened.
Add the smoked paprika, cumin, coriander, red pepper flakes, 1-1/4 teaspoons of the salt, sugar, and tomatoes.
Cook, uncovered, stirring occasionally, for about 10 minutes, or until the sauce is slightly thickened.
While the sauce cooks, chop the greens.
Add the chopped greens and heavy cream to the sauce, and continue cooking, uncovered, until the greens are soft and wilted, about 10 minutes more.
Turn off (or remove the pan from) the heat. Then, using a spoon, make 6 wells/indentations in the sauce.
Carefully crack an egg into each well, then spoon a bit of the sauce over the egg whites (this will contain them and also help them cook a bit faster than the yolks), being careful not to disturb the yolks. Sprinkle the eggs with the remaining 1/4 teaspoon salt. And then sprinkle the feta around the eggs.
Set the pan on the stove over low heat and cover with a lid. Cook until the egg whites are mostly set but still translucent on top, 5 to 7 minutes. Transfer the pan to the oven and broil until the eggs are cooked to your liking, 1 minute or less for runny yolks. Remove the pan from the oven and sprinkle the cilantro over top.
Serve hot with bread.
Note: This recipe has been written by Jenn Segal and republished on MudMatter with Author’s Permission. Please find the original link here – Shakshuka.
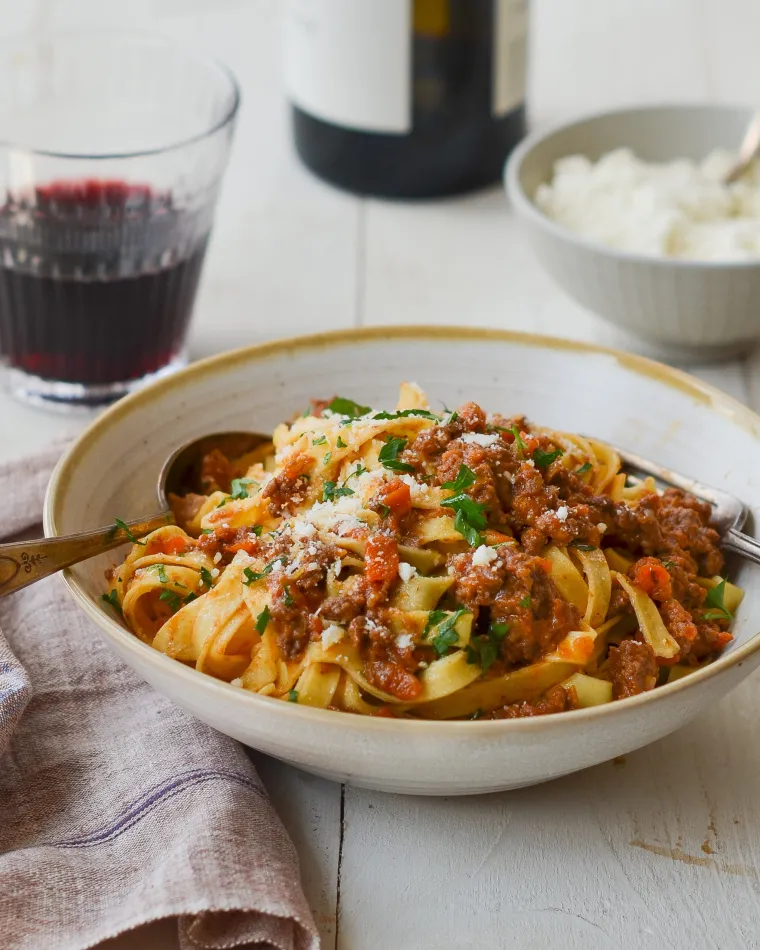
Fresh fettuccine pasta in a richly-flavored meat sauce, this pasta Bolognese is a family favorite.
Pasta Bolognese, or pasta in a tender and richly-flavored meat and vegetable sauce, is one of my favorite Sunday night family suppers. The sauce simmers on the stove for several hours, making the house smell delicious and inviting — and it’s one of those dishes that just tastes like it was made with love. I prefer fresh fettuccine here, which you can find in the refrigerator case at most supermarkets, but it’s good with dried fettuccine, rigatoni or anything, really.
What You’ll Need To Make Pasta Bolognese
Before we get to the step-by-step instructions, a few notes about the ingredients:
Pancetta is simply Italian bacon. Instead of being smoked like American bacon, it is cured with salt and spices and then dried. You can find it in the deli at most supermarkets or precut and packaged in the refrigerated gourmet foods aisle, which is a great time saver.
For the wine, use any dry red (Pinot Noir, Merlot, Cabernet Sauvignon, etc.) that is inexpensive but still good enough to drink.
How To Make Pasta Bolognese
Place onions in bowl of food processor fitted with metal blade.
Pulse until very finely chopped but not puréed.
Transfer the onions to a bowl, then add carrots and celery to the food processor.
Pulse until finely chopped.
Heat the olive oil in large heavy pot over medium-high heat, and add the onion and vegetable mixture.
Cook, stirring frequently, until soft, about 8 minutes. Lower the heat if vegetables start to brown.
Add the ground beef, pancetta, salt and pepper.
Cook over medium-high heat, breaking up meat with a wooden spoon, until meat is no longer pink, 5 to 10 minutes.
Add red wine and cook until liquid is almost dissolved, 1 to 2 minutes.
Add the broth, crushed tomatoes and oregano.
Bring to a gentle boil, then reduce heat to low. Cover with the lid slightly ajar and simmer for 1 hour and 30 minutes.
Stir in the milk.
Cover with the lid slightly ajar and simmer until milk is absorbed, about 35 minutes. If the sauce looks greasy, use a soup spoon to skim the fat off of the top. Cover to keep warm while you make the pasta.
Cook pasta according to package instructions.
Drain, reserving 1 cup of the pasta water. Toss the pasta with the sauce, adding the reserved pasta water little by little if the pasta seems dry. Taste and adjust seasoning with salt and pepper if necessary. Divide the pasta into serving bowls and sprinkle with fresh herbs, if using. Pass the grated Parmigiano Reggiano at the table.
Note: This recipe has been written by Jenn Segal and republished on MudMatter with Author’s Permission. Please find the original link here – Pasta Bolognese.
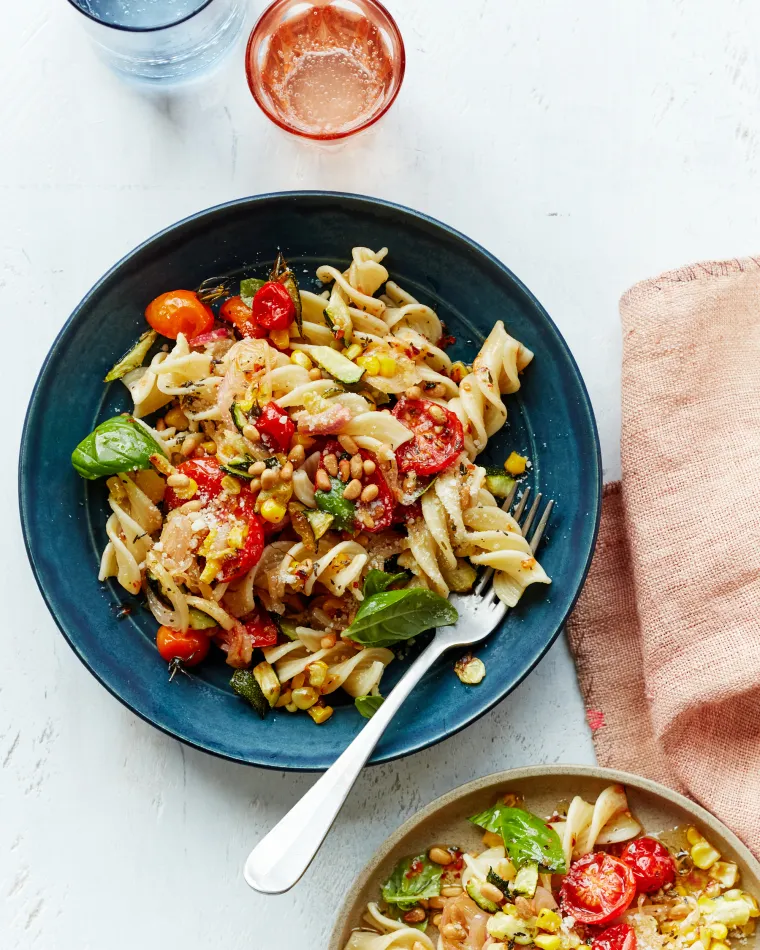
With roasted tomatoes, zucchini, and corn, this pasta primavera is an ode to summer.
I realize the title of this dish is a bit of an oxymoron — the word “primavera” means springtime in Italian. But, generally, when we think of pasta primavera, we think of pasta with a chorus of vegetables from any season. With roasted tomatoes, corn, and zucchini, this pasta primavera is an ode to summer. It is a modern version of the classic pasta primavera made popular in the 1970s by Le Cirque restaurant in New York City that a NYT food columnist called “by far, the most talked-about dish in Manhattan.” The dish rich in flavor so I serve it as a main course, but it also makes a fantastic side to grilled Italian sausage.
What you’ll need To Make Summer Pasta Primavera
Classic pasta primavera is made with heavy cream, but this version gets its richness from a combination of olive oil, butter, and pecorino romano cheese. Toasted pine nuts add more rich flavor and crunch. For the pasta, most short noodle shapes will work – good options include fusilli, penne, farfalle, gemelli, or campanelle.
Step-by-Step Instructions
To begin, combine the tomatoes, shallots, garlic, olive oil, salt, and sugar on the prepared baking sheet. Toss with your hands or a rubber spatula until the vegetables are evenly coated.
Arrange the vegetables in a single layer and roast at 450°F for about 20 minutes, or until the tomatoes are starting to brown.
Remove the pan from the oven and add the zucchini and corn. Toss with a rubber spatula (the tomatoes will collapse; that’s okay) and spread into an even layer.
Roast for 5 minutes more, until the zucchini and corn are tender-crisp.
Meanwhile, cook the pasta in salted water until al dente and drain.
Add the pasta back to the pan, along with the roasted vegetables and all their juices. Add the butter, herbes de Provence, red pepper flakes, pecorino Romano, basil, and pine nuts.
Toss well, then taste and adjust seasoning if necessary.
Spoon into pasta bowls and drizzle with olive oil, if desired. Serve with more grated cheese. Enjoy!
Note: This recipe has been written by Jenn Segal and republished on MudMatter with Author’s Permission. Please find the original link here – Summer Pasta Primavera.