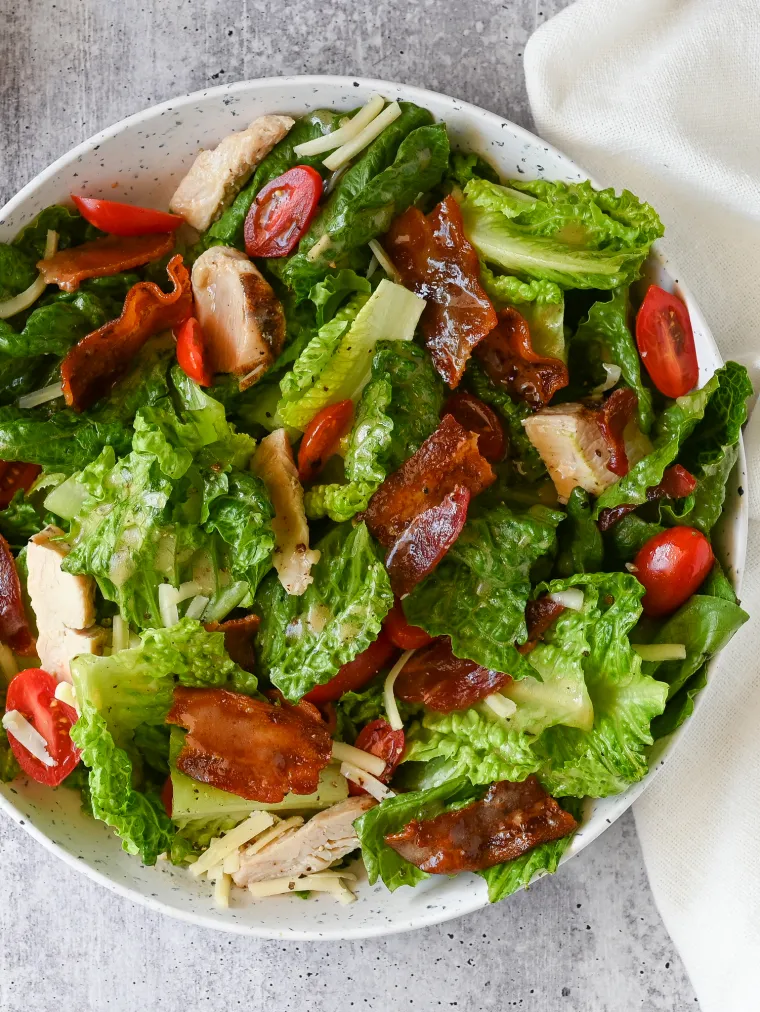
If you love BLTs but crave something lighter without sacrificing flavor, this BLT salad with grilled chicken hits the spot. It’s all the goodness of your favorite sandwich in a satisfying salad.
If you like BLTs, then this flavor-packed BLT salad is for you. Along with the B, the L, and the T, there’s grilled chicken and shredded Cheddar cheese thrown in for good measure, making the salad substantial enough to serve as a main course. If you’d like to make all the components from scratch, I recommend this easy hands-off method for cooking the bacon and leftovers of this grilled chicken recipe. That said, I often use store-bought shortcuts for this salad, like pre-washed romaine hearts, fully-cooked bacon that just needs to be zapped in the microwave, and the grilled chicken slices sold in the refrigerated section at the grocery store (rotisserie chicken works great, too).
The only thing I insist on making from scratch is the vinaigrette, and that only takes a few minutes. Keep in mind that the recipe makes two generous main course salads, so if you’re serving more people, adjust accordingly. The vinaigrette keeps nicely for several days and can be made ahead of time.
What you’ll need to make blt salad with chicken
Step-by-Step Instructions
Put the lettuce in a large bowl, pour about 1/2 cup of the vinaigrette onto the lettuce, and toss well. Taste and add a few more tablespoons of vinaigrette, if desired.
Add the bacon, chicken, tomatoes, and cheese.
Toss gently to combine. Serve the salad with the remaining dressing on the side.
Note: This recipe has been written by Jenn Segal and republished on MudMatter with Author’s Permission. Please find the original link here – BLT Salad with Chicken.
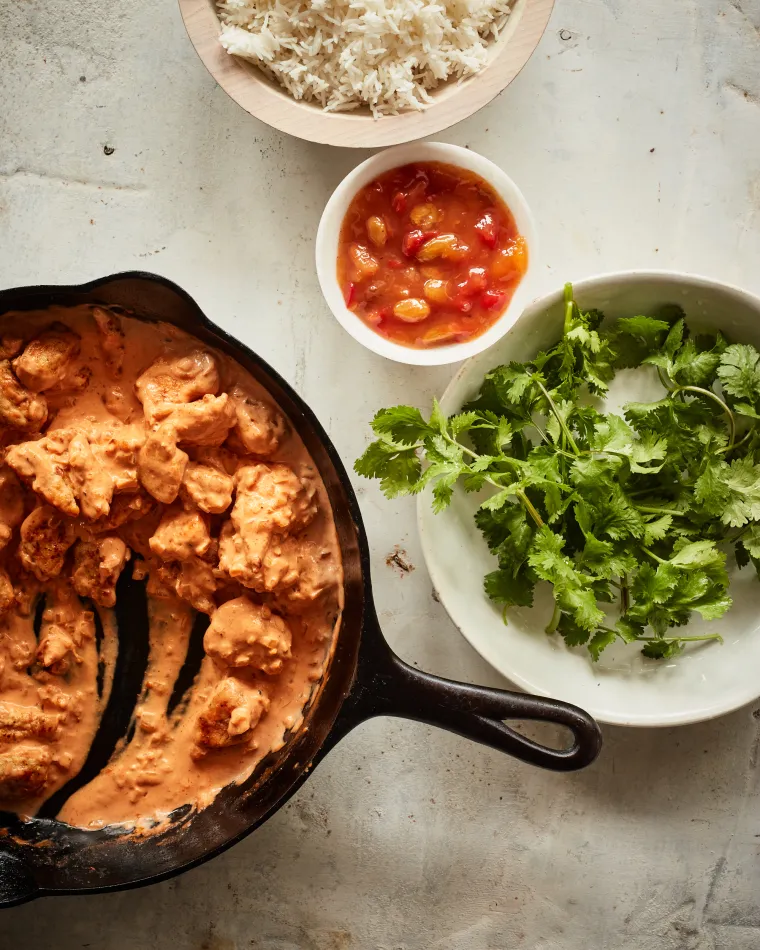
This easy butter chicken recipe features ultra-tender chicken simmered in a rich, creamy, spice-infused tomato sauce.
A staple menu item in many Indian restaurants in the U.S., butter chicken was supposedly created when a restaurateur in India combined leftover chicken with a tomato sauce enriched with butter and cream. Traditionally, the chicken for this dish is marinated in yogurt, lemon, and spices and then cooked in a clay oven called a tandoor. To save time and make the dish home cook-friendly, I sauté unmarinated, seasoned chicken in a skillet and then briefly simmer it in a creamy, spice-infused tomato sauce. This results in ultra-tender chicken. In fact, one reader remarked that this must be called “butter chicken” because the chicken is so tender, it’s like “buttah!” Along with basmati rice or naan, I love a little mango chutney on the side; it adds a delicious gingery sweetness that complements the chicken.
What You’ll Need To Make Butter Chicken with Mango Chutney
Step-by-Step Instructions
In a medium bowl, sprinkle the chicken pieces evenly with 3/4 teaspoon of the salt and 1 teaspoon of the garam masala; toss to coat evenly.
Add the flour.
Toss again, making sure the chicken is well coated.
In a large nonstick skillet, heat 1 tablespoon of the butter and the oil over medium-high heat. When the fat is hot and shimmering, add the chicken in a single layer and cook, without stirring, until the chicken is lightly golden on the underside, about 3 minutes.
Using tongs, turn the chicken pieces over and cook until just cooked through, 2 to 3 minutes more. Using the tongs, transfer the chicken to a plate and set aside while you make the sauce (you’ll use the skillet in the next step—there’s no need to wash it).
Melt the remaining tablespoon butter in the same skillet over medium heat. Add the onion and ginger and cook, stirring frequently, until softened, 3 to 4 minutes.
Add the coriander, cumin, cayenne (if using), and remaining teaspoon of garam masala; stir and cook 1 minute more.
Add the tomato sauce, cream, sugar, pepper, water, and the remaining 1/2 teaspoon salt. Bring to a gentle boil, then reduce the heat and simmer, uncovered, until slightly thickened, about 3 minutes.
Add the chicken along with any accumulated juices, to the sauce.
Simmer a few minutes, until the chicken is warmed through.
Taste the sauce and adjust the seasoning if necessary. Sprinkle with the cilantro, if using.
Serve with basmati rice and mango chutney.
Note: This recipe has been written by Jenn Segal and republished on MudMatter with Author’s Permission. Please find the original link here – Butter Chicken.
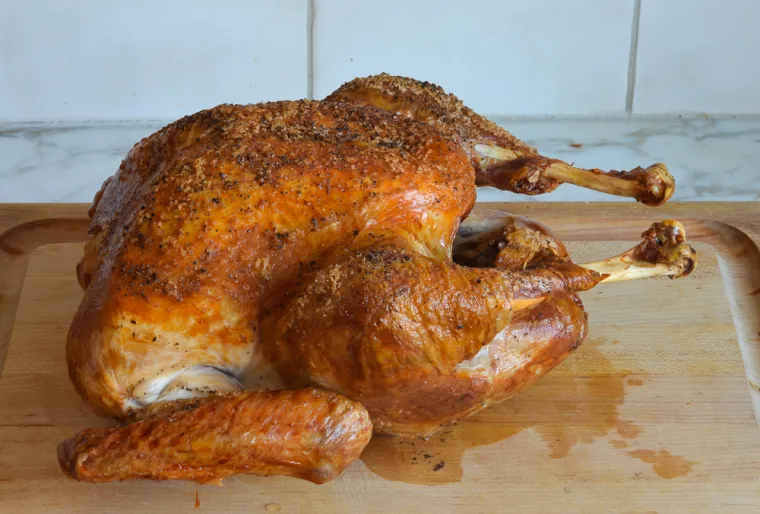
Ideal for turkeys under 14 pounds, the high-heat method guarantees a juicy and crisp-skinned turkey.
The high-heat roasting method is one of my favorite ways to cook a turkey. The prep time is minimal, the cooking time is short, and the turkey emerges from the oven juicy and crisp-skinned. The only drawback is that the high heat can cause a little smoke in the kitchen, so be sure your oven is spotless prior to cooking — and while the bird roasts, turn on your exhaust fan and crack a window. This cooking method only works for turkeys under 14 pounds. For larger birds, I recommend this dry-brined turkey recipe.
For Thanksgiving, I typically make one roast turkey along with a rolled stuffed turkey breast (a make-ahead family favorite) so we have variety and plenty of leftovers. Finally, if you’re a turkey novice or cooking a turkey feels intimidating, check out my best turkey advice; it will make you feel better!
What you’ll need to make roast turkey with Gravy
How to make roast turkey with Gravy
To begin, remove and discard truss that holds turkey legs together. Trim off and discard any excess fat in the neck or body cavity. Remove giblets and neck; discard or save for stock.
Rinse turkey inside and out with warm water. Pat dry with paper towels. Place a V-shaped rack in a 13 x 16 x 3-inch heavy stainless-steel roasting pan. (Do not use a dark roasting pan or a disposable aluminum pan.)
Rub the turkey skin all over with the olive oil and sprinkle with the salt and pepper. Set the bird breast-side-up on the rack. Pull the wings away from the body, then firmly twist them to push the wing tips under the bird.
Using aluminum foil, form caps over the tips of the end of each drumstick. (Do not tie the legs together, add stuffing, or close the body cavity.) Insert a digital leave-in meat thermometer near the center of the breast through thickest part until the tip touches the bone. Turn on your exhaust fan and crack a kitchen window.
Place the turkey in the oven and roast, without basting, until the thermometer reaches 160°F, 1 to 1-1/2 hours. Halfway through roasting time, rotate the pan in the oven to assure even cooking and browning. (If at any point your kitchen gets unbearably smoky or the fat is spitting, pour a cup of tepid water in the roasting pan. Just keep in mind that liquid will create steam, which prevents the skin from getting as crispy.) Remove the pan from the oven.
Using oven mitts that you don’t mind getting dirty, carefully tilt the turkey so that the juices from the cavity run into the roasting pan. Transfer the turkey to a platter or cutting board (do not clean the roasting pan), tent the turkey with foil, and let it rest for 20 to 30 minutes. This will allow the internal temperature to reach at least 165°F (the USDA safe-cooking temperature for turkey) and the juices to settle.
How To Make Gravy
While the turkey rests, make the gravy: Place the roasting pan over a burner on your stove. (Be careful handling the pan, as the handles will be hot.) Skim away any excess fat or solids that have accumulated in the pan.
In a medium saucepan, melt the butter over medium-low heat.
Add the onions.
Cook until very soft and translucent, about 15 minutes. Do not brown.
Add the flour.
Whisk and cook for 2 to 3 minutes, stirring occasionally.
Whisk in the turkey dripping-chicken broth mixture and Cognac and cook, uncovered, stirring occasionally, for about 5 minutes until thickened.
Stir in the cream (if using) and chopped herbs. Taste and adjust seasoning with salt and pepper, if necessary.
Transfer to a gravy bowl. Carve the turkey and serve with the gravy on the side.
Note: This recipe has been written by Jenn Segal and republished on MudMatter with Author’s Permission. Please find the original link here – Easy High-Heat Roast Turkey with Gravy.
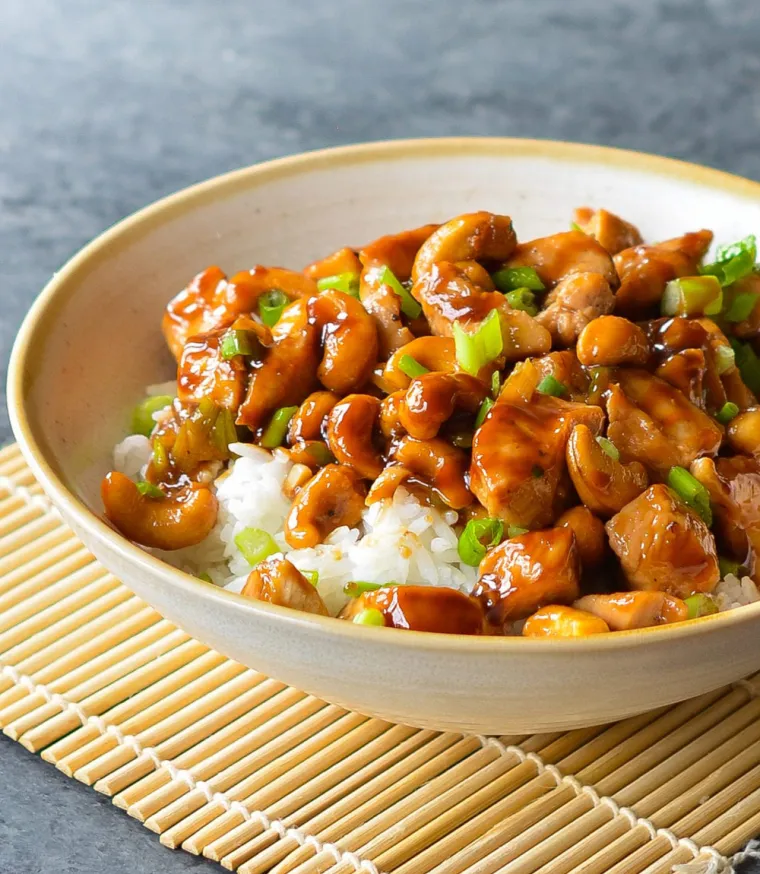
This cashew chicken with tender stir-fried chicken and roasted cashews in garlic sauce tastes just like take-out.
This cashew chicken, or stir-fried chicken with roasted cashews in garlic sauce, tastes just like take-out from your favorite Chinese restaurant. It’s easy to make at home. You don’t need a wok — just a large nonstick skillet — and, aside from the chicken, the only chopping involves garlic and scallions. The rest of the ingredients come out of bottles and jars. As with all stir-fries, the dish cooks quickly, so be sure to have all your ingredients prepped before you start cooking. Also, be sure not to cut the chicken pieces too small, or they will cook too quickly and overcook.
What You’ll Need To Make Cashew Chicken
Be sure to use a high-quality hoisin sauce like Kikkoman or Lee Kum Kee; it makes a big difference.
How To Make Cashew Chicken
To begin, place the cashews on a baking sheet in a single layer.
Toast in the oven until fragrant, about 5 minutes. (They will crisp up as they cool.) Meanwhile, prepare the sauce: in a small bowl, whisk together the water, cornstarch, hoisin sauce and soy sauce. Set aside.
Next, season the chicken with salt and pepper. In a large nonstick skillet, heat 1 tablespoon of the vegetable oil over high heat until very hot. Add half of the chicken to the skillet
Stir-fry until lightly browned but not cooked through, about 3 minutes. Transfer to a plate.
Add the remaining tablespoon vegetable oil to the skillet; then add remaining chicken, garlic and white parts of the scallions. Stir-fry until the chicken is lightly browned but not cooked through, about 3 minutes. Return the first batch of chicken to the pan. Turn the heat down to medium and add the rice vinegar; cook until evaporated, about 30 seconds.
Add the sauce mixture and cook, stirring frequently, until the chicken is cooked through, about 1 minute.
Remove from the heat. Stir in the scallion greens, cashews and sesame oil.
Serve with rice.
Note: This recipe has been written by Jenn Segal and republished on MudMatter with Author’s Permission. Please find the original link here – Cashew Chicken.
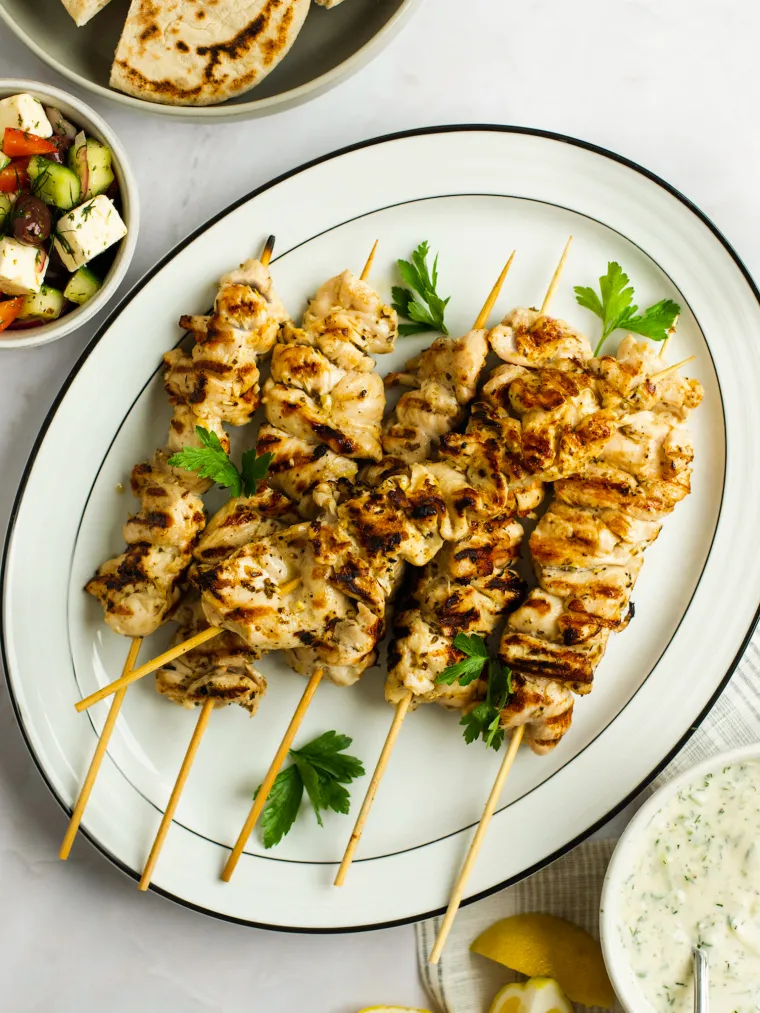
Bring a taste of Greece to your own backyard with souvlaki: succulent skewers of lemony chicken, grilled to perfection.
“Chicken again?” That’s the familiar chorus in our home every time I mention it’s chicken for dinner. My husband starts the refrain, and the kids chime in with melodramatic groans and eye rolls. But I love a good challenge and nothing pleases me more than turning their collective “not again!” into “more, please!” Enter souvlaki: marinated and skewered chicken, grilled to perfection, and served alongside cooling tzatziki sauce. It’s a little taste of Greece that adds a twist to the usual chicken dinner, and I promise you, it’s a guaranteed crowd-pleaser!
The key to making good souvlaki lies in the marinade, which infuses the chicken with lemony, garlicky goodness while also ensuring each bite is tender and juicy. Similar to my go-to grilled chicken recipe, I don’t use lemon juice in my marinade. Despite popular belief, the acidity doesn’t tenderize the lean chicken breasts but can actually toughen them, resulting in a leathery texture. Instead, I use fresh lemon zest to impart a bright, lemony flavor. For the perfect meal, serve the souvlaki with warm pita bread, creamy hummus, and a colorful Greek salad. This combo is a feast fit for any gathering or just simple weeknight dinners in the backyard.
WHAT YOU’LL NEED TO MAKE SOUVLAKI
STEP-BY-STEP INSTRUCTIONS
Step 1: Prep and Cook the Chicken
One at a time, place the chicken breasts in a 1-gallon zip-lock bag; using a meat mallet, pound to an even ½-inch thickness. (Skip this step if using chicken tenderloins.) Cut the meat into 2-inch chunks.
Mix all the ingredients except for the chicken together in a large bowl.
Stir to combine.
Add chicken pieces to the bowl.
Stir until evenly coated. Cover with plastic wrap and let chicken marinate in the refrigerator for at least 4 hours or overnight.
Thread marinated chicken onto skewers, folding if the pieces are long and thin. Be sure not to cram the skewers. (Note: You’ll need about 6 skewers.)
Preheat the grill to medium-high heat and, using tongs, dip a wad of paper towels in vegetable oil and carefully wipe the grill grate several times to prevent sticking. Place the skewers on the grill and cook, covered, turning to brown evenly, until the chicken is cooked through, 5 to 7 minutes total.
Transfer the chicken to a platter and cover to keep warm. Meanwhile, briefly grill the pita bread until warmed through.
Alternative Broiler & Grill Pan Cooking Instructions
To use a broiler: Preheat your broiler to high. Arrange an oven rack so that the skewers will be 5 to 6 inches away from the broiler element. While the broiler is heating, line a baking sheet with aluminum foil for easy cleanup. Place a wire rack on the baking sheet and spray the rack with nonstick cooking spray. Arrange the skewers on the wire rack. Once the broiler is preheated, broil the skewers for 3 to 4 minutes. Using a pair of tongs, turn the skewers over, and cook for another 3 to 4 minutes or until the chicken is fully cooked and has a nice golden color.
To use a grill pan: Heat the pan over medium-high heat on the stove. Once the pan is hot, brush it lightly with vegetable oil to prevent sticking. Place the skewers in the pan in a single layer (you may need to do this in batches). Cook the skewers for 3 to 4 minutes, then use tongs to turn them over and cook for another 3 to 4 minutes. Continue to turn the skewers, if necessary, until the chicken is fully cooked and all sides have nice grill marks.
Step 2: Prepare the Tzatziki
Combine all of the ingredients in a medium bowl and mix until well combined. Taste and adjust seasoning if necessary. Cover and chill for up to 2 days or until ready to serve.
Serve the souvlaki with tzatziki sauce and lemon wedges.
Note: This recipe has been written by Jenn Segal and republished on MudMatter with Author’s Permission. Please find the original link here – Souvlaki.
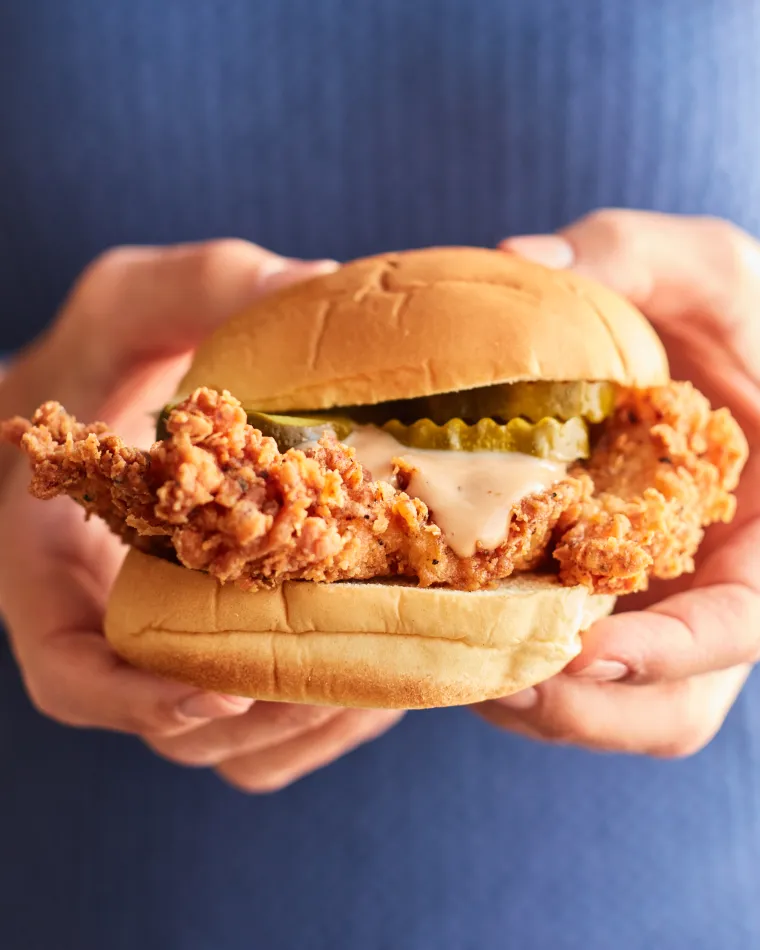
Crispy and juicy beyond compare, these fried chicken sandwiches are a mash-up of your favorite fast food versions.
While I was writing my second cookbook, my daughter, who occasionally grows weary of being my guinea pig taste tester, challenged me to come up with a mash-up version of her favorite fast-food crispy chicken sandwiches (yes, I’m talking about Chick-fil-A and Popeyes). This mission involved several trips to the drive-through, four quarts of oil, a mountain of fried chicken sandwiches, and exhaustive critiques from my kids and their friends (aka the experts). It took me a while, but I finally cracked the code. All I can say is, get ready to be showered with praise — your family will be talking about these for days.
What You’ll Need To Make Fried Chicken Sandwiches
Step-by-Step Instructions
Step 1: Prep and Brine the Chicken
One at a time, place the chicken breasts in a resealable freezer bag. Using a meat mallet or rolling pin, pound them to an even ¼-inch.
Cut each pounded breast in half. (If the pieces seem too large to fit in a bun, trim off the pointy ends; you can cook those as chicken nuggets at the same time you’re cooking the breasts.)
Pour the water into a medium bowl; add the 2 tablespoons of the salt and the sugar and whisk until dissolved. Place the chicken breasts in the brine. Cover the bowl and refrigerate for at least 4 hours or overnight (the longer you brine, the saltier the chicken will be).
Step 2: Bread and Fry the Chicken
Line a plate with a few layers of paper towels and set it next to the stove. Pour the oil into a large, high-sided pot or Dutch oven until it reaches a depth of about1 inch. Heat the oil over medium-high heat until shimmering (about 350°F).
In a medium bowl, whisk the egg and milk until evenly combined.
In another medium bowl, whisk the flour, cornstarch, baking powder, garlic powder, pepper, Accent, paprika, and the remaining ¾ teaspoon salt.
Drizzle 4 tablespoons of the egg mixture into the flour mixture.
Mix with a fork until the flour mixture is evenly clumpy.
Line a baking sheet with aluminum foil for easy cleanup. Remove the chicken from the brine and pat dry with paper towels. One at a time, dip each breast into the egg mixture, letting any excess drip off, and then into the flour mixture, turning a few times and pressing firmly so that the clumps adhere.
Set the breaded chicken on the lined baking sheet and repeat with the remaining breasts.
Carefully place a few pieces of breaded chicken into the hot oil without crowding the pot. Cook, turning a few times, until golden brown and crispy on both sides, 4 to 5 minutes total.
Place the cooked chicken on the paper towel-lined plate to drain. Fry the remaining breasts in the same manner, adjusting the heat as necessary to maintain the temperature of the oil.
Step 3: Make the Sauce
In a small bowl, whisk the mayonnaise, barbecue sauce, and mustard.
Step 4: Assemble the Sandwiches
Spread some of the sauce on the top and bottom of each bun.
Top each bottom bun with a piece of crispy chicken and a few pickles.
Close the sandwiches and serve immediately.
Note: This recipe has been written by Jenn Segal and republished on MudMatter with Author’s Permission. Please find the original link here – Fried Chicken Sandwiches.
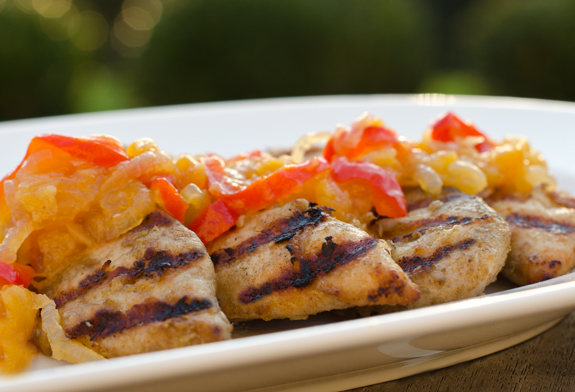
Southeast Asian spices and lots of fresh ginger flavor this delicious grilled chicken.
This recipe is a variation on my Grilled Moroccan Chicken (one of the most popular recipes on my site) but instead of North African spices, I use Southeast Asian spices and lots of fresh ginger to flavor the chicken.
This is actually delicious on its own — in fact, my kids prefer it that way — but it’s even better paired with a sweet and sour apricot chutney. As you’ll see below, making homemade chutney is easy, but if you’ve got a store-bought brand that you like, by all means, save time and use it.
What you’ll need to make Grilled Ginger Chicken
How to make it
Begin by pounding the breasts to an even 1/2-inch thickness. This ensures they stay extra tender.
Next, combine the chicken and marinade ingredients in a Ziplock freezer bag. Mix well, then marinate in the refrigerator for at least 5 hours or overnight.
Meanwhile, make the apricot chutney.
Cook the onions in vegetable oil until they are soft and translucent, then add the minced garlic and ginger and cook a minute more.
Add the apricots, red bell peppers, vinegar, honey, water, and cayenne pepper and bring to a boil.
Turn the heat down and simmer for about an hour. The chutney is done when most of the liquid is dissolved, the apricots are tender, and the mixture looks “jammy.” Refrigerate the chutney until ready to serve.
When you’re ready to eat, preheat the grill to high heat, then grill the breasts a few minutes per side. It’s important that the grill is very hot — you want nice char marks in the short amount of time it takes to cook the chicken. Be sure not to overcook it!
Top the breasts with the chutney, or serve it alongside.
If you’ve got any chutney left over, try it on salty crackers with cream cheese — it’s delicious. Enjoy!
Note: This recipe has been written by Jenn Segal and republished on MudMatter with Author’s Permission. Please find the original link here – Grilled Ginger Chicken with Apricot Chutney.
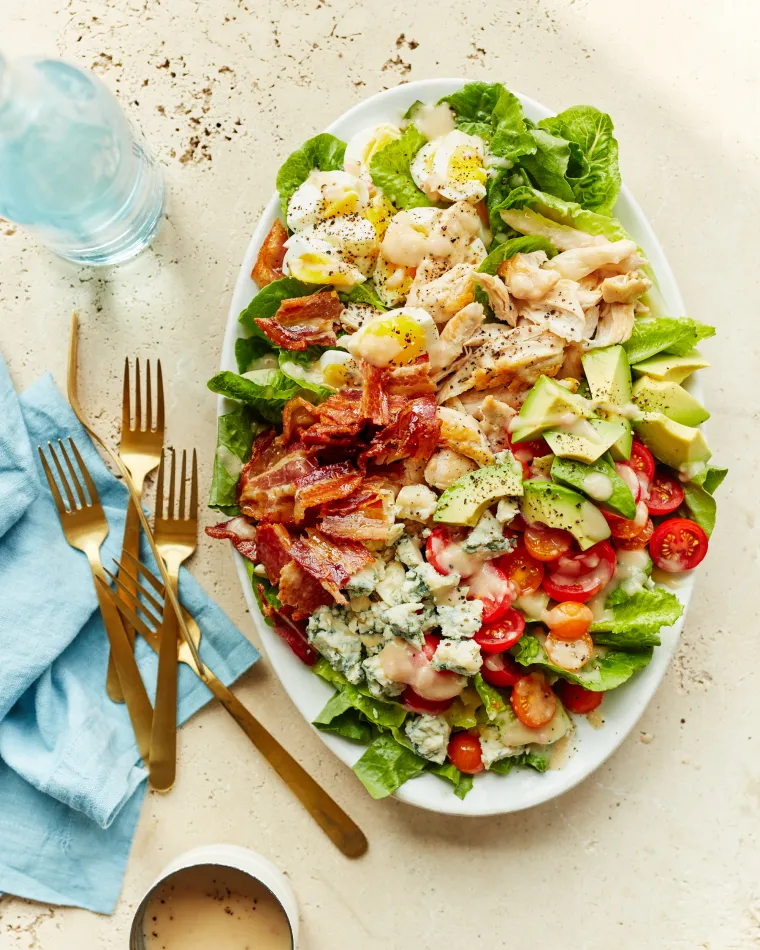
his cobb salad is not just a classic, it’s a satisfying meal packed to the brim with chicken, bacon, avocado, blue cheese, and a whole lot more.
I love salads that have a lot of “stuff” in them, and this classic cobb salad fits the bill. It has everything you could want—lettuce, chicken, bacon, avocados, tomatoes, hard-boiled eggs, and blue cheese, all tossed in tangy red wine vinaigrette. The origin of the salad has different accounts, but the most popular story dates back to 1937 when Robert Cobb, the owner of the Brown Derby restaurant in Hollywood, CA, found himself hungry after closing time. He scavenged the fridge and stumbled upon a mix of leftovers—lettuce, tomatoes, avocado, cheese, and hard-boiled eggs. Adding some bacon, he tossed it all together with dressing, creating the iconic Cobb salad, which quickly became a signature dish of the restaurant.
What makes it really special is that, instead of using plain poached or grilled chicken, which can be a bit boring, the chicken is cooked in the rendered fat from the bacon – a technique I borrowed from a New York Times recipe by Alison Roman. Not only does it add a surprising amount of flavor to the salad, but it also makes full use of all of the ingredients. Go ahead and cook some extra bacon; it’s impossible to resist the temptation to sneak a few bites while you put the rest of the salad together.
What You’ll Need To Make Cobb Salad
A traditional Cobb salad is made with lettuce, chicken, bacon, avocados, tomatoes, hard-boiled eggs, blue cheese, and red wine vinaigrette. There are various accounts of how the salad came to be, but according to most, the story goes that one night in 1937, Robert Cobb, the owner of the Brown Derby restaurant in Hollywood, CA was hungry after all the restaurant patrons had left. He went digging in the fridge late-night and pulled out a variety of leftovers – lettuce, tomatoes, avocado, cheese, and hard-boiled eggs. He also grabbed some bacon to add to the mix, tossed everything together with some dressing, and created what we now know to be a Cobb salad. Supposedly, it became the one of the restaurant’s signature dishes.
Step-by-Step Instructions
Step 1: Make the Dressing
Combine the shallot, vinegar, oil, mustard, salt, pepper, and sugar in a medium jar with a tight-fitting lid.
Screw on the lid and shake vigorously to emulsify. (Alternatively, whisk the ingredients together in a bowl.)
Step 2: Cook the Bacon & Chicken
In a medium nonstick skillet over medium heat, cook the bacon.
Stir occasionally until crisp, 6 to 8 minutes.
Use a slotted spoon to transfer the bacon to a paper towel-lined plate to drain, leaving the fat in the pan.
Season the chicken with the salt and add to the bacon fat in a single layer.
Cook over medium heat, stirring frequently, until cooked through, 3 to 5 minutes. Using the slotted spoon, remove the chicken to a plate and set aside to cool.
Step 3: Assemble the Salad
Put the romaine, chicken, and the tomatoes in a large mixing bowl. Give the dressing a shake to re-emulsify, then add three-quarters of it to the bowl; toss gently to combine. Add more dressing, little by little, until the greens are dressed to your liking. Taste and adjust seasoning, if necessary.
Arrange the salad mixture on a serving platter or plates. Sprinkle the hard-boiled eggs, avocado, blue cheese (if using), and reserved bacon over the salad. Pass the pepper mill at the table.
Note: This recipe has been written by Jenn Segal and republished on MudMatter with Author’s Permission. Please find the original link here – Cobb Salad.
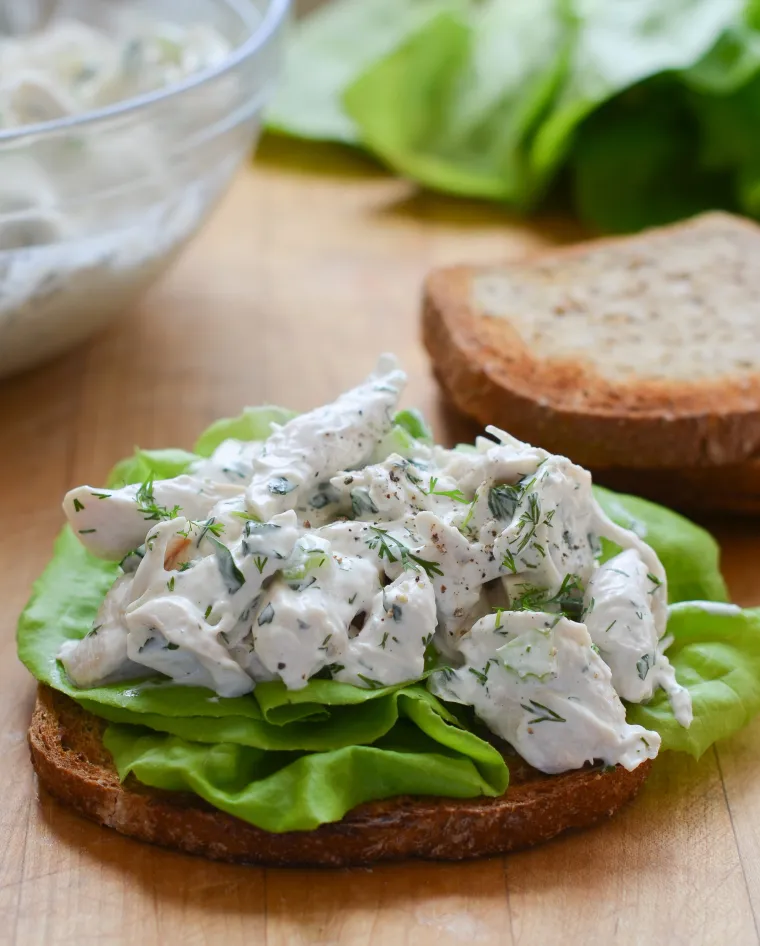
A great basic recipe, this classic chicken salad is similar to the version served at many delis.
I have shared several of my favorite chicken salad recipes over the years, from Curried Chicken Salad to Chicken Salad with Grapes & Almonds, but this is this classic version is the one I make most often for my family. It is simple, creamy, and flavorful — similar to the chicken salad served at many delis, with “no weird stuff in it,” as my kids would say. The key to success is starting with tender chicken. I use my simple 15-minute poached chicken recipe, but oven-roasted chicken breasts or a rotisserie chicken work well too. Serve the salad over greens or in a wrap or sandwich.
What You’ll Need Yo Make Classic Chicken Salad
As mentioned above, I use poached chicken for this recipe — it’s easy. If you’d prefer to use roasted chicken, you’ll need 3 pounds bone-in, skin-on chicken breasts. Preheat the oven to 425°F and line a baking sheet with aluminum foil. Arrange the chicken breasts skin-side up on the prepared baking sheet, and coat them with 1 tablespoon of olive oil and sprinkle with salt and pepper. Roast for 30 to 35 minutes, or until done, and then let cool.
Step-by-Step Instructions
Make the dressing: In a large bowl, combine the mayonnaise, sour cream, lemon juice, mustard, salt, sugar, and pepper.
Whisk well to combine.
To the dressing, add the chicken, scallions, celery, dill, and parsley.
Toss until evenly combined. (If using a rotisserie chicken, be careful when mixing so that it doesn’t fall apart too much.) Taste and adjust seasoning, if necessary.
Cover and refrigerate until ready to serve.
Note: This recipe has been written by Jenn Segal and republished on MudMatter with Author’s Permission. Please find the original link here – Classic Chicken Salad.
Cook up a family favorite with Bourbon chicken, an easy-to-make dish that brings the flavors of New Orleans right to your kitchen.
Picture a dinner that whisks you away to the lively, music-filled Bourbon Street in New Orleans, all from the comfort of your own kitchen. That’s the magic of Bourbon chicken, a predominantly Asian dish that gets a unique Cajun twist from the unmistakable oaky flavor of bourbon whiskey. This easy-to-make dish is a culinary chameleon of sorts; it can be found on menus at Cajun joints, American Chinese restaurants, and even mall food courts. The main ingredients are simple — soy sauce, brown sugar, orange juice, ginger, garlic, rice vinegar, and, of course, bourbon. When combined, they create a delicious blend of savory, sweet, and tangy flavors. Bourbon chicken is a family favorite in our house, and I bet it will be in yours too. Serve with fluffy white rice to soak up every last drop of that delicious sauce.
What You’ll Need To Make Bourbon Chicken
Step-by-Step Instructions
Make the sauce: In a medium bowl, whisk the soy sauce, sugar, water, orange juice, bourbon, sesame oil, and pepper until well combined.
Prep the chicken: In another medium bowl, toss the chicken with the 2 tablespoons of cornstarch and 2 tablespoons of the sauce mixture until thoroughly combined.
To cook: Heat the vegetable oil in a 12-inch nonstick skillet over medium-high heat until shimmering. Add the chicken all at once (the skillet will be very full; do your best to spread the chicken into a single layer).
Cook, stirring every few minutes, until deeply golden brown and cooked through, about 10 minutes.
Stir in the garlic, ginger, and light green scallions and cook, stirring constantly, for about one minute; do not let burn.
Add the remaining sauce mixture.
Bring to a boil, then reduce the heat to medium and cook at a gentle boil until the sauce is slightly reduced, about 5 minutes. Stir in the cornstarch/water mixture and cook until the sauce is thickened, about 2 minutes.
Off the heat, stir in the vinegar and sprinkle with dark green scallions.
Serve over rice.
Note: This recipe has been written by Jenn Segal and republished on MudMatter with Author’s Permission. Please find the original link here – Bourbon Chicken.

