Articles contributed by the community, curated for your enjoyment and reading.
Filters
Reset
Baked Ziti with Sausage
This bubbling baked ziti is perfect for feeding a crowd, and it freezes well too. This baked ziti is a MAJOR family-pleaser. Loaded with Italian sausage, which packs a ton of flavor, it’s similar to meat lasagna but without the fuss; it’s easy enough for a weeknight but also special enough for company; and it makes a great prep-ahead potluck dish. To save time, go ahead and use pre-shredded mozzarella cheese from a bag; just be sure it’s made from whole milk (low-fat won’t taste nearly as good). While the baked ziti is in the oven, throw together a big Italian salad and warm some bread, and dinner is served! What You’ll Need to Make Baked Ziti with Sausage Ricotta cheese is a traditional addition to baked ziti, but I leave it out because it has a tendency to get dry and grainy when baked. I use heavy cream to add richness instead. For the mozzarella cheese, I recommend using whole milk mozzarella; it melts beautifully. You can purchase a plastic-wrapped brick of mozzarella (pictured above and sold in the dairy case) and shred it yourself. (To make it easier to work with, pop it in the freezer for 15 to 20 minutes prior to shredding.) Or, to save time time, use pre-shredded mozzarella; just be sure it is made from whole milk. Avoid fresh buffalo mozzarella, which is best suited for salads. Many grocers sell bulk Italian sausage (pictured above), which is simply ground sausage without the casings. If you can’t find it, you can ask your butcher to take the meat out of the casings or do it yourself. Step-by-Step Instructions For Baked Ziti Step 1: Boil the Noodles Bring a large pot of salted water to a boil. Cook the ziti according to the package instructions until a few minutes shy of al dente, about 7 minutes. (It will continue to cook in the oven, so you want to undercook it just a bit.) Drain and add the pasta back to the pot. Set aside. Step 2: Make the Sauce Heat a large sauté pan over medium-high heat, and crumble the sausage into the pan. Cook the sausage, breaking apart with a wooden spoon, until lightly browned and just cooked through, 5 to 6 minutes. Use a slotted spoon to transfer the cooked sausage to a plate. Drain all but 1 tablespoon of the fat from the pan and set over low heat (if you don’t have enough fat in the pan, add a tablespoon of olive oil). Add the garlic and cook, stirring constantly with a wooden spoon, until soft but not browned, about 1 minute. Add the heavy cream, 1/3 cup of the pecorino Romano, and basil to the pan. Then stir in the cooked sausage. Carefully pour the contents of the sauté pan into the large pot with the pasta and gently stir to combine. Step 3: Assemble & Bake Spoon half of the mixture into a 9 x 13-inch baking dish. Sprinkle with half of the shredded mozzarella and half of the remaining pecorino Romano. Spoon the remaining pasta mixture on top and sprinkle with the remaining mozzarella and pecorino Romano. Transfer to the oven and bake, uncovered, until the cheese has melted and browned, 15 to 20 minutes. Spinach Quiche Made with heavy cream and Gruyère, this rich spinach quiche is classic French. Of all the spinach quiches I’ve tried over the years, this classic French version is my favorite. The recipe comes from my childhood friend Trish, who is not only one of the funniest people I know, but also a stunning hostess. When Trish entertains, she goes all out – beautiful table settings, seasonal cocktails, fabulous food, and (best of all) hilarious party games. She once created an entire game of Jeopardy! for our old high school gang, complete with categories like Prom Dates, ’80s Pop Stars, and Senior Superlatives. Note: This recipe has been written by Jenn Segal and republished on MudMatter with Author’s Permission. Please find the original link here – Baked Ziti with Sausage.

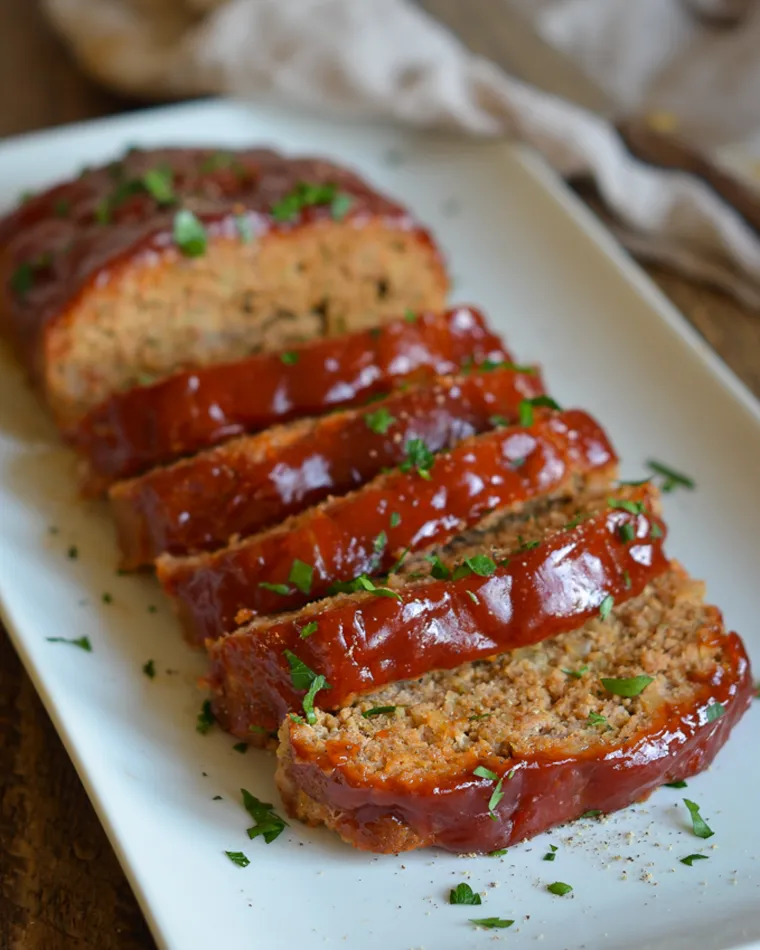
Turkey Meatloaf
A family favorite, this turkey meatloaf is as flavorful and juicy as one made with ground beef. Swapping ground turkey for ground beef is a great way to make meatloaf a bit healthier. However, for all its merits as a low-fat alternative to ground beef, ground turkey can be dry and bland. The key to making a good turkey meatloaf is to add flavor and moisture without adding fat, which would defeat the whole purpose of making it lighter. I season this turkey meatloaf with sautéed onions and garlic, and I also add some of the sweet and tangy glaze directly to the meatloaf mixture, which makes the meatloaf flavorful and juicy. One tip if you’re making this for kids: be sure to chop the onions very finely. My experience is that kids do not like finding flecks of onions (or flecks of anything, really!) in their meatloaf. Naturally, leftovers make excellent meatloaf sandwiches. What you’ll need To Make Turkey Meatloaf Step-by-Step Instructions Begin by making the glaze: in a medium bowl, combine the ketchup, brown sugar, apple cider vinegar, and mustard. Whisk to combine. Next, in a small pan, heat the olive oil and add the onions. Cook until softened, then add the garlic and cook for a few minutes more. Meanwhile, in a large bowl, combine 1/4 cup of the glaze with the Worcestershire sauce, Dijon mustard, paprika, thyme, salt, pepper, and eggs. Whisk to combine. Mix in the onion mixture. Then add the bread crumbs and turkey. Use your hands to mix it all together. Form two loaves on a baking sheet. Then spread the remaining BBQ glaze over top. Bake for 40 to 45 minutes. I prefer this “free-form” meatloaf to those made in a loaf pan; clean-up is so much easier and all the extra fat is able to ooze out during baking. Scrape the fat away from the loaves, transfer to a platter, and slice. Note: This recipe has been written by Jenn Segal and republished on MudMatter with Author’s Permission. Please find the original link here – Turkey Meatloaf.

Sweet & Spicy Roast Chicken with Carrots, Dates & Pistachios
This sheet-pan roast chicken dinner is the perfect no-fuss dish for company. Everything can be prepared and assembled a day in advance, so all that’s left to do at dinnertime is pop it in the oven. Don’t you just love discovering new “keeper” recipes? The first time I made Melissa Clark’s fabulous Sweet & Spicy Roast Chicken from The New York Times, I knew it’d be a family favorite for years to come. The chicken is immersed in a honey, citrus, and chili-infused marinade, and then roasted on a sheet pan with carrots and dates. Before serving, herbs, scallions, and pistachios are added for freshness, color, and crunch. Not only is it delicious, but it’s also the perfect no-fuss dish for company. Everything can be prepared and assembled a day in advance, so all that’s left to do at dinnertime is pop it in the oven. Serve with couscous and a green vegetable and dinner is done! What you’ll need to make Sweet & Spicy roast chicken The original recipe is wonderful as printed but, as with any recipe, each time I’ve made it, I’ve tweaked it to suit my style and my family’s taste. What follows is the version I make today. How to make Sweet & Spicy roast chicken Begin by making the marinade: whisk together the lemon zest, lemon juice, orange zest, orange juice, olive oil, mustard, honey, red pepper flakes, garlic, thyme, and salt. Place the chicken, carrots, onions, and dates in a large sealable plastic bag. Add the marinade and seal shut. Massage to make sure everything is evenly coated with the marinade, then marinate in the refrigerator for at least 6 hours or overnight. Transfer all ingredients from the bag, including the marinade, to a rimmed sheet pan. Turn the chicken skin side up. Roast until chicken is lightly browned and cooked through, 40 to 45 minutes. Turn on broiler (leave pan on middle rack), and cook a few minutes more, or until the skin is golden brown and crispy. Watch very carefully: the honey in the marinade can cause the skin to burn quickly! Transfer the chicken, carrots, onions and dates onto a platter, along with the sauce in the pan. Sprinkle the parsley, scallions and pistachio nuts over top and serve. Note: This recipe has been written by Jenn Segal and republished on MudMatter with Author’s Permission. Please find the original link here – Sweet & Spicy Roast Chicken with Carrots, Dates & Pistachios.

Honey, Lime & Sriracha Chicken Skewers
These chicken skewers marinated in honey, lime juice and Sriracha taste every bit as good as they look. These chicken skewers marinated in honey, lime juice, and Sriracha are every bit as good as they look — and if you haven’t tried Sriracha, the Asian hot sauce named after the coastal city of Si Racha in Thailand, this is the perfect recipe to taste just how delicious it is. Made from sun-ripened chili peppers, distilled vinegar, garlic, sugar, and salt, Sriracha is used in soups, sauces, noodle dishes, omelets, burgers or anything else to add a delicious spicy taste. It has become so popular in the States that you can find it in the international section of most supermarkets. What You’ll Need To Make Honey, Lime & Sriracha Chicken Step-by-Step Instructions Begin by making the marinade. In a blender, combine the zest of a lime, fresh lime juice, honey, soy sauce, vegetable oil, garlic, ginger, and Sriracha. (Even though you’re puréeing the marinade, it’s a good idea to roughly chop the garlic and ginger so they get incorporated — some blenders can’t handle large chunks.) Purée until completely smooth, then set aside 1/2 cup of the marinade to use as a drizzling sauce. Next, prepare the chicken. I’ve specified boneless skinless chicken thighs for this recipe because they’re more flavorful than chicken breasts and easier to cook without drying out. I know many people prefer white meat but I’ve tried both in this recipe and, trust me, it’s much better made with dark meat. The only drawback to using chicken thighs is that they need to be trimmed before you cook them. I think it’s easiest to use kitchen shears as opposed to a knife. So, using scissors, simply cut off any gristle and large chunks of fat (don’t fret over every little bit as it mostly melts away on the grill) and then cut the meat into 2-inch pieces. Place the chicken in a Ziplock bag with the remaining marinade and refrigerate for at least 6 hours or overnight. After the chicken has marinated, thread the pieces onto skewers. Preheat your grill to medium-high heat. Scrape the grates clean to prevent the chicken from sticking, then dip a wad of paper towels in oil and rub the grates until smooth and shiny. Grill the chicken, turning occasionally to promote even browning, for 10-15 minutes. Keep an eye on it — the honey in the marinade causes the chicken to caramelize on the grill and turn a beautiful, rich brown color; however, the chicken can burn if the grill is too hot. Lower the heat if the chicken is browning too fast. Transfer the skewers to a platter and drizzle with the reserved marinade. Sprinkle chopped cilantro over top and serve. Enjoy! Note: This recipe has been written by Jenn Segal and republished on MudMatter with Author’s Permission. Please find the original link here – Honey, Lime & Sriracha Chicken Skewers.

BBQ-Spiced Chicken Thighs with Tangy Honey Glaze
You can make these flavor-packed, BBQ-spiced chicken thighs in under 30 minutes! Inspired by one of the most popular Cooking Light recipes, these BBQ-spiced chicken thighs are a huge family pleaser and super-easy to prepare. The chicken is seasoned with a Southwestern rub, broiled for 10 minutes, brushed with an apple cider vinegar-honey glaze, and then flashed under the broiler again until caramelized and juicy. Finally, the chicken is doused with a bit more vinegar to balance the sweetness of the honey and also create a delicious pan sauce. Start to finish, the recipe takes under 30 minutes! (In case you’re wondering, this recipe will work on the grill, but you’ll definitely miss those tasty pan juices for spooning over the chicken.) Serve the chicken thighs with any simple corn dish: corn on the cob, spoon bread, cornbread, corn muffins, sautéed corn, or corn salad, to name just a few. What you’ll need to make BBQ-Spiced Chicken Thighs With Tangy Honey Glaze It’s important to use boneless, skinless thighs as opposed to chicken breasts. They stand up better to the bold seasonings, are more flavorful, and won’t dry out. Just be sure to trim off most of the fat; I like to use kitchen shears as opposed to a knife, as it’s much easier. Step-by-Step Instructions To begin, combine the olive oil and spices in a large bowl. Whisk to combine. Add the chicken thighs and toss with the spice rub to coat evenly. Arrange the chicken on a foil-lined baking sheet for easy clean-up. Broil for 10 minutes, flipping once halfway through. Meanwhile, combine the honey and cider vinegar in a small bowl to make the glaze. Brush the cooked chicken with half the glaze, then broil for 1 to 2 minutes. Flip the chicken over, brush with the remaining glaze, and broil for a few minutes more until the chicken is nicely caramelized. Sprinkle the chicken with the remaining cider vinegar and serve with the pan sauces. Note: This recipe has been written by Jenn Segal and republished on MudMatter with Author’s Permission. Please find the original link here – BBQ-Spiced Chicken Thighs with Tangy Honey Glaze.

Tandoori Chicken
Deliciously spiced with super-crispy skin, tandoori chicken is a family favorite. Tandoori chicken is a traditional Indian dish of chicken marinated in yogurt, citrus, and spices, and then roasted in a tandoor, a cylindrical clay oven. The chicken gets its signature reddish hue from the combination of spices, the flavor of which is further enhanced by toasting them in a pan prior to incorporating into the marinade. Tandoori chicken is a simple dish to prepare, and you can replicate the tandoor environment at home by roasting in a high-heat oven. In this recipe, adapted from Food & Wine, the chicken is deliciously seasoned with super-crispy skin. The chicken is best marinated for a few hours or overnight, but if you’re in a time crunch, you can simply coat the chicken with the marinade and cook it immediately; it will still be packed with flavor. Instead of making a traditional green chutney, I serve store-bought mango chutney alongside – it adds a gingery sweetness that complements the spices. Serve tandoori chicken with naan, basmati rice pilaf with dried fruits and almonds (or simple basmati rice), and a refreshing cucumber mint salad. Kids love this one, too! Drumsticks are an excellent choice for tandoori chicken. They have enough fat to stay moist when cooked at high heat. Bone-in chicken thighs would also work, and the cook time would be about the same. Classic tandoori chicken is made with ground Kashmiri chili pepper, a spice found in Indian grocery stores and some supermarkets. Paprika makes an excellent substitute, so I use that instead. The yogurt in the marinade helps to tenderize the meat; it breaks down the proteins making the chicken moist and tender when cooked. (Yogurt is also used to marinate and tenderize the chicken in chicken tikka masala, another classic Indian dish.) Step-by-Step Instructions Begin by combining the spices in a small skillet. Toast for a few minutes until the spices are fragrant. This step really enhances the flavor. Next, zest the lime and chop your fresh ginger and garlic (the ginger and garlic will get blended in a food processor, but they won’t fully pulverize unless you give them a rough chop first). Combine the toasted spices, ginger, garlic, yogurt, lime juice, lime zest, oil and salt in a mini food processor or blender. Pulse until smooth. Then, using a sharp knife, make slashes in the drumsticks. This increases the surface area of the chicken, so the marinade can penetrate the meat. Toss the drumsticks with the marinade, cover and refrigerate for at least 3 hours or overnight. Line a baking sheet with heavy duty aluminum foil and place a greased oven-proof rack over top. Arrange the marinated drumsticks on the rack, leaving a bit of space in between them. Cook for 45 minutes, turning once, until the chicken is cooked and the skin is quite crisp. Finally, flash the chicken under the broiler for about 5 minutes, until the skin is super-crisp and a bit charred. Serve with mango chutney and lime wedges on the side. Note: This recipe has been written by Jenn Segal and republished on MudMatter with Author’s Permission. Please find the original link here – Tandoori Chicken.

Element Plus - WPBakery Page Builder Addon (Formerly Visual Composer) Nulled Free Download
Element Plus - WPBakery Page Builder Addon (Formerly Visual Composer) Nulled Free Download DOWNLOAD Element Plus - WPBakery Page Builder Addon (Formerly Visual Composer) Technical Data Developer monster_devs Version WordPress 4.8.x - 5.2.x Compatibility Visual Composer 4.11.x - 5.1.x License GPL About Element Plus - WPBakery Page Builder Addon (Formerly Visual Composer) This powerful addon is engineered to address the specific limitations faced by users of the WPBakery Page Builder, formerly known as Visual Composer. It introduces a suite of advanced elements and functionalities that streamline the design and development process for WordPress websites. By integrating seamlessly, it expands the creative possibilities available within the WPBakery environment, allowing for more dynamic and visually engaging page layouts. The goal is to provide a comprehensive solution for creating sophisticated web designs without requiring extensive coding knowledge. For those seeking to expand their WPBakery capabilities, a Free Download Element Plus - WPBakery Page Builder Addon (Formerly Visual Composer) offers immediate access to these enhanced features. The core architecture of this addon is built upon a foundation of efficiency and clean code practices. It ensures that all added JavaScript and CSS assets are managed intelligently, preventing conflicts and minimizing overhead. This focus on backend performance means that your WPBakery-built pages remain fast and responsive, even with the addition of numerous complex elements. The careful resource management contributes significantly to the overall health and speed of your WordPress installation, making Element Plus - WPBakery Page Builder Addon (Formerly Visual Composer) a smart choice for performance-conscious developers. Integration is a key strength of this addon, offering broad compatibility with the modern WordPress ecosystem. It works harmoniously with popular page builders like Elementor and the native Gutenberg editor, ensuring a consistent user experience across different content creation tools. Furthermore, it has been tested extensively with major WordPress themes and other critical plugins, minimizing potential conflicts and ensuring a stable website environment. This broad compatibility makes it an adaptable solution for a wide range of projects. The impact on website performance is a significant benefit of using this addon. By optimizing how elements are rendered and resources are loaded, it directly contributes to faster page loading times and improved server response (TTFB). This optimization extends to database efficiency, ensuring that your site remains nimble even as you add more advanced design features. A faster website leads to better user engagement and improved search engine rankings, making the Free Download Element Plus - WPBakery Page Builder Addon (Formerly Visual Composer) a strategic advantage. As an SEO and performance-focused tool, this addon incorporates features relevant to advanced web development. For SEO, it aids in proper metadata implementation and schema markup generation. In terms of performance, it supports principles of minification and efficient asset loading. The addon's design considers aspects like lazy loading for images and other media, contributing to a better user experience and faster perceived load times. Understanding these technical aspects is crucial for any serious web professional seeking to leverage Element Plus - WPBakery Page Builder Addon (Formerly Visual Composer) to its fullest potential. For developers and advanced users, the addon provides a robust set of customization options. It exposes professional-grade settings that allow for fine-tuning of element behavior and appearance. Additionally, it offers developer hooks and filters, providing entry points for custom code modifications and integrations. This extensibility ensures that the addon can adapt to unique project requirements, allowing for bespoke solutions beyond its standard functionality. The availability of such advanced customization makes Element Plus - WPBakery Page Builder Addon (Formerly Visual Composer) a versatile tool. The direct business value for digital agencies and website owners is substantial. By providing premium features that would otherwise require custom development, this addon significantly cuts down on development hours and associated costs. It allows teams to deliver more sophisticated designs and functionalities to their clients faster, improving project profitability and client satisfaction. The ability to achieve complex layouts with ease means that even smaller budgets can yield impressive results, making the Free Download Element Plus - WPBakery Page Builder Addon (Formerly Visual Composer) a cost-effective solution. This addon is particularly valuable for projects requiring intricate layouts and advanced interactive elements within the WPBakery framework. It helps overcome the inherent design constraints of the builder by offering pre-built components that are both visually appealing and functionally robust. The ease with which these components can be implemented makes it an indispensable tool for agencies and freelancers who rely on WPBakery for client projects. The ability to get more done with less effort is a defining characteristic of this powerful extension. Key Features Expands WPBakery with unique design elements. Offers advanced styling controls for each element. Includes responsive design options for all components. Provides pre-designed templates for quick setup. Optimized for fast loading and minimal impact on site speed. Seamless integration with the latest WPBakery versions. Includes custom post type layouts and archive page designs. Provides advanced parallax scrolling effects. Offers custom icon integration and styling options. Includes unique pricing table and testimonial modules. Free Download WooCommerce Split Order Payments Frequently Asked Questions Is Element Plus - WPBakery Page Builder Addon (Formerly Visual Composer) safe to download? Yes, downloading Element Plus - WPBakery Page Builder Addon (Formerly Visual Composer) from this resource is 100% safe, secure, and verified. We ensure all files are clean and free from malware. How can I install Element Plus - WPBakery Page Builder Addon (Formerly Visual Composer) for free? You can install Element Plus - WPBakery Page Builder Addon (Formerly Visual Composer) for free by following the standard WordPress plugin installation procedure after downloading the file from our verified source. Simply navigate to Plugins > Add New > Upload Plugin in your WordPress dashboard. What are the benefits of using the Nulled version of Element Plus - WPBakery Page Builder Addon (Formerly Visual Composer)? The Nulled version provides access to all premium features without the cost of a license. This allows users to experiment with advanced functionalities and build sophisticated websites on a budget. For those looking for a Free Download Element Plus - WPBakery Page Builder Addon (Formerly Visual Composer), this offers a complete feature set. Does Element Plus - WPBakery Page Builder Addon (Formerly Visual Composer) require a license key for the GPL version? No, as the software is distributed under the freedom of the GPL license, a license key is not required for its use or updates when obtained through this verified channel. The GPL license permits free use, modification, and distribution. Can I use Element Plus - WPBakery Page Builder Addon (Formerly Visual Composer) on multiple websites? Yes, under the terms of the GPL license, you are free to use this Element Plus - WPBakery Page Builder Addon (Formerly Visual Composer) on as many websites as you need. There are no restrictions on the number of sites you can deploy it on.
Business Tools Ad Manager for OnAir2 WordPress Theme Nulled Free Download
Business Tools Ad Manager for OnAir2 WordPress Theme Nulled Free Download DOWNLOAD Business Tools Ad Manager for OnAir2 WordPress Theme Technical Data Developer QantumThemes Version WordPress 6.6.x Compatibility Elementor, Elementor Pro, WooCommerce 8.x.x, WPBakery Page Builder License GPL About Business Tools Ad Manager for OnAir2 WordPress Theme The Business Tools Ad Manager for OnAir2 WordPress Theme addresses a critical need for radio station owners looking to effectively monetize their online presence. This plugin provides a centralized system for managing and displaying advertisements across your website, ensuring a seamless experience for both advertisers and listeners. By integrating advanced ad management functionalities, it allows for dynamic ad placement and targeting, crucial for maximizing revenue streams. For those seeking a robust solution, a Free Download Business Tools Ad Manager for OnAir2 WordPress Theme offers immediate access to these powerful features. At its core, this solution is built for efficiency, designed to handle a high volume of ad requests without compromising website performance. The backend architecture emphasizes clean code and optimized resource loading, ensuring that JavaScript and CSS assets associated with ad display are managed intelligently. This prevents any potential bloat, contributing to a faster and more responsive user experience. The availability of Business Tools Ad Manager for OnAir2 WordPress Theme Nulled ensures that even budget-conscious users can implement sophisticated ad monetization strategies. Integration is a key strength, with the Ad Manager boasting broad compatibility. It works flawlessly with modern page builders like Elementor and Gutenberg, allowing for easy placement of ad units within any page layout. Furthermore, it is designed to function harmoniously with popular themes and essential plugins such as WooCommerce, ensuring a unified and consistent website operation. This adaptability makes it a versatile tool for a wide range of WordPress-driven radio station websites. The impact on site performance is carefully considered. This plugin is engineered to minimize any negative effects on page loading times and server response (TTFB). Through efficient ad serving mechanisms and optimized database queries, it contributes to a speedier website overall. A fast-loading site is paramount for user retention and search engine rankings, and this tool helps maintain those crucial metrics. Accessing the Business Tools Ad Manager for OnAir2 WordPress Theme Nulled means you can leverage these performance benefits. As a specialized tool for website monetization, it falls within the digital advertising and content management category. It supports ad serving protocols, dynamic ad insertion, ad rotation, and click tracking. For SEO purposes, it ensures ad content doesn't negatively impact crawlability or indexing, respecting robots.txt and sitemaps. The plugin facilitates the integration of various ad formats, including banner ads, sponsored content, and affiliate links, all managed through a user-friendly interface. This is essential for any site aiming for effective ad revenue. Professional-grade customization options are available for advanced users. The plugin offers developer hooks and filters, providing extensive control over ad display logic and behavior. This allows for fine-tuning ad placements, targeting specific user segments, or integrating with custom ad networks. Such flexibility is invaluable for agencies and developers seeking to tailor monetization strategies precisely to their clients' needs. This level of control is readily accessible with a Free Download Business Tools Ad Manager for OnAir2 WordPress Theme. The direct business value for digital agencies and site owners is substantial. By utilizing this premium tool, development hours dedicated to building custom ad management systems are drastically reduced, saving significant budget. It provides a ready-made, feature-rich solution that can be implemented quickly, allowing businesses to focus on content creation and audience engagement rather than complex ad infrastructure. This empowers them to generate revenue more effectively from day one. Key Features Advanced ad placement and scheduling controls. Support for multiple ad zones and ad types (banner, text, native). Dynamic ad rotation and frequency capping to prevent ad fatigue. Seamless integration with Elementor and WPBakery Page Builder. Compatibility with WooCommerce for e-commerce ad opportunities. Performance-optimized ad serving to maintain fast load times. Easy-to-use dashboard for managing all ad campaigns. Detailed reporting on ad impressions and clicks. Developer hooks for custom integrations and advanced logic. Targeted ad delivery based on user behavior or page content. Free Download Categories Accordion WooCommercre WordPress Plugin FAQ Is Business Tools Ad Manager for OnAir2 WordPress Theme safe to download? Yes, downloading the Business Tools Ad Manager for OnAir2 WordPress Theme from this resource is 100% safe, secure, and verified. The software is distributed under the freedom of the GPL license, ensuring open access and modification rights. We provide access to the original plugin files without any alterations, guaranteeing their integrity. How do I install Business Tools Ad Manager for OnAir2 WordPress Theme for free? To install the Business Tools Ad Manager for OnAir2 WordPress Theme free, you simply need to download the plugin files from our site. Once downloaded, navigate to your WordPress dashboard, go to 'Plugins' > 'Add New', and then click 'Upload Plugin'. Select the zip file you downloaded and proceed with the installation and activation. Can I use Business Tools Ad Manager for OnAir2 WordPress Theme on multiple websites? Absolutely. As the Business Tools Ad Manager for OnAir2 WordPress Theme is distributed under the GPL license, you are free to use it on as many websites as you need. The GPL license grants you the freedom to use, modify, and distribute the software without limitations. What is the difference between this download and the official paid version? The core functionality of the Business Tools Ad Manager for OnAir2 WordPress Theme remains identical to the official paid version. This download provides access to the same features and capabilities, all under the terms of the GPL license. The primary difference lies in the licensing model and support; this download offers a cost-free solution for accessing premium functionality. Does "Business Tools Ad Manager for OnAir2 WordPress Theme Nulled" mean it's modified or cracked? The term "Nulled" in this context refers to the removal of licensing restrictions that might otherwise limit the use of the software. It does not imply that the code has been altered in a way that compromises its functionality or security. This Business Tools Ad Manager for OnAir2 WordPress Theme Nulled download is provided in its original, unaltered state, adhering to the principles of the GPL license.