Articles contributed by the community, curated for your enjoyment and reading.
Filters
Reset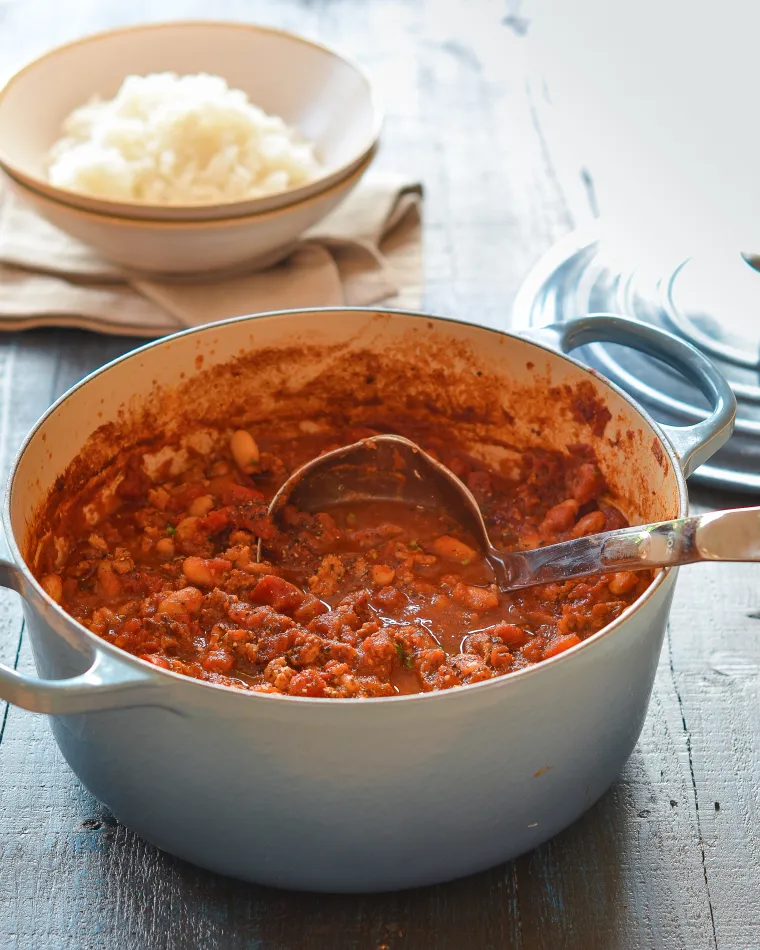
Chicken Chili with White Beans
This chicken chili is a hearty, healthy dish you can feel good about eating. This is a healthy chili that you can actually feel good about eating: it’s made from scratch, loaded with veggies, and chock-full of protein-rich chicken and beans. Don’t worry, it’s still hearty and delicious — even your manly football fanatics will love it. What you’ll need to make Chicken Chili with White Beans . At first glance, the list of ingredients looks long but it’s really just a lot of spices; and while it simmers on the stove for almost two hours, active cooking time is only about 30 minutes. It’s important to use regular ground chicken – not the kind labeled “lean” – and same goes if you’re substituting ground turkey. Also, use Pomi boxed chopped tomatoes if you can find them; they are superior to canned tomatoes and lend nice texture to the chili. How to make it To begin, heat the oil in a large Dutch oven or nonreactive soup pot over medium heat. Add the onions and red bell pepper and cook, stirring frequently, until softened, 8 to 10 minutes. Add the garlic and cook, stirring to prevent garlic from burning, about two minutes more. Increase the heat to medium-high. Add the ground chicken, chili powder, cumin, coriander, red pepper flakes, oregano, cayenne pepper, and salt. As the chicken cooks, use a wooden spoon to break the meat into very small clumps; cook until no longer pink, about 5 minutes. Add the tomatoes, chicken broth, and sugar. Bring to a boil, then reduce the heat to low and simmer, partially covered with lid ajar, for about one hour, stirring occasionally. Stir in the white beans and simmer, uncovered for about 50 minutes more, or until the meat is tender and the flavors are well combined. For a soupier chili, you can add additional water. For a thicker chili, simmer uncovered until the desired consistency is reached. Taste and add more salt if necessary. Note that this chili is moderately spicy; feel free to adjust to your liking by increasing or decreasing the cayenne and red pepper flakes. Note: This recipe has been written by Jenn Segal and republished on MudMatter with Author’s Permission. Please find the original link here – Chicken Chili with White Beans.

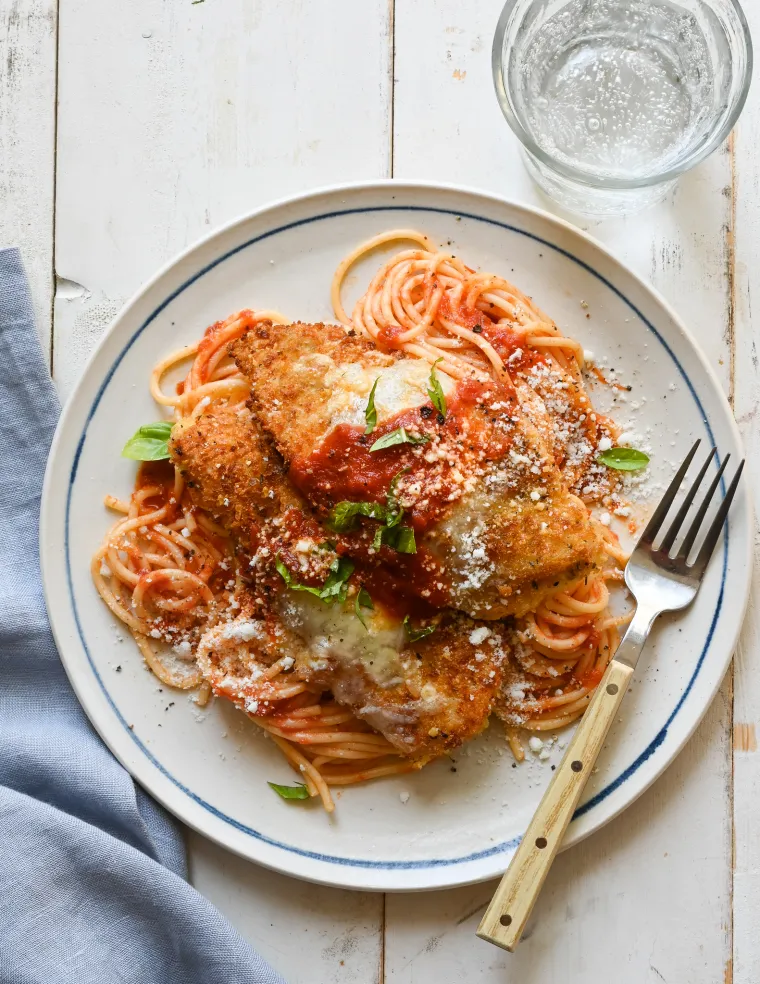
Easy Chicken Parmesan
This family- and weeknight-friendly chicken parmesan will rival your favorite Italian restaurant’s version. Chicken parmesan is a major family pleaser, but the traditional recipe can be time-consuming to make. Between the homemade sauce and pounding, breading, and pan-frying the chicken — not to mention melting the cheese over the chicken in the oven — the classic preparation takes well over an hour and leaves you with a sinkful of dishes. This easy recipe incorporates a few smart shortcuts, like using good-quality jarred sauce and chicken tenderloins, making it totally doable on a weeknight. You’ll notice that I don’t smother the chicken with sauce and cheese; this keeps the crust crispy (and you can always serve more sauce on the side). Chicken parm is a great dish to serve when you have people over since much of the prep can be done ahead of time. Serve with pasta, spaghetti squash, a salad, or a roasted vegetable. What You’ll Need To Make Chicken Parmesan Most recipes call for boneless skinless chicken breasts, which need to be sliced in half horizontally and pounded thin. I use chicken tenderloins, which can be quickly flattened with the palm of your hand to ensure even, quick cooking. Unlike the ready-to-cook thinly sliced chicken cutlets you find at the store, they are guaranteed to be tender and juicy. I recommend using jarred marinara sauce. The recipe only calls for 1-1/2 cups of sauce, so it doesn’t make sense to make it from scratch, especially when there are plenty of good store-bought options (I like Rao’s or Victoria). Japanese-style panko creates a feathery, crisp crust, and it also stays crispy long after it is cooked, so you don’t have to pan-fry the chicken at the very last minute. Mozzarella cheese is usually called for in chicken parmesan recipes. However, I prefer fontina, a semisoft cheese with a buttery, nutty flavor. Fontina stays gooey after it’s melted, while mozzarella tends to turn rubbery as soon as it comes out of the oven. Most large supermarkets carry Swedish or Danish fontina (with a red wax rind), which is ideal for cooking. If you can’t find it, shredded whole milk mozzarella is fine. Step-by-Step Instructions Step 1: Prep and Bread the Chicken Begin by prepping the tenderloins. You may notice a white tendon at the end of the tenderloin. Go ahead and trim it off with a knife or kitchen shears. Using the palm of your hand, gently flatten the tenderloins so that they are an even 1/4-inch thickness. Season the flattened chicken all over with 1-1/4 teaspoons salt and 1/2 teaspoon pepper. In a large shallow bowl (I use a pie plate), combine the panko, 3/4 cup of the Parmigiano Reggiano, the oregano, the thyme, 3/4 teaspoon salt, and 1/4 teaspoon pepper. Mix well, making sure there are no clumps of cheese. Place the flour in another shallow bowl. Beat the eggs in a third bowl. Set up a breading station in this order: flour, eggs, panko. Dredge the chicken in the flour, coating evenly. Dip in the eggs, letting any excess drip off; then dredge in the panko mixture, turning and patting to adhere. Place the breaded chicken on a lined baking sheet. (The recipe can be prepared up to this point, covered, and refrigerated up to 8 hours ahead of time. The breaded tenders can also be frozen for up to 3 months.) Step 2: Pan-Fry the Chicken In a large nonstick skillet, heat about 1/8 inch of oil over medium heat until shimmering. Place 5 or 6 tenders in the pan in a single layer. Cook until the first side is golden brown, 2 to 3 minutes. Flip the chicken and cook for another 2 to 3 minutes, until golden and cooked through. Cook the remaining chicken in the same manner, adding additional oil only if necessary. Step 3: Top the Chicken with Cheese and Broil Place the cooked chicken on a foil-lined baking sheet. Sprinkle the fontina and remaining 2 tablespoons Parmigiano Reggiano over the center of the chicken tenderloins, leaving the sides bare so that they remain crispy. Broil until the cheese is melted and bubbling, 1 to 2 minutes. Step 4: Serve Warm the marinara sauce, then taste and adjust seasoning to your liking. With store-bought sauce, I find a generous pinch of sugar and some fresh basil go a long way. Transfer the chicken to a serving platter or individual plates. Spoon the marinara sauce over the cheese, again leaving the sides bare so that they stay crispy. Sprinkle with fresh basil and serve. Note: This recipe has been written by Jenn Segal and republished on MudMatter with Author’s Permission. Please find the original link here – Easy Chicken Parmesan.
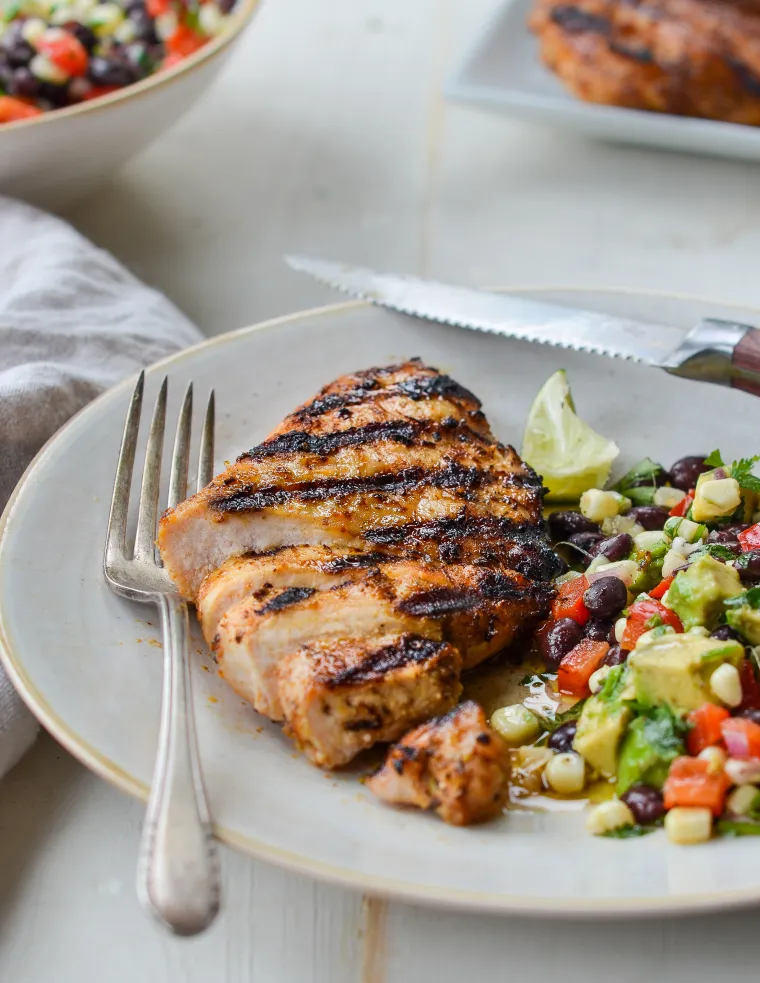
Grilled Tequila Lime Chicken
Also known as “margarita chicken,” this tequila lime chicken is loaded with bright Southwestern flavor. Tequila Lime Chicken, a.k.a. Margarita Chicken, is one of those dishes that just screams fun. The marinade is a combination of tequila, lime, garlic and spices, and it’s loaded with bright Southwestern flavor. Contrary to what you might think, this recipe is family friendly. The tequila is mild and the chicken isn’t too spicy. Pair it with my black bean salad, restaurant-style salsa, cornbread muffins, and margaritas for a Southwestern-themed cookout. What You’ll Need To Make Tequila Lime Chicken How To Make Tequila Lime Chicken Step 1: Pound the Chicken Place the chicken breasts in a 1-gallon freezer bag and pound to an even ½-inch thickness. This both tenderizes the meat and ensures even cooking. Left in their natural shape, the thin side of the fillet dries out while the thicker side finishes cooking. Step 2: Make the Marinade Begin by zesting the limes with a fine or Microplane grater. Simply rub the lime in one direction against the blades, turning the fruit as you go. Be sure to remove only the green part; the white pith underneath is bitter. I don’t use the juice of the limes in the marinade because, contrary to popular belief, acidic ingredients (such as vinegar or lemon juice) do not tenderize lean boneless chicken breasts. Just the opposite: they “cook” the exterior of the meat and give it a leathery texture. The zest is enough to give the chicken the essence of lime, while still maintaining its succulent texture. Mix all of the ingredients except for the chicken together in a 1-gallon zip-lock bag (go ahead and use the same one you used for pounding if it is still in good shape). Add the chicken breasts to the bag and massage the marinade into the meat until evenly coated. Step 3: Marinate Seal the bag and place in a bowl in the refrigerator (the bowl protects against leakage); let the chicken marinate for at least 4 hours or overnight. Step 4: Grill Preheat the grill to high heat and cook, covered, for 2 to 3 minutes per side. Be careful not to overcook; when pounded thin, chicken breasts cook very quickly. Note: This recipe has been written by Jenn Segal and republished on MudMatter with Author’s Permission. Please find the original link here – Grilled Tequila Lime Chicken.

Baked Penne with Spinach, Ricotta & Fontina
This easy vegetarian pasta bake gives you all the flavor of classic spinach and cheese cannelloni without the fuss. This vegetarian pasta bake is a quick and easy riff on classic spinach and ricotta cannelloni. Instead of stuffing traditional pasta shells, I toss penne pasta in a creamy sauce made with spinach, basil, and ricotta. After topping the dish with two flavorful cheeses, I bake it until golden and bubbly. To ensure a smooth and creamy texture, I add mascarpone (or cream cheese) to the sauce, which eliminates any potential graininess that can sometimes occur with ricotta-based sauces. While the pasta bakes, I usually toss a big salad to complete the meal. You’ll need to make Baked penne with spinach, ricotta & fontina How to make Baked penne with spinach, ricotta & fontina To begin, bring a large pot of salted water to a boil and add the penne. Cook until al dente, about 9 minutes. The pasta will continue to cook in the oven, so you want it a bit underdone. Drain the pasta, then place it back in the pan and set aside. Meanwhile, drain the spinach and squeeze as dry as possible. In the bowl of a food processor fitted with the steel blade, combine the dry spinach, basil, ricotta, mascarpone (or cream cheese), half-and-half cream, 1 cup fontina, 3 tablespoons Parmigiano Reggiano, salt, pepper, and nutmeg. Process until puréed. Add the spinach mixture to the pasta. Stir to combine. Transfer to a baking dish. Top with the remaining fontina and Pecorino Romano cheese. Bake until the pasta is bubbling and the top is golden in spots, about 20 minutes. Let cool for a few minutes, then serve. Note: This recipe has been written by Jenn Segal and republished on MudMatter with Author’s Permission. Please find the original link here – Baked Penne with Spinach, Ricotta & Fontina.

Check Session Timeout by Using ActionFilters in MVC
In a dynamic web application, the session is crucial to hold the information of current logged in user identity/data. So someone without authentication cannot have access to some Page or any ActionResult, to implement this kind of functionality, we need to check session exists (is not null) in every action which required authentication. So, the general method is as follows: [HttpGet] public ActionResult Home() { if(Session["ID"] == null) return RedirectToAction("Login","Home"); } We have to check the above 2 statements each time and in each ActionResult, but it may cause 2 problems. Repeat Things: As per the good programming stranded, we don't have to repeat the things. Create a module of common code and access it multiple times/repeatedly Code missing: We have to write code multiple times so it might happen some time we forget to write code in some method or we missed it. How To Avoid? The ASP.NET MVC provides a very great mechanism i.e., Action Filters. An action filter is an attribute. You can apply most action filters to either an individual controller action or an entire controller. If you want to know more about action filter, please click here. So we will create a custom Action Filter that handles session expiration and if session is null, redirect to Login Action. Create a new class in your project and copy the following code: namespace Mayur.Web.Attributes { public class SessionTimeoutAttribute : ActionFilterAttribute { public override void OnActionExecuting(ActionExecutingContext filterContext) { HttpContext ctx = HttpContext.Current; if (HttpContext.Current.Session["ID"] == null) { filterContext.Result = new RedirectResult("~/Home/Login"); return; } base.OnActionExecuting(filterContext); } } } Now our Action Filter is created and we are ready to use it. The following code will show you how we can apply attribute to Action or to complete controller. 1. Apply to Action [HttpGet] [SessionTimeout] public ActionResult MyProfile() { return View(); } 2. Apply to Controller [SessionTimeout] public class HomeController : Controller { [HttpGet] public async ActionResult MyProfile() { return View(); } [HttpGet] public async ActionResult MyQuestions() { return View(); } [HttpGet] public async ActionResult MyArticles() { return View(); } } Now all actions of Home Controller will check for session when hit with the help of Action Filter. So we have reduced the code and repetitive things. This is the benefits of Action Filters. Happy coding !!!

Helper to validate image in MVC
In almost 90% of projects, we need to upload images to server and store them. In most cases, hackers try to exploit an image upload system and try to upload exploitable materials like web-shells, some harmful scripts, table deletions scripts, etc. To prevent this, I have written one helper function which validates file in many conditions and makes sure the file is in correct image format. The code is not fully written by me, I researched many articles and filtered the conditions which helps us to validate the required output. /// <summary> /// Verifies that a uploading file is in valid Image format /// </summary> /// <param name="postedFile">File which is selected for upload</param> /// <param name="imageMinBytes">Minimum file size in byte</param> /// <param name="imageMaxBytes">Maximum file size in byte</param> /// <returns>true if the file is a valid image format and false if it's not</returns> public static bool IsValidImageFormat(HttpPostedFileBase postedFile, int imageMinBytes, long imageMaxBytes) { //------------------------------------------- // Check the image extension //------------------------------------------- if (Path.GetExtension(postedFile.FileName).ToLower() != ".jpg" && Path.GetExtension(postedFile.FileName).ToLower() != ".png" && Path.GetExtension(postedFile.FileName).ToLower() != ".gif" && Path.GetExtension(postedFile.FileName).ToLower() != ".jpeg") { return false; } //------------------------------------------- // Check the image MIME types //------------------------------------------- if (postedFile.ContentType.ToLower() != "image/jpg" && postedFile.ContentType.ToLower() != "image/jpeg" && postedFile.ContentType.ToLower() != "image/pjpeg" && postedFile.ContentType.ToLower() != "image/gif" && postedFile.ContentType.ToLower() != "image/x-png" && postedFile.ContentType.ToLower() != "image/png") { return false; } //------------------------------------------- // Attempt to read the file and check the first bytes //------------------------------------------- try { if (!postedFile.InputStream.CanRead) { return false; } if (postedFile.ContentLength < imageMinBytes) { return false; } byte[] buffer = new byte[512]; postedFile.InputStream.Read(buffer, 0, 512); string content = System.Text.Encoding.UTF8.GetString(buffer); if (Regex.IsMatch(content, @"<script|<html|<head|<title|<body| <pre|<table|<a\s+href|<img|<plaintext|<cross\-domain\-policy", RegexOptions.IgnoreCase | RegexOptions.CultureInvariant | RegexOptions.Multiline)) { return false; } } catch (Exception) { return false; } //------------------------------------------- // Try to instantiate new Bitmap, if .NET will throw exception // we can assume that it's not a valid image //------------------------------------------- try { using (var bitmap = new System.Drawing.Bitmap(postedFile.InputStream)) { } } catch (Exception) { return false; } return true; } Hope it will help you. Let me know your thoughts!
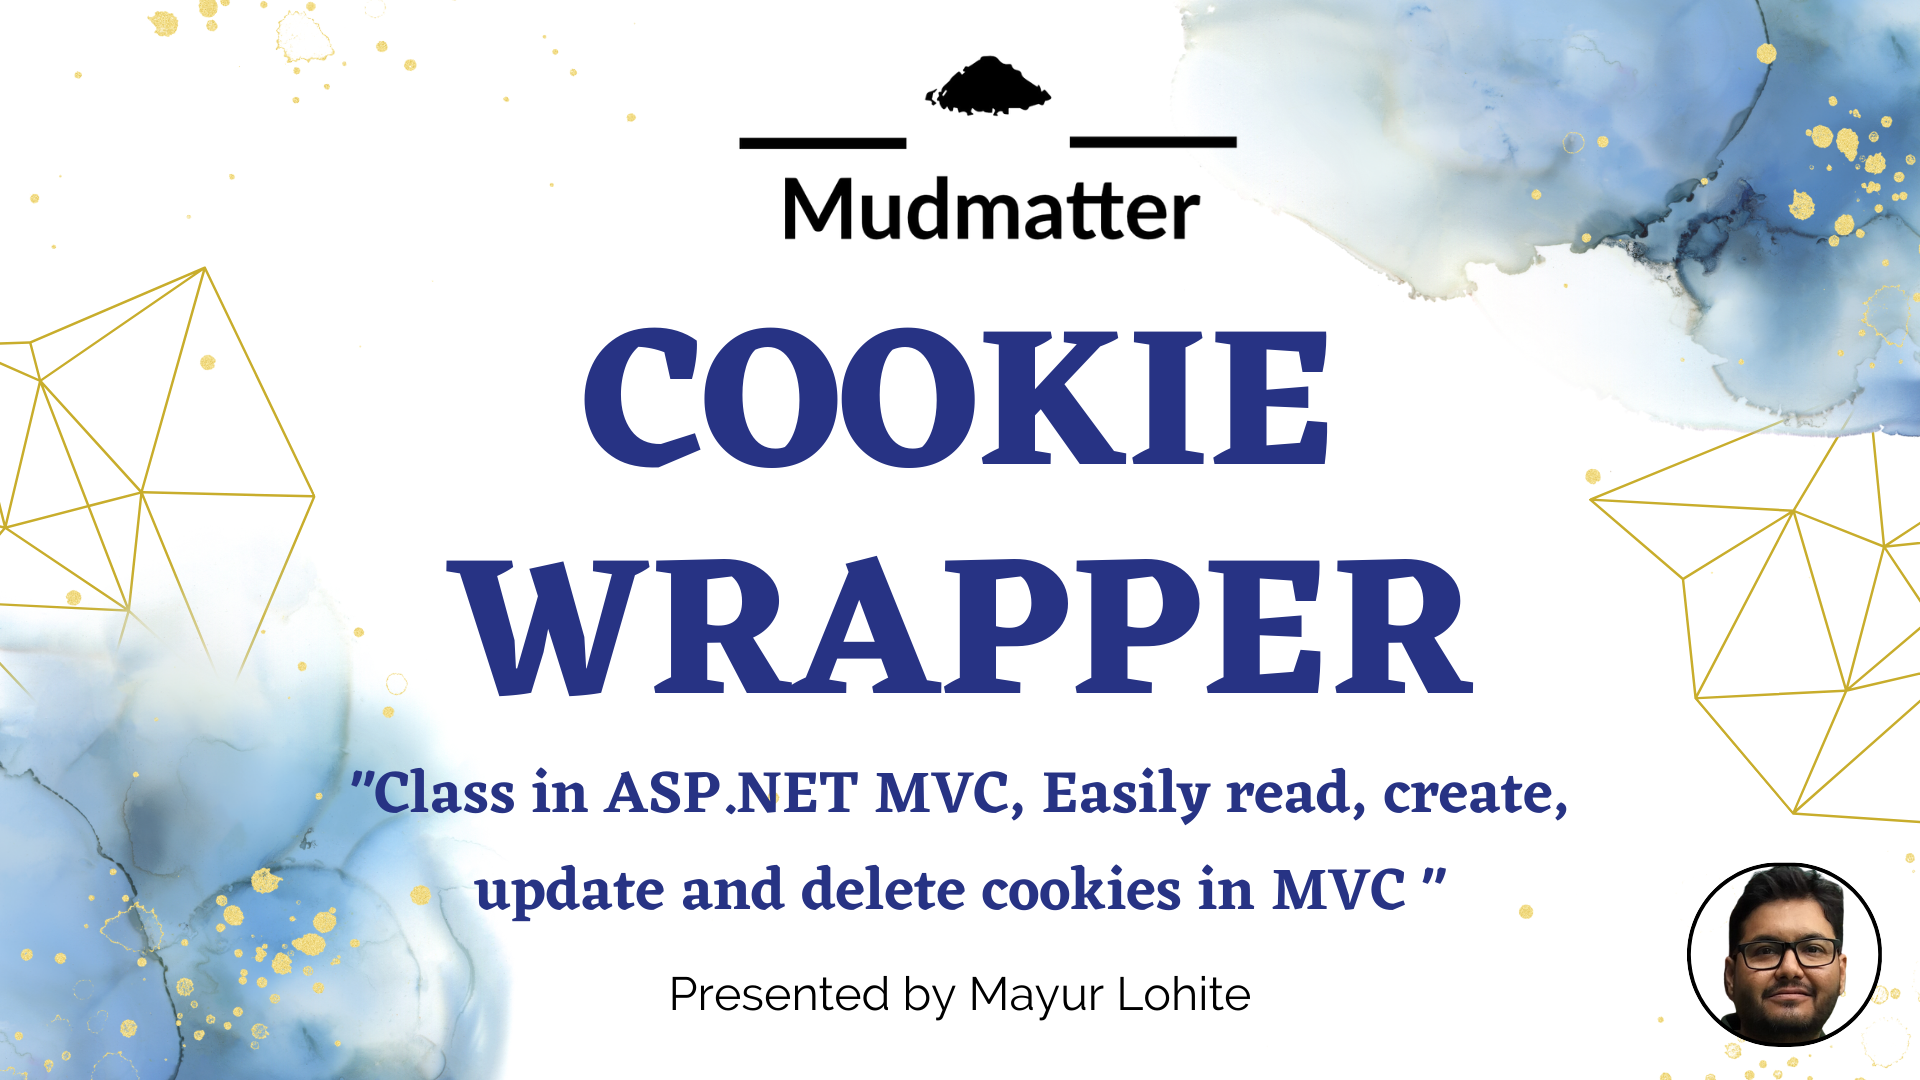
A cookie wrapper class in MVC
A Simple Cookie Wrapper Class for MVC: Easily Manage Cookies in Your Web Application In web development, managing cookies efficiently is a crucial part of building user-friendly applications. In this post, I will show you how to create a simple and reusable cookie helper class in MVC, which allows you to easily create, read, update, and delete cookies. This approach simplifies cookie management and ensures your code is clean and easy to maintain. Introduction to Cookie Management in MVC Cookies are small pieces of data stored in the user's browser. They are typically used for sessions, preferences, and other user-specific data. In MVC applications, handling cookies manually can be cumbersome. That's where a helper class comes in handy. Let’s build a CookieHelper.cs class to abstract the common operations like creating, reading, updating, and deleting cookies. CookieHelper Class Code Create a new file named CookieHelper.cs and paste the following code into it. This class defines the basic functionality you need for working with cookies in your MVC application. using System; using System.Web; public class CookieHelper { #region Constants // The name of the cookie to be used public const string CookieName = "UserName"; #endregion #region Enums public enum CookieInterval { SECOND = 0, MINUTE = 1, HOUR = 2, DAY = 3, MONTH = 4, YEAR = 5 }; #endregion #region Utility Methods // Calculates the expiration date for the cookie based on the given duration and unit private static DateTime CalculateCookieExpiry(int duration, CookieInterval durationUnit) { DateTime cookieExpire = DateTime.Now; switch (durationUnit) { case CookieInterval.SECOND: cookieExpire = DateTime.Now.AddSeconds(duration); break; case CookieInterval.MINUTE: cookieExpire = DateTime.Now.AddMinutes(duration); break; case CookieInterval.HOUR: cookieExpire = DateTime.Now.AddHours(duration); break; case CookieInterval.DAY: cookieExpire = DateTime.Now.AddDays(duration); break; case CookieInterval.MONTH: cookieExpire = DateTime.Now.AddMonths(duration); break; case CookieInterval.YEAR: cookieExpire = DateTime.Now.AddYears(duration); break; default: cookieExpire = DateTime.Now.AddDays(duration); break; } return cookieExpire; } #endregion #region Public Methods // Creates a cookie with a specific name, value, and expiration time public static string CreateCookie(string cookieName, string cookieValue, CookieInterval durationUnit, int duration) { HttpCookie cookie = new HttpCookie(cookieName) { Value = cookieValue, Expires = CalculateCookieExpiry(duration, durationUnit) }; HttpContext.Current.Response.Cookies.Add(cookie); return cookieValue; } // Reads the value of an existing cookie by its name public static string ReadCookie(string cookieName) { HttpCookie cookie = HttpContext.Current.Request.Cookies[cookieName]; return cookie?.Value ?? string.Empty; } // Updates the value and expiration of an existing cookie public static string UpdateCookie(string cookieName, string newCookieValue, CookieInterval durationUnit, int duration) { HttpCookie cookie = HttpContext.Current.Request.Cookies[cookieName]; if (cookie != null) { cookie.Value = newCookieValue; cookie.Expires = CalculateCookieExpiry(duration, durationUnit); HttpContext.Current.Response.Cookies.Add(cookie); } return newCookieValue; } // Deletes a cookie by setting its expiration date to the past public static void DeleteCookie(string cookieName) { HttpCookie cookie = new HttpCookie(cookieName) { Expires = DateTime.Now.AddDays(-1) }; HttpContext.Current.Response.Cookies.Add(cookie); } #endregion } How to Use the CookieHelper Class Now that you have the CookieHelper class, let's walk through some common scenarios: creating, reading, updating, and deleting cookies. 1. Create a Cookie To create a cookie, you simply call the CreateCookie method with the cookie's name, value, duration unit (such as days or months), and duration: string cookieValue = CookieHelper.CreateCookie(CookieHelper.CookieName, "This is a test cookie", CookieHelper.CookieInterval.DAY, 7); This will create a cookie that expires in 7 days. 2. Read a Cookie To read the value of an existing cookie, use the ReadCookie method: string cookieValue = CookieHelper.ReadCookie(CookieHelper.CookieName); If the cookie exists, this will return its value. If it doesn't, it will return an empty string. 3. Update a Cookie To update the value of an existing cookie, call the UpdateCookie method: string updatedCookieValue = CookieHelper.UpdateCookie(CookieHelper.CookieName, "Updated cookie value", CookieHelper.CookieInterval.DAY, 14); This will update the cookie's value and reset its expiration date to 14 days from now. 4. Delete a Cookie To delete a cookie, use the DeleteCookie method: CookieHelper.DeleteCookie(CookieHelper.CookieName); This will remove the cookie by setting its expiration date to a past date, effectively deleting it from the user's browser. Conclusion With this simple CookieHelper class, you can easily manage cookies in your MVC applications. Whether you're creating, reading, updating, or deleting cookies, the code is clean and easy to use. Feel free to use this class in your project, and let me know your thoughts or any improvements you might suggest!

social-network-events-calendar-for-wordpress
Social Network Events Calendar For WordPress Nulled Free Download DOWNLOAD Social Network Events Calendar For WordPress Technical Data Developer tiva_theme Version WordPress 4.9.x Compatibility All modern WordPress versions License GPL About Social Network Events Calendar For WordPress The Social Network Events Calendar For WordPress is engineered to address the complex needs of managing and displaying event information within a social networking context. It provides a structured framework for users to create, share, and discover events, fostering community engagement. This plugin is essential for sites aiming to build vibrant online communities around shared interests and activities. Obtaining a Free Download Social Network Events Calendar For WordPress allows for immediate implementation of these advanced features. The core engine of this calendar plugin prioritizes backend efficiency and a clean code architecture. It meticulously handles resource management, ensuring that JavaScript and CSS assets are loaded only when necessary. This approach minimizes server load and optimizes the user experience. The careful consideration of how the Social Network Events Calendar For WordPress Nulled operates under the hood contributes to its overall stability and performance. Integration power is a key strength, offering seamless compatibility with modern page builders like Elementor and Gutenberg. It also plays well with most major WordPress themes and other critical plugins, ensuring a smooth setup process. This broad compatibility means you can easily incorporate its functionality into your existing website without conflicts. The Social Network Events Calendar For WordPress Nulled has been tested to work harmoniously within diverse site architectures. Performance and speed are paramount, and this plugin significantly impacts page loading times. It contributes to a lower Time To First Byte (TTFB) and aids in database optimization. Faster loading pages lead to better user retention and improved search engine rankings. Users looking for a Free Download Social Network Events Calendar For WordPress will appreciate its contribution to a swift and responsive website. This plugin falls under the social networking and event management categories. It leverages numerous technical terms for optimal functionality, including but not limited to event schema markup, calendar widgets, user-generated content integration, recurring event scheduling, RSVP management, event categorization, location-based filtering, and advanced search functionalities. For those seeking to manage events effectively, a Free Download Social Network Events Calendar For WordPress is an invaluable asset. Professional-grade settings allow for advanced customization, catering to specific needs. The plugin exposes developer hooks and filters, providing extensive control for custom modifications and integrations. This makes the Social Network Events Calendar For WordPress Nulled a flexible solution for developers and advanced users who require fine-grained control over event display and functionality. The direct business value for digital agencies and site owners is substantial. By utilizing this premium tool, development hours and associated costs are significantly reduced. Instead of building complex event management systems from scratch, you gain access to a robust, pre-built solution. This allows teams to focus on other critical aspects of website development and marketing. A Free Download Social Network Events Calendar For WordPress offers immediate cost savings and efficiency gains. Key Features Intuitive event creation and management dashboard. Support for recurring events with flexible scheduling options. Integrated RSVP system for attendees. Event categorization and tagging for better organization. Location-based event searching and filtering. Compatibility with Google Maps for event locations. Customizable event display layouts and templates. User-friendly interface for both administrators and end-users. Integration with social sharing options for events. Responsive design for optimal viewing on all devices. Free Download 3D Carousel Addon for WPBakery Page Builder (formerly Visual Composer) FAQ Is Social Network Events Calendar For WordPress safe to download? Yes, downloading the Social Network Events Calendar For WordPress from this resource is 100% safe, secure, and verified. The software is distributed under the freedom of the GPL license, ensuring its integrity and usability. How can I install Social Network Events Calendar For WordPress for free? To install the Social Network Events Calendar For WordPress free, simply download the plugin files from this page. You can then upload and activate it through your WordPress admin dashboard under the Plugins section, just like any other plugin. What are the benefits of using Social Network Events Calendar For WordPress Nulled? Using the Social Network Events Calendar For WordPress Nulled provides access to all premium features without requiring a purchase. This allows you to implement advanced event management capabilities on your website at no cost, saving significant budget and development time. Does Social Network Events Calendar For WordPress work with the latest WordPress versions? While the listed compatibility is WordPress 4.9.x, the GPL license ensures that the core functionality of many plugins remains adaptable. For the most up-to-date compatibility information regarding the Social Network Events Calendar For WordPress, it's advisable to check any specific update notes if available, though this Free Download Social Network Events Calendar For WordPress typically functions well. Is it legal to download Social Network Events Calendar For WordPress under the GPL license? The General Public License (GPL) grants users the freedom to use, modify, and distribute software. Downloading and using software distributed under the GPL, such as the Social Network Events Calendar For WordPress, is permitted by its license terms. This specific resource ensures the GPL-compliant distribution of the plugin.
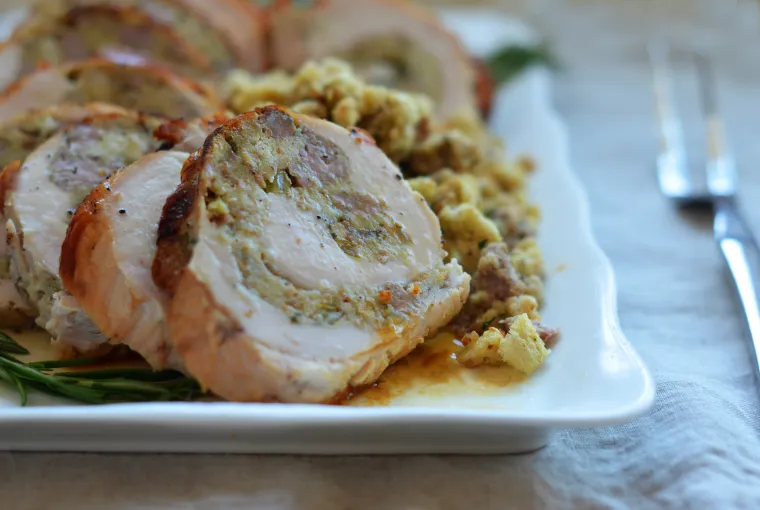
Rolled Turkey Breast with Sausage & Herb Stuffing
A delicious (and make-ahead!) alternative to traditional holiday turkey. Whether you’re cooking for a smaller crowd for the holidays or looking for an alternative to traditional turkey, this stuffed turkey breast is the answer. Adapted from Patrick and Gina Neely, it is much more flavorful and juicy than your typical roast turkey and cooks in just 1¼ hours. What’s more, it can be made entirely ahead of time and is a cinch to carve. The hardest part of the recipe is pounding the turkey breast thin, so I suggest asking your butcher to do it for you. This recipe has become part of my family’s Thanksgiving tradition — everyone prefers it to traditional roast turkey, even the dark-meat lovers. Sometimes I even make it in addition to roasting a large bird to guarantee we have plenty of leftovers. What You’ll Need To Make Rolled Turkey Breast with Sausage & Herb Stuffing Step-by-Step Instructions To begin, make the stuffing. Melt the butter in a large skillet over medium heat. Add the onions and celery and cook, stirring frequently, until soft. Add the garlic and sausage. Continue to cook, breaking up the meat with a wooden spoon, until the sausage is cooked and slightly browned, about 5 minutes. Add the wine, rosemary and thyme. Cook for two minutes more, using your wooden spoon to scrape up any browned bits from the bottom of the pan. Remove from the heat. n a large mixing bowl, combine the egg, stuffing cubes, chicken broth, parsley, 1/2 teaspoon kosher salt, 1/4 teaspoon pepper, and sausage mixture. Stir until all the bread is moistened. Place the butterflied turkey breast skin-side down on a countertop or work surface. Pound to an even 1/2-inch thickness. Spoon about half of the stuffing in an even 1/2-inch layer over the breast, leaving a 1-inch border all around. (You’ll cook the remaining stuffing separately.) Starting at the long end, roll the turkey into a long cylinder. Tie the roll with kitchen string with about 2 inches between each knot, and then trim the strings. Line a baking sheet with aluminum foil and place an oven-proof rack over top. Place the turkey seam-side down on the rack, drizzle with olive oil and season with salt and pepper. Remove the turkey from the oven and let rest, loosely tented with foil for 15 minutes. The turkey will rise in temperature as it rests to 165°F. Snip the kitchen twine. Transfer the roll to a cutting board and slice into 1/2-inch thick slices. Arrange on a platter and serve with gravy. Note: This recipe has been written by Jenn Segal and republished on MudMatter with Author’s Permission. Please find the original link here – Rolled Turkey Breast with Sausage & Herb Stuffing.
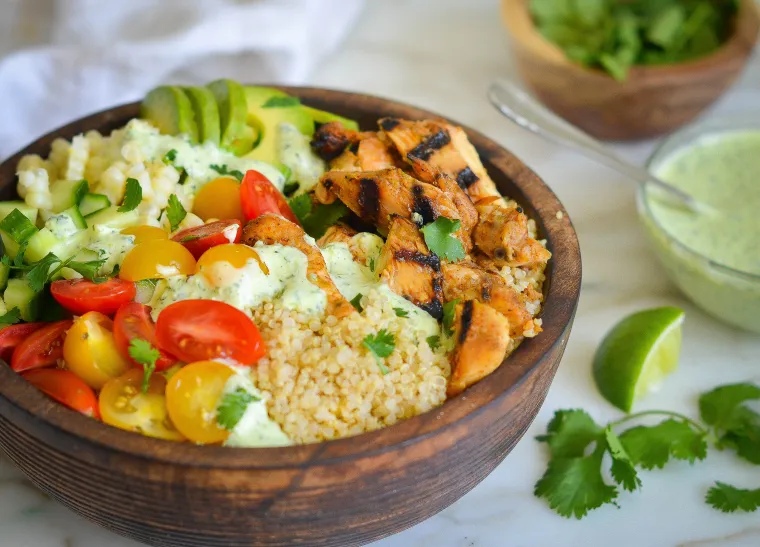
Chicken & Quinoa Burrito Bowls with Spicy Green Sauce
Good and good for you! You’ll love these protein-packed chicken and quinoa burrito bowls with a spicy green sauce. These burrito bowls are really three stand-alone dishes in one: an easy grilled chicken recipe you’ll put on repeat throughout grilling season; a spicy green sauce you’ll want to put on everything; and foolproof quinoa. The toppings are up to you – fresh corn, beans, tomatoes, cucumbers, avocado, or whatever your heart desires. These bowls are totally doable for a dinner party since you can make most of the recipe ahead, and everyone will love assembling their own bowls. They’re healthy and gluten-free to boot. What you’ll need to make Burrito Bowls How to make burrito bowls Begin by making the marinade for the chicken. To make life easy, I combine everything in a ziplock bag (no dirty bowls!). Lime gives the chicken wonderful flavor but note that I only use the zest. Lime juice, or any acidic ingredient, will turn lean boneless skinless chicken breasts into shoe leather before they ever hit the grill. To zest the limes, it’s best to use a rasp grater like the one above. Marinate the chicken in the refrigerator for at least six hours or overnight. Next make the sauce. Simply combine all of the ingredients in a blender or food processor and blend until smooth. You’ll notice that I add some of the seeds of the jalapeño to make it spicy — go easy at first and add more to your liking. Finally, make the quinoa by combining the quinoa, salt, and water in a medium saucepan. You’ll notice that my recipe calls for a little less water than the instructions on the package. I find it comes out better (read: less mushy) this way, and you can always add a little more water at the end if need be. Cover and simmer until the quinoa is cooked. Up to this point, the entire recipe can be made ahead. Come dinnertime, preheat the grill. Place the chicken on the grill and cook, covered, for 2-3 minutes per side, turning only once. Cut the chicken into bite-sized pieces and serve with the quinoa, green sauce, and toppings of your choosing. Note: This recipe has been written by Jenn Segal and republished on MudMatter with Author’s Permission. Please find the original link here – Chicken & Quinoa Burrito Bowls with Spicy Green Sauce.