Articles contributed by the community, curated for your enjoyment and reading.
Filters
Reset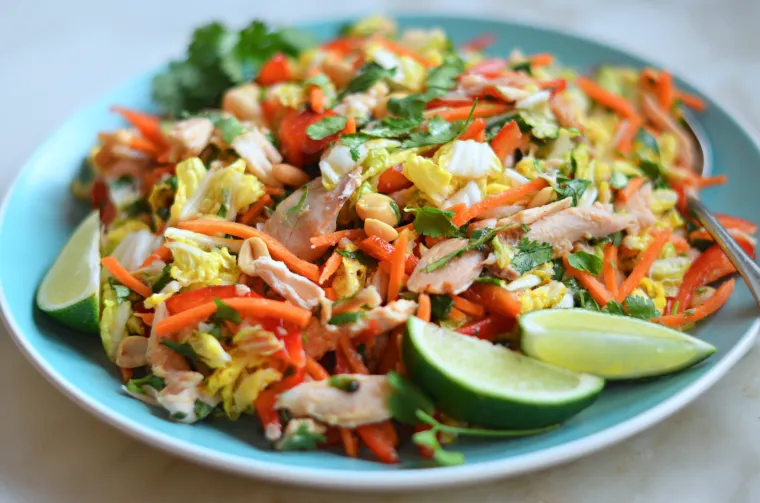
Vietnamese Shredded Chicken Salad
Made with a rotisserie chicken, this salad is easy to whip up and full of bright, spicy Southeast Asian flavor. As much as I love salad as a meal, it’s not usually enough for my husband, who is more of a protein/two sides kind of a guy. But this is one salad that I can get away with serving for dinner — it’s satisfying and full of bright, spicy Southeast Asian flavor. It’s easy, too! You simply shred a rotisserie chicken, chop some veggies, whisk the dressing, and dinner is done. The recipe makes enough for 2 to 3 main course salads; if you want to stretch it, serve some store-bought crispy spring rolls on the side. What you’ll need to make Vietnamese Shredded Chicken Salad Step-by-Step Instructions To begin, combine all of the salad ingredients, except for the peanuts, in a large bowl. Next, make the dressing. You’ll need to juice a few limes; an inexpensive juicer like this one is helpful but not necessary. Whisk together the freshly squeezed lime juice, Sriracha, garlic, sugar, fish sauce, and vegetable oil. Pour the dressing over the salad and toss well. Top with peanuts and serve. Note: This recipe originally comes from Saveur magazine but I’ve tweaked it a bit to make it my own. (I omitted the rice vinegar and Thai peppers, increased the lime, and added bell peppers, scallions, Sriracha, and peanuts.) Note: This recipe has been written by Jenn Segal and republished on MudMatter with Author’s Permission. Please find the original link here – Vietnamese Shredded Chicken Salad.

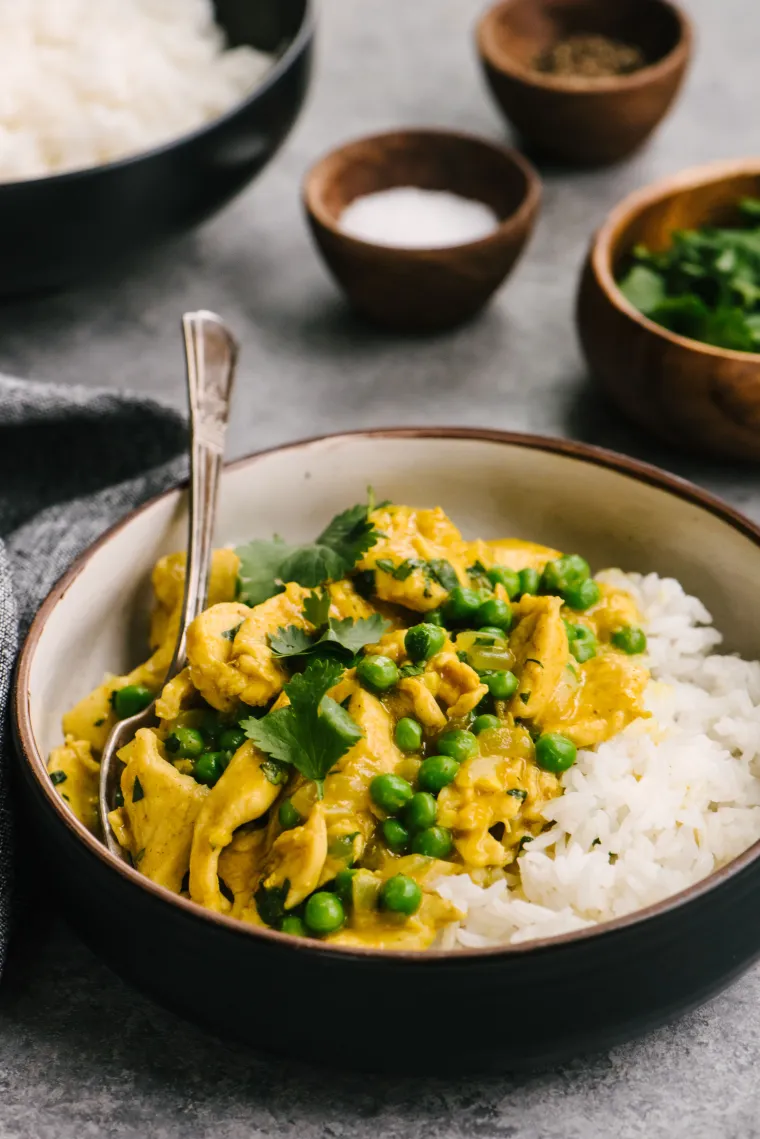
Chicken Curry
This chicken curry recipe is family-friendly and easy enough for a busy weeknight. Serve it with basmati rice and dinner is done! In this family-friendly chicken curry dish, thinly sliced chicken breasts are sautéed with curry powder and simmered in an aromatic curry sauce thickened with Greek yogurt. You can have it on the table in 30 minutes — or in the time it takes to make some basmati rice — and the cooking method ensures that the chicken comes out reliably tender every time. As with many Indian dishes, the taste and spice level of this dish will vary a bit depending on the type of curry powder you use, so adjust the seasoning as necessary. What you’ll need to make chicken curry Step-By-Step Instructions Begin by cutting the chicken into 1/4-inch slices. The best way is to cut each breast in half lengthwise, then slice on the diagonal. Don’t make yourself crazy over it, but try to make each piece about the same size; this ensures that they cook evenly. Next, season the chicken with salt, pepper and curry powder. Heat some vegetable oil in a large skillet, then briefly sauté the chicken until it is lightly browned but still pink in spots. Transfer the partially cooked chicken to a clean bowl, then add the onions to the pan and cook until soft and translucent. Add the ginger, garlic, and more curry powder and sauté until fragrant. Add the chicken stock and cornstarch to the vegetables. Cook until the sauce is thickened, then add the chicken back to the pan, along with the frozen peas and simmer until the chicken is just cooked. Add the Greek yogurt and fresh chopped cilantro. Stir until combined. Serve with basmati rice and/or naan. Note: This recipe has been written by Jenn Segal and republished on MudMatter with Author’s Permission. Please find the original link here – Chicken Curry.
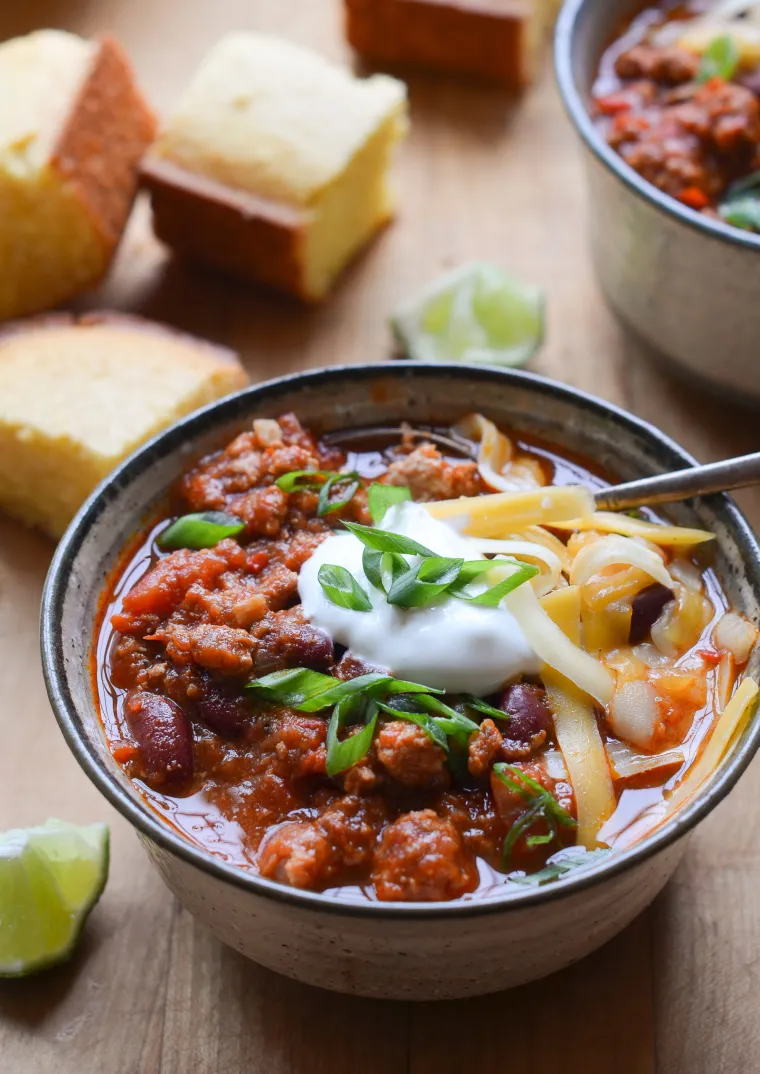
Classic Turkey Chili
This healthy turkey chili has a rich, spicy flavor and thick texture — and it’s loaded with nutrient-rich kidney beans. When it’s cold outside, there’s nothing more inviting than a big pot of chili simmering on the stove, and this turkey chili adapted from The Complete One Pot Cookbook from America’s Test Kitchen always hits the spot. It has a rich, spicy flavor and thick texture, and it’s loaded with fiber-rich kidney beans. Since ground turkey is lean and can easily dry out, the recipe uses a genius technique to ensure the meat stays moist. Instead of adding all of the meat at once, a portion of the turkey is sautéed in the beginning and cooked low and slow to build flavor. Then, towards the end of the simmering time, the remaining turkey is pinched into small pieces and stirred into the chili, creating chunks of tender turkey in every bite. Be sure to use 93% lean ground turkey, which is a combination of light and dark meat, rather than 99% lean ground turkey breast. Serve with cornbread or cornbread muffins and your favorite chili toppings. What You’ll Need To Make Turkey Chili Step-by-Step Instructions Roughly chop the onions, bell pepper, and garlic and place in the bowl of a food processor fitted with the steel blade. Pulse, scraping down the sides as necessary, until the vegetables are finely chopped. Do not over-process; the vegetables should not be puréed. (Alternatively, finely chop the onions, bell pepper, and garlic by hand.) Heat the oil in a large pot or Dutch oven over medium heat. Add the chopped vegetables, chili powder, cumin, coriander, red pepper flakes, oregano, and cayenne pepper. Cook, stirring often, until the vegetables are softened, about 10 minutes. Add about 1-1/4 pounds of the turkey to the pot. Increase the heat to medium-high, and cook, breaking up the meat with a wooden spoon, until no longer pink, about 4 minutes. Stir in the beans, diced tomatoes and their juice, crushed tomatoes, broth, and salt and bring to a simmer. Reduce the heat to medium-low and cook, uncovered, until the chili has begun to thicken, about 1 hour. Pat the remaining 3/4 pound turkey together into a ball, then pinch off teaspoon-size pieces of meat and stir into the chili. Continue to simmer, stirring occasionally, until turkey is tender and chili is slightly thickened, about 40 minutes. (If the chili begins to stick to the bottom of the pot or looks too thick, stir in extra broth as needed.) Taste and adjust seasoning, if necessary, and serve with your favorite chili toppings. Note: This recipe has been written by Jenn Segal and republished on MudMatter with Author’s Permission. Please find the original link here – Classic Turkey Chili.
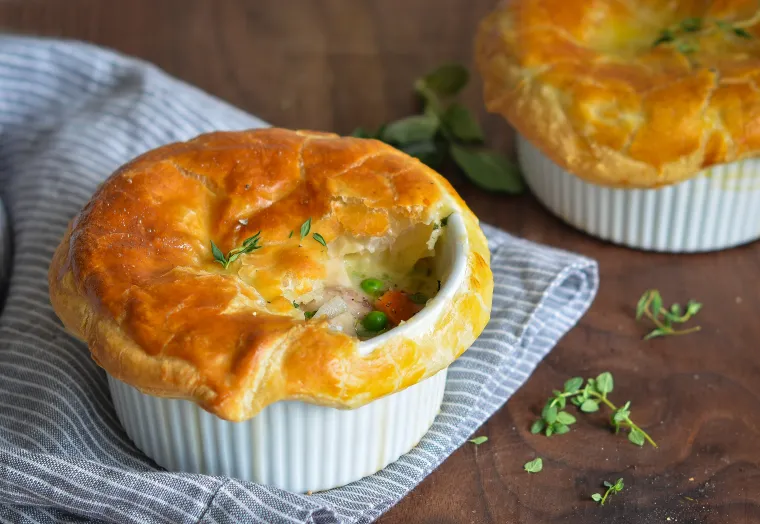
Chicken Pot Pie
Store-bought rotisserie chicken and puff pastry make these individual chicken pot pies easy to prepare. Between the chicken, the sauce, and the crust, you could spend an entire day in the kitchen making traditional chicken pot pie. For this version, my goal was to come up with an easy recipe that didn’t sacrifice flavor. After many trials, I found that using a rotisserie chicken for the filling and a good quality store-bought puff pastry for the crust were both excellent shortcuts. With that settled, I moved on to tackle the problem with most chicken pot pies: the bland, goopy white sauce. I thinned the sauce to a chowder-like consistency. I also borrowed an ingredient from my favorite turkey gravy – Cognac – and it added that je ne sais quoi that makes these chicken pot pies next-level delicious. What you’ll need to make chicken pot pie recommend Dufour all-butter puff pastry if you can find it (it’s sold at Whole Foods) but Pepperidge Farm, which is readily available in the freezer section of most supermarkets, is very good, too. How to make chicken pot pie To begin, dust a clean, dry work surface with flour and place the puff pastry over top. Sprinkle the pastry with flour and roll to about 1/8-inch thick, smoothing the creases with the rolling pin at the same time. Using a sharp knife, kitchen shears, or a pizza cutter, cut out 4 circles about 2 inches larger than the circumference of your soup bowls. Place the dough rounds on a foil-lined baking sheet and refrigerate until ready to use. Next, make the filling. In a large sauté pan over medium heat, melt the butter, Add the yellow onion, garlic, celery, pearl onions, and carrots. Sauté for 8 to 10 minutes, or until the carrots are just cooked. Add the flour. Cook, stirring constantly, for about 2 minutes. Add the broth, cognac, salt, and white pepper. Bring to a boil, stirring with a wooden spoon to incorporate the flour. Simmer until thickened, a few minutes. Off the heat, stir in the heavy cream, herbs, chicken, and peas. Ladle the filling into oven-safe ramekins or soup bowls (be sure they are oven proof up to 425°F). The filling should come up no more than three-quarters of the way to the top of the bowls. If you have extra, make another bowl. Brush the outside edges of each bowl with an egg wash. Place the cold dough rounds over the soup bowls, pressing firmly around the edges so that the dough adheres, and then brush the top of the dough with the egg wash. Using a sharp knife, make a ½-inch slit in the top of each pie. Bake for 20 to 25 minutes, or until the pastry is a rich golden brown. Let cool for about 10 minutes, then use a wide spatula to carefully transfer the hot ramekins to serving plates. Sprinkle a few fresh thyme sprigs over top of the bowls and serve. For this recipe, you’ll need oven-safe (up to 425°F) soup bowls. To make four servings, use bowls with an 18 to 20-oz capacity. To make six servings, use bowls with a 12 to 14-oz capacity. Note: This recipe has been written by Jenn Segal and republished on MudMatter with Author’s Permission. Please find the original link here – Chicken Pot Pie.
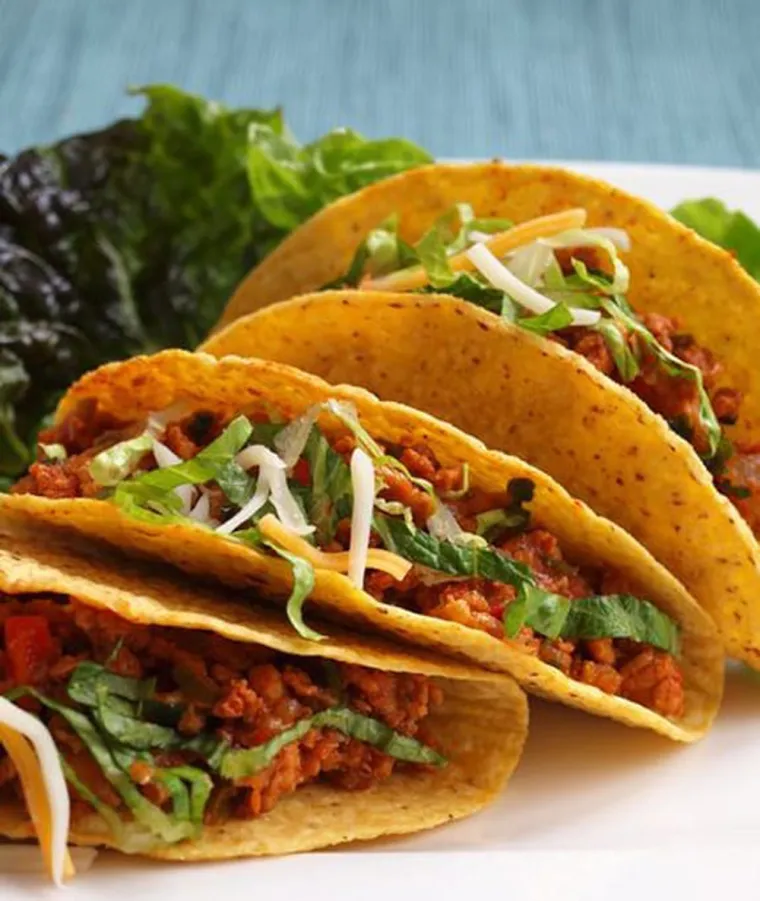
Chicken Tacos
These chicken tacos are a healthier spin on traditional beef tacos — and they’re just as good, if not better. When my kids were little, I came up with some weeknight traditions to make dinnertime special and fun for my family. One of our favorites was Taco Tuesdays. The kids would come home from school on Tuesdays all “Yay, it’s taco night!” and it made deciding what to make for dinner easy for me. We made all sorts of different tacos — shrimp tacos, carne asada tacos, and Baja fish tacos — but these chicken tacos were always the kids’ favorite. Even now as young adults, they still love them! They’re a healthier spin on hard-shell beef tacos, and they’re just as good, if not better. What you’ll need to make Chicken Tacos Step-by-Step Instructions To make them, begin by chopping the vegetables. You can do this in a food processor if you like; just be sure not to purée them. Normally, I don’t believe in hiding vegetables but in this case, I dice them very small so my kids don’t notice them (or at least they can’t pick them out). I figure what they don’t know won’t hurt them, and one night where I’m not nagging them to eat their vegetables is good for all of us. Heat the olive oil in a large pan and add the vegetables. Cook over medium heat for 10-15 minutes, until soft. Add ground chicken and spices use a wooden spoon to break chicken into small pieces. Turn the heat to high and use a wooden spoon to break the chicken into small clumps; cook until the chicken is partially cooked, about 5 minutes. Add the tomato sauce, then turn the heat down to low. Simmer, stirring occasionally and breaking chicken into smaller clumps, for 10-15 minutes or until chicken is cooked through. Sprinkle with fresh chopped cilantro, then taste and adjust seasoning if necessary. Meanwhile, heat the shells in the oven. To serve, spoon the chicken inside the shells and top with shredded lettuce and cheese. Note: This recipe has been written by Jenn Segal and republished on MudMatter with Author’s Permission. Please find the original link here – Chicken Tacos.
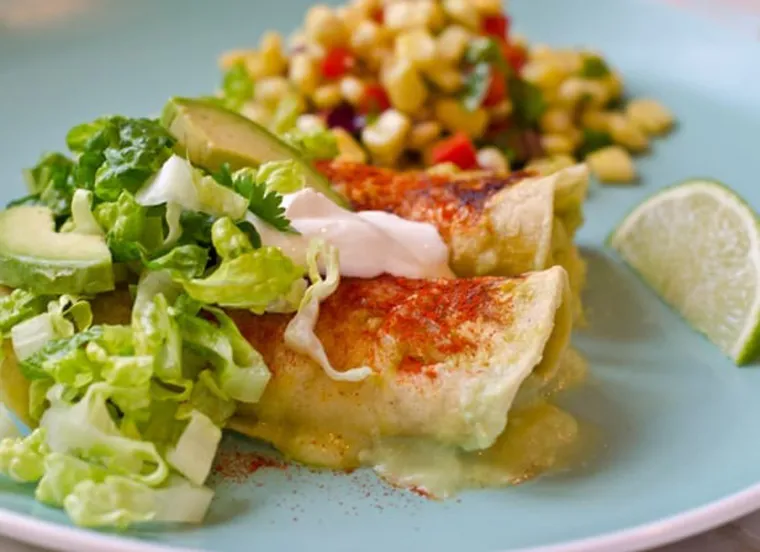
Chicken Enchiladas with Tomatillo Sauce
Light and fresh chicken enchiladas filled with tender, smoky chicken and cheddar cheese in a tangy tomatillo sauce. My whole family loves these chicken enchiladas. They take a bit of time to make, but you can make the sauce and filling ahead of time, then assemble and bake the enchiladas another time for a quick and easy weeknight meal. Most chicken enchilada recipes call for dark meat because it stays moist. This is important because the chicken is cooked twice: once in preparing the filling and then again in heating the assembled dish. However, I like to use chicken tenderloins; they’re much easier to prep than dark meat and, unlike boneless breasts, they stay tender even if slightly overcooked. Plus, tenderloins are usually sold in convenient one-pound packs, which is exactly how much you’ll need. The sauce for this dish is made with tomatillos. If you’re unfamiliar with them, they look like small green tomatoes covered by a papery husk. They’re related to tomatoes but have a distinctive tart flavor. (Note that they are not the same as green tomatoes, which are simply unripe tomatoes.) You can find them in most grocery stores. Finally, this recipe calls for three jalapeño peppers, which I know seems like a lot. Don’t worry, as long as you remove the fiery ribs and seeds, the enchiladas won’t be spicy. When you taste the sauce on its own, it will have a little kick but once you put the dish together it will be mild enough even for young children. If you’d like more heat, throw in some of the seeds. (Always wear gloves and/or wash your hands very well after working with jalapeños, and keep your hands away from your eyes!) How to make chicken enchiladas Begin by making the tomatillo sauce. Cook the onions and garlic in olive oil until soft (no need to chop them too finely since it all gets puréed in the end). Add the tomatillos, jalapeños, sugar, salt, cumin and 1/3 cup water. Simmer until the tomatillos are soft. Then, transfer the mixture to a blender and purée until completely smooth. Set the sauce aside and start the filling. Season the chicken with the cumin, smoked paprika and salt. Sauté the chicken in olive oil until just cooked through, about 2 minutes per side, then set aside to cool. Once cool, shred the chicken into bite-sized pieces. Tenderloins all have a tough tendon running through them; just remove it. In the same pan that you cooked the chicken in, cook the onions until soft Remove the pan from the heat, then add the shredded chicken along with the cilantro and shredded cheese. That’s your filling. You can make the dish ahead of time up to this point. To assemble the enchiladas, begin by smearing 3/4 cup of the tomatillo sauce on the bottom of a 9 x 13-inch baking dish. Next, brush each tortilla on both sides with oil. Stack them on a plate and microwave until hot and steamy, about 2 minutes. This makes them pliable; if you skip this step, they’ll shred to pieces when you roll them. Spoon the filling down the middle of each tortilla. Then roll tightly with your hands. Place the enchiladas side by side, seam side down, in the prepared baking dish. Pour the remaining sauce over top. Spread the sauce evenly over the tortillas, then sprinkle with more grated cheese. Bake until sauce is hot and bubbling and cheese is melted, 15-20 minutes. Sprinkle the enchiladas with smoked paprika — it makes them look pretty but also adds more delicious smoky flavor. Serve immediately with shredded lettuce, sour cream, sliced avocado, and lime wedges. Enjoy! Note: My starting point for this recipe was a similar version in Cook’s Illustrated. I made a lot of changes, but the tomatillo sauce is very similar to the original recipe. Note: This recipe has been written by Jenn Segal and republished on MudMatter with Author’s Permission. Please find the original link here – Chicken Enchiladas with Tomatillo Sauce.
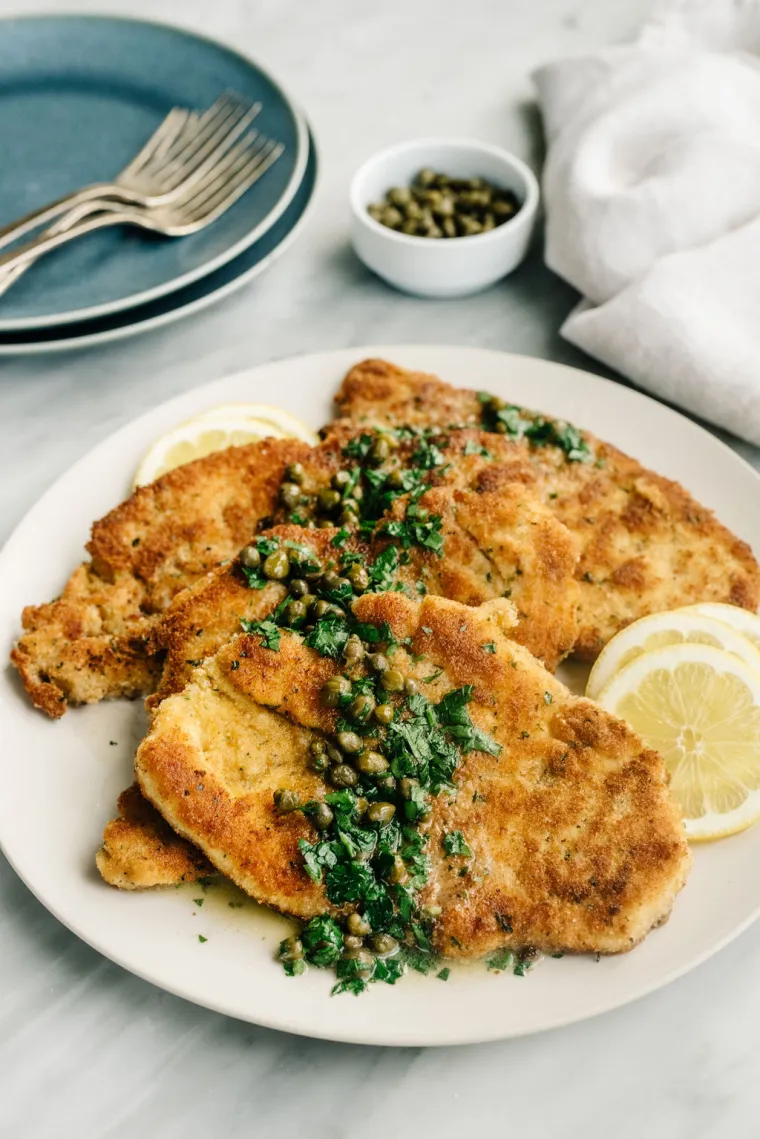
Chicken Piccata
The whole family will love this chicken piccata — and the dish comes together in a flash. When it’s 5:30 PM and I’m staring blankly into the fridge at a package of boneless chicken breasts, wondering what the heck am I going to make for dinner, it’s often chicken piccata to the rescue. Crispy chicken cutlets in a lemony butter and caper sauce, chicken piccata is one of those quick and easy suppers that makes everyone at the table happy. My kids like the chicken plain, while Michael and I love the lemony, briny notes in the butter sauce. Capers definitely fall into the love-’em-or-hate-’em category, so feel free to leave them out if you’re not a fan. Chicken piccata pairs well with many easy sides, such as buttered angel hair pasta, roasted vegetables, mashed potatoes or couscous. That means you can go from “what’s for dinner?” to “dinner’s on the table!” in less than 30 minutes. How To Make Chicken Piccata Begin by prepping the chicken breasts. First slice each chicken breast in half horizontally. Place the chicken breasts in a large sealable plastic bag and, using a meat mallet or rolling pin, pound them to an even 1/4-inch thickness. This ensures that they cook quickly and evenly. (I use a sealable plastic bag to pound the chicken because it can also be used in the next step to easily coat the chicken with flour.) To the bag, add the flour, 3/4 teaspoon salt, and 1/4 teaspoon pepper; seal and shake to combine. Add the chicken to the bag. Then seal and shake to coat the chicken evenly. Beat the eggs in a large, shallow bowl. In another large, shallow bowl, mix the bread crumbs with 1/4 teaspoon salt. Using tongs (or your hands), dip each chicken breast first in the egg mixture, turning to coat evenly and letting any excess egg drip off, and then into the bread crumbs, turning to coat evenly. This 3-step breading method (flour + eggs + bread crumbs) ensures that the coating adheres. Heat the oil in a large sauté pan over medium-high heat. Add the chicken to the pan and cook for until the first side is golden brown, 2 to 3 minutes. Flip the chicken and cook until the second side is golden, about 2 minutes more. Transfer the chicken to the prepared baking sheet and place in the oven while you make the sauce. (Note: the chicken should be almost fully cooked at this point. Don’t leave it in the oven for more than 5 minutes or it will overcook.) Transfer the chicken to the prepared baking sheet and place in the oven while you make the sauce. (Note: the chicken should be almost fully cooked at this point. Don’t leave it in the oven for more than 5 minutes or it will overcook.) Off the heat, swirl in the butter. Add the parsley. Taste and adjust seasoning with salt and pepper, if necessary. Remove the chicken piccata from the oven and transfer to plates. Spoon the sauce over top and enjoy! Note: This recipe has been written by Jenn Segal and republished on MudMatter with Author’s Permission. Please find the original link here – Chicken Piccata.
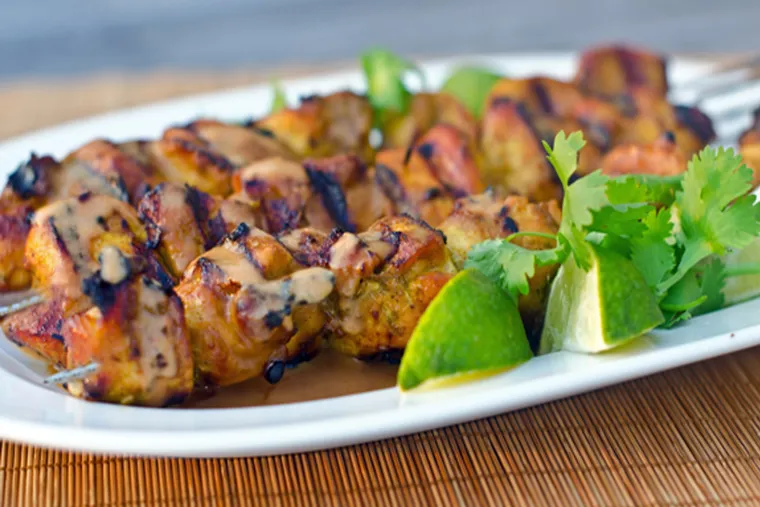
Grilled Thai Curry Chicken Skewers with Coconut-Peanut Sauce
From food writer Alice Currah, these grilled Thai curry chicken skewers are a crowd pleaser for all ages. This recipe was passed on to me by my dear friend, Kelly Santoro. She found it in the Costco magazine but the recipe originally comes from food writer Alice Currah of the blog and book, Savory Sweet Life. The dish is a crowd-pleaser for all ages. It’s the sauce that makes it so good. My 10-year-old son, upon taking a second helping of the broccoli I served alongside, answered my surprised look with, “Mom, this sauce would make anything taste good.” I have to agree: I was tempted to forget the chicken entirely and just have the sauce as soup! What You’ll Need To Make Grilled Thai Curry Chicken Skewers Most of the ingredients for these chicken skewers are pretty straightforward. If you’re not familiar with Thai red curry paste, it’s a blend of lemongrass, Thai ginger, fresh red chilis, and fragrant spices. Most large supermarkets carry it in the Asian food section. How To Make Grilled Thai Curry Chicken skewers Begin by pounding the chicken breasts to an even 1/2-inch thickness. This both tenderizes the meat and ensures it cooks evenly. Next, make the marinade by combining the soy sauce, brown sugar, lime zest, vegetable oil, garlic, curry powder, ginger, cardamom and salt in a bowl. Cut the chicken into chunks and combine it with the marinade. Cover and let marinate for at least 4 hours or overnight. Meanwhile, make the sauce by combining the coconut milk, peanut butter, dark brown sugar, soy sauce and red curry paste in a medium saucepan. Bring the sauce to a boil, then turn the heat down and cook a few minutes more. Finish the sauce with freshly squeezed lime juice. Once the chicken has marinated, thread the chunks onto skewers. Preheat the grill to high. To grease the grill, lightly dip a wad of paper towels in vegetable oil and, using tongs, rub the paper towels over the grates until smooth and shiny. Grill the chicken about 5 minutes per side, or until cooked through. Serve with the coconut peanut sauce and enjoy! If you have leftovers, try serving the chicken over a salad — the chilled sauce makes an excellent dressing. Note: I made several changes to the original recipe. For starters, I added a bit of salt and extra garlic to the marinade, and also swapped lime juice for lime zest as I do not like to use acidic ingredients in marinades for boneless skinless chicken breasts (they are so lean, it almost cooks the exterior of the meat and creates a leathery texture). I also pounded the chicken breasts first to tenderize them. To the sauce, I added more red curry paste and lots of fresh lime juice to brighten the flavor — otherwise, it was just too rich for my taste. To see the original recipe, click here. Note: This recipe has been written by Jenn Segal and republished on MudMatter with Author’s Permission. Please find the original link here – Grilled Thai Curry Chicken Skewers with Coconut-Peanut Sauce.
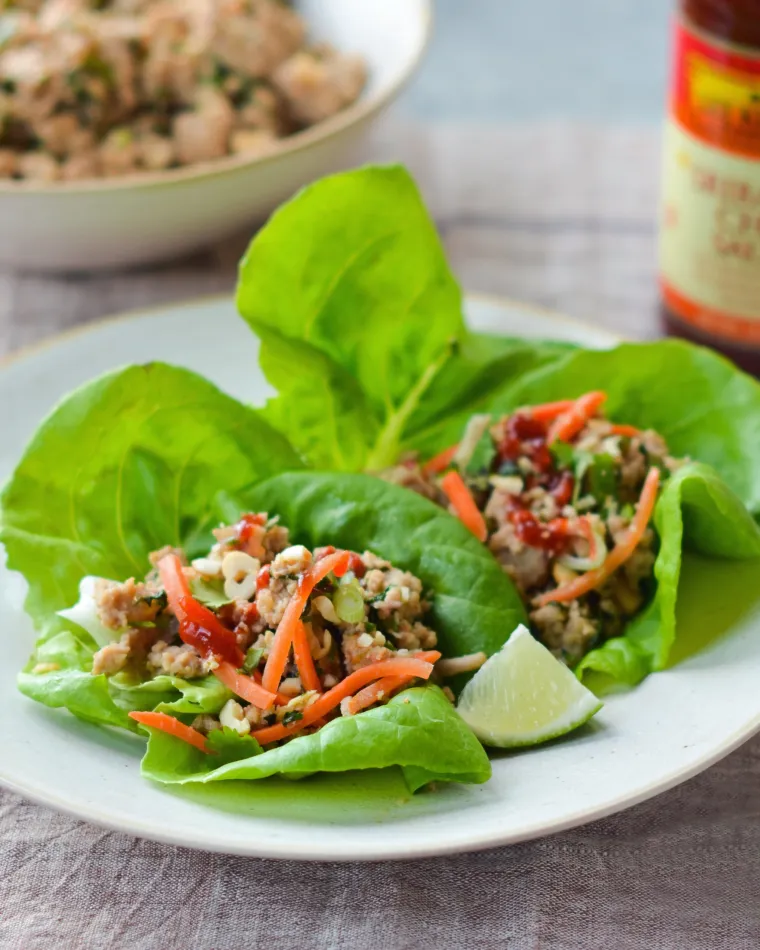
Thai-Style Minced Chicken Lettuce Cups
Based on the popular Thai dish Larb Gai, this is a quick, easy, and flavorful weeknight dinner. This recipe is based on Larb Gai, the popular Thai dish made from minced chicken, fish sauce, lime juice, chilies, and fresh herbs. You can have it on the table in 30 minutes, and it can be served in lettuce cups or over rice. What you’ll need to make Thai Minced Chicken Lettuce Cups As you can see from the photo, the recipe is inexpensive to make with ingredients found at your local supermarket. One of the key ingredients is fish sauce. Contrary to what you might expect, it doesn’t add a “fishy” taste, but rather a salty, savory, umami flavor. If you’ve never cooked with it, I’ll warn you that it smells pretty bad (my kids RUN out of the kitchen when I use it), but please don’t let that deter you — it absolutely makes the dish! If possible, buy a brand imported from Thailand or Vietnam, and don’t worry about buying a large bottle; it keeps forever. Step-by-Step Instructions For the chicken, begin by cooking the onions and ginger in oil until soft. Add the minced garlic and cook one minute more. Add the ground chicken and use a wooden spoon to break the meat apart. Add the fish sauce, soy sauce, lime zest, lime juice, brown sugar and red pepper flakes, and cook until the chicken is done. Off the heat, add the fresh cilantro, mint, scallions, and nuts. Stir to combine. Spoon into lettuce cups and serve with finely sliced carrots, herbs and Sriracha sauce. Note: This recipe has been written by Jenn Segal and republished on MudMatter with Author’s Permission. Please find the original link here – Thai-Style Minced Chicken Lettuce Cups.
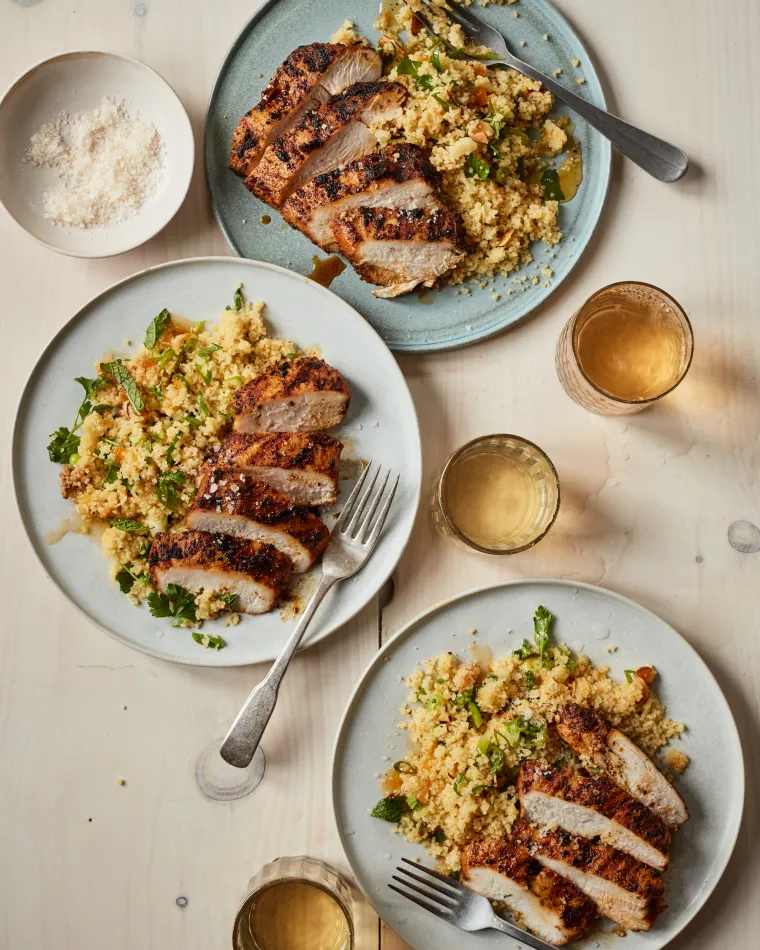
Grilled Moroccan Chicken
The spices in this grilled chicken recipe are reminiscent of ras el hanout, a North African spice blend that usually contains over a dozen spices. I love Moroccan food, especially how dishes often combine spicy, savory, and sweet flavors, and that’s the idea behind this grilled Moroccan chicken. The spices in the marinade are reminiscent of ras el hanout, a North African spice blend that usually contains more than a dozen spices, like cumin, coriander, ginger, turmeric, cinnamon, cayenne pepper, cardamom, allspice, fenugreek, and more. This dish is a real family pleaser – even small children seem to love it – and the best part is that it takes just minutes to prepare (and there’s barely any clean-up!). Pair the chicken with plain couscous or my warm couscous salad with apricot vinaigrette. What You’ll Need To Make Grilled Moroccan Chicken Step-by-step instructions Begin by pounding the chicken breasts to an even 1/2-inch thickness. This both tenderizes the meat and ensures even cooking. Left in their natural shape, the thin side of the fillet dries out while the thicker side finishes cooking. Next, make the marinade by combining the olive oil, spices, salt, garlic and sugar in a bowl or directly in a sealable plastic bag. Mix well. Place the chicken and marinade in a freezer bag, press the air out and then massage the marinade into the chicken until the breasts are evenly coated. Marinate in the fridge for 5-6 hours. When you’re ready to eat, preheat your grill to high. It’s important that the grill is very hot — you want nice grill marks and char in the short amount of time it takes to cook these. Grill just a few minutes per side for perfectly tender chicken breasts. Photo by Johnny Miller (Clarkson Potter, 2021) Note: This recipe has been written by Jenn Segal and republished on MudMatter with Author’s Permission. Please find the original link here – Grilled Moroccan Chicken.