
Suggested for you
Sachin Tendulkar
@sachin_rt
Sachin Tendulkar
@sachin_rt
Sachin Tendulkar
@sachin_rt
Sachin Tendulkar
@sachin_rt
Mastering Database Isolation Levels in SQL Server: Ensuring Data Consistency and Concurrency Control
Introduction to Database Isolation Levels:
Database isolation levels play a critical role in ensuring data consistency and managing concurrency in SQL Server. These levels define how transactions interact with each other, which directly affects the accuracy and reliability of your data. In this comprehensive guide, I will delve deeply into SQL Server’s isolation levels, offering detailed explanations, real-world scenarios, and considerations to help you make well-informed decisions.
Understanding Isolation Levels in SQL Server:
SQL Server provides four primary isolation levels, each addressing specific requirements and challenges:
1. Read Uncommitted:
Transactions can read uncommitted changes from other transactions.
Prone to issues like dirty reads, which occur when one transaction reads data modified by another uncommitted transaction.
2. Read Committed:
Allows transactions to see only committed changes made by others.
Solves dirty reads but can lead to non-repeatable reads and phantom reads.
3. Repeatable Read:
Ensures that data read within a transaction remains unchanged.
Handles both dirty and non-repeatable reads but doesn’t prevent phantom reads.
4. Serializable:
Guarantees maximum data integrity by applying read and write locks.
Eliminates dirty reads, non-repeatable reads, and phantom reads but can impact concurrency.
5. Snapshot Isolation:
A newer addition, this level maintains a versioned copy of the data for each transaction, preventing reads from blocking writes and ensuring consistent snapshots.
Implementation and Code Examples:
The process of setting isolation levels varies depending on the database system in use. For instance, SQL Server employs T-SQL commands like SET TRANSACTION ISOLATION LEVEL to specify the desired level.
SET TRANSACTION ISOLATION LEVEL READ UNCOMMITTED;
BEGIN TRANSACTION;
-- Perform your queries and operations
COMMIT;
Understanding Common Problems and Scenarios:
1. Dirty Read:
Problem: Transaction A reads data modified by Transaction B, which is later rolled back.
Solution: Higher isolation levels like Read Committed or Serializable can prevent dirty reads.
2. Lost Update:
Problem: Two transactions simultaneously update the same data, causing one update to be overwritten.
Solution: Use Repeatable Read or Serializable isolation levels to prevent lost updates.
3. Non-Repeatable Read:
Problem: Transaction A reads a row, Transaction B updates the same row, and Transaction A reads the row again, resulting in different values.
Solution: Higher isolation levels can mitigate non-repeatable reads.
4. Phantom Read:
Problem: Transaction A reads a set of rows, Transaction B inserts a new row, and Transaction A reads the set again with the new row.
Solution: Use Serializable isolation to prevent phantom reads.
Considerations When Choosing Isolation Levels:
1. Application Requirements:
Choose an isolation level that aligns with your application’s data consistency and concurrency needs.
2. Performance Impact:
Consider the trade-off between data consistency and performance. Higher isolation levels may impact concurrency and resource usage.
Conclusion:
Selecting the appropriate isolation level is a pivotal aspect of designing a robust database system. By exploring real-world scenarios and grasping the intricacies of problems like dirty reads, lost updates, non-repeatable reads, and phantom reads, you can make well-informed decisions to ensure both data consistency and effective concurrency control. Understanding SQL Server’s isolation levels empowers you to architect reliable and high-performing database solutions.
Introduction:
In modern web development, handling concurrency and improving application responsiveness are critical aspects. ASP.NET Core offers powerful tools for managing asynchronous operations through Tasks and Threads. In this blog post, I will delve into the concepts of Tasks and Threads, understand their differences, and explore practical code examples to leverage their benefits in ASP.NET Core applications.
Introduction to Asynchronous Programming:
Asynchronous programming allows applications to perform tasks concurrently, enabling better resource utilization and responsiveness. Unlike synchronous programming, where each operation blocks the thread until completion, asynchronous operations free up threads to handle other tasks. This enhances scalability and improves the overall user experience in web applications.
Understanding Tasks in ASP.NET Core:
Tasks represent asynchronous operations in ASP.NET Core. They encapsulate a unit of work that can run concurrently with other tasks. Here’s an example of creating and running a Task in ASP.NET Core:
using System;
using System.Threading.Tasks;
public class MyService
{
public async Task<string> GetDataAsync()
{
await Task.Delay(2000); // Simulate a time-consuming operation
return "Data from asynchronous operation";
}
}
Exploring Threads in ASP.NET Core:
Threads are low-level constructs used for concurrent programming. While Tasks abstract away the complexities, Threads provide direct control over concurrency. Here’s a basic example of creating and executing a Thread in ASP.NET Core:
using System;
using System.Threading;
public class MyService
{
public void ProcessData()
{
Thread thread = new Thread(DoWork);
thread.Start();
}
private void DoWork()
{
// Perform some work on a separate thread
}
}
Asynchronous Web Requests with Tasks:
In ASP.NET Core, you can use Tasks to perform asynchronous web requests. This ensures that your application remains responsive even during time-consuming API calls. Here’s an example:
using System.Net.Http;
using System.Threading.Tasks;
public class MyService
{
private readonly HttpClient _httpClient;
public MyService(HttpClient httpClient)
{
_httpClient = httpClient;
}
public async Task<string> GetApiResponseAsync(string url)
{
HttpResponseMessage response = await _httpClient.GetAsync(url);
return await response.Content.ReadAsStringAsync();
}
}
Parallel Processing with Threads:
Threads are suitable for CPU-bound operations that can be executed concurrently. The Parallel class in ASP.NET Core allows you to execute parallel loops easily:
using System;
using System.Threading.Tasks;
public class MyService
{
public void ProcessDataParallel()
{
Parallel.For(0, 10, i =>
{
// Perform some CPU-bound work in parallel
});
}
}
Best Practices and Considerations:
When working with Tasks and Threads, it’s essential to consider error handling, performance optimization, and choosing the right approach for specific scenarios. Properly managing resources and handling exceptions will ensure a robust and reliable application.
Conclusion:
By understanding and effectively using Tasks and Threads in ASP.NET Core, developers can create responsive, scalable, and high-performance web applications. Whether handling asynchronous web requests or performing parallel processing, mastering these concepts is crucial for building modern web applications.
In conclusion, the power of asynchronous programming in ASP.NET Core lies in the ability to harness the full potential of Tasks and Threads to create efficient and responsive applications. By incorporating these techniques into your development workflow, you can build applications that deliver exceptional user experiences and perform optimally under various conditions.
I am Kawser Hamid. Please find original article here, Asynchronous Programming in ASP.NET Core: Demystifying Tasks and Threads.
Introduction:
In the world of ASP.NET Core development, design patterns play a crucial role in creating maintainable, flexible, and scalable applications. One such essential pattern is the Factory Method design pattern. In this blog post, I will explore the Factory Method pattern and its implementation in ASP.NET Core with a real-world example.
Factory Method Design Pattern:
The Factory Method pattern is a creational design pattern that provides an interface for creating objects in a super class, but allows subclasses to alter the type of objects that will be created. This pattern promotes loose coupling between client code and the objects it creates, enabling easier extension and modification of the codebase.
Core Components of the Factory Method Pattern in ASP.NET Core:
Creator: The abstract class or interface that declares the factory method for creating objects.
Concrete Creator: Subclasses that implement the factory method to create specific objects.
Product: The abstract class or interface that defines the interface of objects the factory method creates.
Concrete Product: The classes that implement the Product interface and represent the objects created by the factory method.
Example: Creating Different Payment Gateways with Factory Method
Let’s demonstrate the Factory Method pattern in ASP.NET Core with an example of creating different payment gateways.
1. Create the Product interface – IPaymentGateway.cs
public interface IPaymentGateway
{
void ProcessPayment(decimal amount);
}
2. Implement Concrete Products – PayPalGateway.cs and StripeGateway.cs
public class PayPalGateway : IPaymentGateway
{
public void ProcessPayment(decimal amount)
{
// Integration code for processing payment through PayPal API
Console.WriteLine($"Processing payment of {amount} USD using PayPal Gateway...");
}
}
public class StripeGateway : IPaymentGateway
{
public void ProcessPayment(decimal amount)
{
// Integration code for processing payment through Stripe API
Console.WriteLine($"Processing payment of {amount} USD using Stripe Gateway...");
}
}
3. Create the Creator abstract class – PaymentGatewayFactory.cs
public abstract class PaymentGatewayFactory
{
public abstract IPaymentGateway CreateGateway();
}
4. Implement Concrete Creators – PayPalGatewayFactory.cs and StripeGatewayFactory.cs
public class PayPalGatewayFactory : PaymentGatewayFactory
{
public override IPaymentGateway CreateGateway()
{
return new PayPalGateway();
}
}
public class StripeGatewayFactory : PaymentGatewayFactory
{
public override IPaymentGateway CreateGateway()
{
return new StripeGateway();
}
}
5. Client Code – Startup.cs (ConfigureServices method)
public void ConfigureServices(IServiceCollection services)
{
// Register the desired payment gateway factory based on configuration or user selection
services.AddScoped<PaymentGatewayFactory, PayPalGatewayFactory>();
//services.AddScoped<PaymentGatewayFactory, StripeGatewayFactory>();
}
6. Client Code – PaymentController.cs
public class PaymentController : ControllerBase
{
private readonly PaymentGatewayFactory _paymentGatewayFactory;
public PaymentController(PaymentGatewayFactory paymentGatewayFactory)
{
_paymentGatewayFactory = paymentGatewayFactory;
}
[HttpPost("process-payment")]
public IActionResult ProcessPayment(decimal amount)
{
IPaymentGateway gateway = _paymentGatewayFactory.CreateGateway();
gateway.ProcessPayment(amount);
return Ok("Payment processed successfully.");
}
}
Conclusion:
The Factory Method Design Pattern in ASP.NET Core provides a powerful mechanism for creating objects with loose coupling. By encapsulating the object creation process within a factory method, we can easily switch between different implementations of payment gateways without modifying the client code. This flexibility enhances the maintainability and scalability of our ASP.NET Core applications.
Through the example of creating different payment gateways, I have explored how to implement the Factory Method pattern in ASP.NET Core, allowing developers to build more organized and extensible codebases. By leveraging design patterns like Factory Method, ASP.NET Core developers can craft robust and adaptable solutions that meet the diverse requirements of modern web applications.
Please find original article here, Mastering the Factory Method Design Pattern in ASP.NET Core.
A Guide to Handling Requests and Responses
ASP.NET Core is a powerful and flexible framework for building web applications, and one of its key features is Middleware. Middleware is a crucial component that sits between the server and the application, allowing you to handle incoming HTTP requests and outgoing responses. In this blog post, we will demystify ASP.NET Core Middleware and explore how it enables you to add custom logic, modify requests, and process responses.
What is Middleware?
In ASP.NET Core, Middleware is a pipeline-based request processing mechanism. Each Middleware component in the pipeline can examine, modify, or delegate the processing of an HTTP request. The request then flows through the pipeline, passing through each Middleware, until it reaches the application or gets a response.
Middleware components are executed in the order they are added to the pipeline, and they work together to handle various tasks such as authentication, logging, routing, and caching. The ability to chain multiple Middlewares gives developers the flexibility to compose complex request handling logic efficiently.
Middleware Components
Middleware components are simple classes or functions that conform to the Middleware signature. A Middleware component has access to the HttpContext, which contains the incoming request and the outgoing response.
Here’s the signature of a Middleware component:
public delegate Task RequestDelegate(HttpContext context);
A Middleware component is a delegate that takes an HttpContext as a parameter and returns a Task. The delegate can handle the incoming request, optionally modify it, and pass it along to the next Middleware or the application itself.
Implementing Custom Middleware
Creating custom Middleware is straightforward. You can add a custom Middleware component to the pipeline using the UseMiddleware extension method in the Startup class’s Configure method.
Let’s create a simple custom Middleware that logs information about incoming requests:
public class RequestLoggerMiddleware
{
private readonly RequestDelegate _next;
public RequestLoggerMiddleware(RequestDelegate next)
{
_next = next;
}
public async Task Invoke(HttpContext context)
{
// Log information about the incoming request
var requestPath = context.Request.Path;
var requestMethod = context.Request.Method;
Console.WriteLine($"Incoming request: {requestMethod} {requestPath}");
// Call the next Middleware in the pipeline
await _next(context);
// Middleware code to execute after the request has been handled
}
}
In the example above, our custom Middleware, RequestLoggerMiddleware, logs information about the incoming request and then calls the next Middleware in the pipeline using the _next delegate.
To add the custom Middleware to the pipeline, update the Configure method in the Startup class:
public void Configure(IApplicationBuilder app)
{
app.UseMiddleware<RequestLoggerMiddleware>();
// Other Middlewares and application configuration
}
Now, whenever a request is made to your application, the RequestLoggerMiddleware will log information about the incoming request.
Ordering Middleware Components
The order of Middleware components matters, as each Middleware can influence the behavior of subsequent components. For example, if authentication Middleware is added before routing Middleware, authentication will be performed before routing the request to the appropriate controller action.
To control the order of Middleware execution, you can use the Use and Run extension methods. The Use method adds the Middleware to the pipeline, while the Run method adds a terminal Middleware that doesn’t call the next Middleware.
app.UseMiddleware<AuthenticationMiddleware>();
app.UseMiddleware<RequestLoggerMiddleware>();
app.UseMiddleware<RoutingMiddleware>();
app.Run(async context =>
{
// Terminal Middleware for handling requests without calling the next Middleware.
await context.Response.WriteAsync("Page not found.");
});
In the example above, AuthenticationMiddleware, RequestLoggerMiddleware, and RoutingMiddleware are executed in sequence, while the Run method provides a terminal Middleware to handle requests that don’t match any route.
Conclusion
ASP.NET Core Middleware is a powerful and flexible feature that enables developers to handle HTTP requests and responses in a modular and extensible manner. By creating custom Middleware components, you can add custom logic, modify requests, and process responses to build robust and feature-rich web applications. Understanding how Middleware works and its order of execution is essential for building efficient and well-organized ASP.NET Core applications.
In this blog post, I’ve explored the concept of ASP.NET Core Middleware, implemented a custom Middleware, and learned how to control the order of Middleware execution. Armed with this knowledge, you can enhance your ASP.NET Core projects with custom Middleware to handle various tasks efficiently and provide a seamless user experience.
Please find original article here, Demystifying ASP.NET Core Middleware.
Understanding Inversion of Control (IoC) Container and Lifetime Management in ASP.NET Core
In modern software development, the Inversion of Control (IoC) pattern has become a fundamental principle for building scalable and maintainable applications. The IoC pattern promotes loose coupling between classes by allowing the control of object creation and dependency resolution to be inverted or delegated to a container. In the context of ASP.NET Core, the IoC container is a core component that manages the lifetime and resolution of dependencies, making it easier to manage application dependencies and promote modular design.
In this blog post, we will explore the concept of the IoC container and understand the different dependency lifetimes supported by ASP.NET Core, accompanied by relevant code examples.
What is an IoC Container?
At its core, an IoC container is a tool that automates the process of managing object creation and dependency resolution in an application. It is responsible for instantiating objects and resolving their dependencies, removing the burden from the application code. By using an IoC container, classes can be decoupled from their dependencies, leading to more modular and testable code.
In ASP.NET Core, the built-in IoC container is based on the Microsoft.Extensions.DependencyInjection library. It is a lightweight, extensible, and feature-rich container that simplifies the management of application dependencies.
Dependency Lifetimes in ASP.NET Core
When registering services with the IoC container, you can specify different dependency lifetimes. The dependency lifetime defines how long an object (service) should exist within the container and when a new instance should be created. ASP.NET Core supports three main dependency lifetimes:
Transient: A new instance of the service is created every time it is requested from the container. Transient lifetime is suitable for lightweight, stateless services.
Scoped: A single instance of the service is created per HTTP request or service scope. Within the same HTTP request or service scope, the same instance is reused. Scoped lifetime is suitable for services that maintain state across multiple related operations within the same request.
Singleton: A single instance of the service is created and shared across the entire application. The same instance is reused for every request. Singleton lifetime is suitable for services that are stateless or should maintain global state throughout the application’s lifetime.
Example: Registering Services with Dependency Lifetimes
Let’s look at a practical example of registering services with different dependency lifetimes in an ASP.NET Core application:
// Startup.cs
using Microsoft.Extensions.DependencyInjection;
public class Startup
{
public void ConfigureServices(IServiceCollection services)
{
// Transient lifetime - A new instance is created each time it's requested.
services.AddTransient<IMyTransientService, MyTransientService>();
// Scoped lifetime - A single instance is created per HTTP request or service scope.
services.AddScoped<IMyScopedService, MyScopedService>();
// Singleton lifetime - A single instance is created and shared across the application.
services.AddSingleton<IMySingletonService, MySingletonService>();
}
}
In this example, we have registered three services with different dependency lifetimes. Now, let’s define these services:
// Services
public interface IMyTransientService
{
string GetInstanceId();
}
public class MyTransientService : IMyTransientService
{
private readonly Guid _instanceId;
public MyTransientService()
{
_instanceId = Guid.NewGuid();
}
public string GetInstanceId()
{
return _instanceId.ToString();
}
}
public interface IMyScopedService
{
string GetInstanceId();
}
public class MyScopedService : IMyScopedService
{
private readonly Guid _instanceId;
public MyScopedService()
{
_instanceId = Guid.NewGuid();
}
public string GetInstanceId()
{
return _instanceId.ToString();
}
}
public interface IMySingletonService
{
string GetInstanceId();
}
public class MySingletonService : IMySingletonService
{
private readonly Guid _instanceId;
public MySingletonService()
{
_instanceId = Guid.NewGuid();
}
public string GetInstanceId()
{
return _instanceId.ToString();
}
}
In this example, we have defined three services: MyTransientService, MyScopedService, and MySingletonService, each implementing their respective interfaces. Each service has a unique identifier generated during its instantiation.
Using Services with Different Dependency Lifetimes
Now, let’s use these services in a controller to observe how their dependency lifetimes behave:
// MyController.cs
using Microsoft.AspNetCore.Mvc;
[Route("api/[controller]")]
[ApiController]
public class MyController : ControllerBase
{
private readonly IMyTransientService _transientService;
private readonly IMyScopedService _scopedService;
private readonly IMySingletonService _singletonService;
public MyController(
IMyTransientService transientService,
IMyScopedService scopedService,
IMySingletonService singletonService)
{
_transientService = transientService;
_scopedService = scopedService;
_singletonService
= singletonService;
}
[HttpGet]
public IActionResult Get()
{
var result = new
{
TransientInstanceId = _transientService.GetInstanceId(),
ScopedInstanceId = _scopedService.GetInstanceId(),
SingletonInstanceId = _singletonService.GetInstanceId()
};
return Ok(result);
}
}
In this controller, we inject the three services as constructor parameters. We then call the GetInstanceId() method on each service and return the unique instance IDs in the HTTP response.
Conclusion
Understanding the concept of an IoC container and the different dependency lifetimes in ASP.NET Core is crucial for building modular and maintainable applications. By leveraging the IoC container, you can achieve loose coupling, improve testability, and promote good software design practices. Utilizing the appropriate dependency lifetime for each service ensures that your application performs efficiently and meets the requirements of different scenarios.
In this blog post, we explored the IoC container and the three main dependency lifetimes supported by ASP.NET Core. By applying these concepts and principles in your projects, you can create robust, scalable, and maintainable software solutions.
Remember, the IoC container is an indispensable tool in the arsenal of every software developer, enabling them to write cleaner, more modular code that is easier to maintain and extend. Embrace the IoC pattern, harness the power of the ASP.NET Core IoC container, and elevate your software development journey to new heights!
Please find original article here, IoC Container and Lifetime Management
Dependency Injection (DI) is a powerful software design pattern widely used in modern application development, including ASP.NET Core. It helps manage the complexity of large-scale applications by promoting loose coupling and increasing testability and maintainability. In this blog post, we will explore the concept of Dependency Injection, understand its benefits, and demonstrate how to implement DI in an ASP.NET Core application with relevant code examples.
What is Dependency Injection?
Dependency Injection is a design pattern that allows components to depend on abstractions (interfaces) rather than concrete implementations. It enables the separation of concerns, making the code more modular and flexible. In the context of ASP.NET Core, DI enables the injection of required services (dependencies) into classes rather than creating them directly within the class.
Benefits of Dependency Injection:
Decoupling: DI promotes loose coupling between classes, making it easier to change or replace dependencies without affecting other parts of the application.
Testability: With DI, it becomes straightforward to replace real dependencies with mock implementations during unit testing, enabling isolated and more reliable tests.
Reusability: By using interfaces and abstractions, components become more reusable across different parts of the application.
Maintainability: DI enhances code maintainability by breaking down complex components into smaller, focused classes with clear responsibilities.
Flexibility: It allows runtime configuration of dependencies, facilitating easy switch between different implementations, such as in different environments (development, production).
Dependency Injection (DI) can be categorized into three main types:
Constructor Injection:
Constructor Injection is the most common and recommended type of DI. In this type, dependencies are injected into a class through its constructor. The class declares its dependencies as constructor parameters, and the DI container provides the appropriate implementations when creating instances of the class. This promotes a clear and explicit declaration of dependencies, making the class easier to understand and test.
Example of Constructor Injection:
public class ProductService : IProductService
{
private readonly IProductRepository _productRepository;
// Constructor Injection - The IProductRepository dependency is injected into ProductService.
public ProductService(IProductRepository productRepository)
{
_productRepository = productRepository;
}
// Other methods...
}
Property Injection:
In Property Injection, dependencies are set using public properties of the class. The DI container sets the property values after creating the instance of the class. Property Injection is less preferred compared to Constructor Injection because it hides the class’s dependencies and makes it less clear which dependencies are required.
Example of Property Injection:
public class ProductService : IProductService
{
// Property Injection - The IProductRepository dependency is set using a public property.
public IProductRepository ProductRepository { get; set; }
// Other methods...
}
Method Injection:
Method Injection involves passing dependencies to a method as parameters. This type of DI is used when a class needs a dependency only for a specific method and not throughout its lifetime. Method Injection is less common and typically used in scenarios where a specific method requires additional dependencies not used by other methods in the class.
Example of Method Injection:
public class ProductService : IProductService
{
// Method Injection - The IProductRepository dependency is passed as a parameter.
public void ProcessProduct(IProductRepository productRepository)
{
// Method logic using the provided productRepository...
}
// Other methods...
}
It’s essential to choose the appropriate DI type based on the specific needs of your application. Constructor Injection is generally recommended due to its explicit declaration of dependencies and ease of testing. Property Injection and Method Injection is useful in certain scenarios but should be used with caution to maintain code readability and avoid potential pitfalls.
Implementing Dependency Injection in ASP.NET Core:
Let’s walk through an example of implementing DI in an ASP.NET Core application with the following project structure:
├── src
│ ├── Core # Contains the core business logic and domain models
│ ├── Infrastructure # Contains infrastructure concerns such as data access, external services
│ └── UI # Contains the user interface layer, including controllers, views, etc.
1. Define Interfaces:
In the Core project, create interfaces for services that will be injected into other classes. For example, IProductService and IProductRepository.
// IProductService.cs
public interface IProductService
{
Task<IEnumerable<ProductViewModel>> GetProducts();
// Other methods...
}
// IProductRepository.cs
public interface IProductRepository
{
Task<IEnumerable<Product>> GetAll();
// Other methods...
}
2. Implement Services and Repositories:
In the Infrastructure project, implement the services and repositories defined in the Core project.
// ProductService.cs
public class ProductService : IProductService
{
private readonly IProductRepository _productRepository;
public ProductService(IProductRepository productRepository)
{
_productRepository = productRepository;
}
public async Task<IEnumerable<ProductViewModel>> GetProducts()
{
var products = await _productRepository.GetAll();
// Map and return view models...
}
// Other methods...
}
// ProductRepository.cs
public class ProductRepository : IProductRepository
{
private readonly ApplicationDbContext _dbContext;
public ProductRepository(ApplicationDbContext dbContext)
{
_dbContext = dbContext;
}
public async Task<IEnumerable<Product>> GetAll()
{
return await _dbContext.Products.ToListAsync();
}
// Other methods...
}
3. Register Services in Startup:
In the Startup.cs file of the UI the project, configure DI by registering services.
public void ConfigureServices(IServiceCollection services)
{
services.AddDbContext<ApplicationDbContext>(options =>
options.UseSqlServer(Configuration.GetConnectionString("DefaultConnection")));
services.AddScoped<IProductService, ProductService>();
services.AddScoped<IProductRepository, ProductRepository>();
// Other service registrations...
services.AddControllersWithViews();
}
4. Utilize Dependency Injection:
Finally, utilize DI in the controllers or other classes that require the services.
public class ProductController : Controller
{
private readonly IProductService _productService;
public ProductController(IProductService productService)
{
_productService = productService;
}
public async Task<IActionResult> Index()
{
var products = await _productService.GetProducts();
return View(products);
}
// Other actions...
}
Conclusion:
Dependency Injection is a crucial aspect of building scalable and maintainable applications. In ASP.NET Core, it allows for the decoupling of components, increases testability, and enhances code maintainability. By utilizing interfaces and registering services in the Startup class, we can easily implement DI in our projects. This approach helps to achieve a clean, organized, and robust architecture that is highly beneficial for long-term project success.
Implementing DI in your projects can lead to more maintainable, testable, and flexible applications, allowing you to focus on delivering value to your users while maintaining a high level of code quality.
Note: This article has been written by Kawser Hamid and republished on MudMatter with Author’s Permission. Please find the original link here – Understanding Dependency Injection: A Practical Guide with Code Examples.
Introduction:
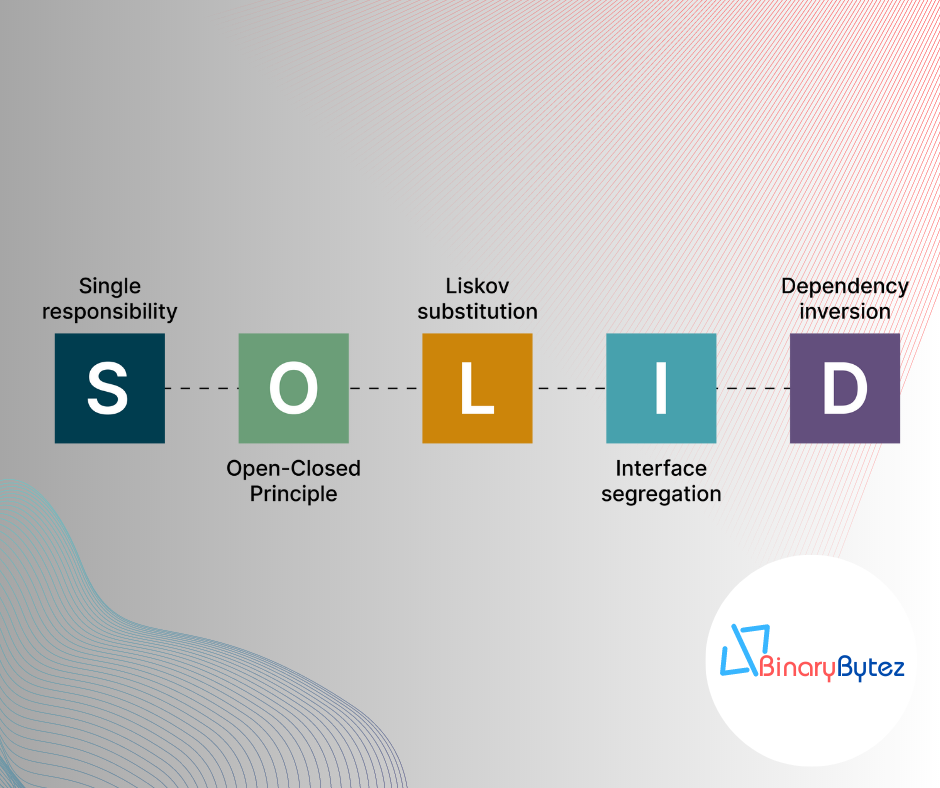
In the dynamic world of software development, writing maintainable and scalable code is crucial to the success of any project. SOLID design principles provide a set of guidelines that can help developers achieve precisely that. Developed by Robert C. Martin (Uncle Bob), these principles have become a cornerstone of modern software architecture. In this blog post, we will dive deep into each SOLID principle, understand its significance, and learn how to apply them with practical coding examples.
1. Single Responsibility Principle (SRP):
The Single Responsibility Principle states that a class should have only one reason to change. In other words, a class should have a single responsibility or task. Let’s see how we can apply this principle to a sample application.
// Bad Practice - One class with multiple responsibilities
class OrderProcessingService
{
public void ProcessOrder(Order order)
{
// ... Process the order ...
}
public void SendEmailConfirmation(Order order)
{
// ... Send email confirmation ...
}
public void GenerateInvoice(Order order)
{
// ... Generate the invoice ...
}
}
// Good Practice - Separate classes with single responsibility
class OrderProcessor
{
public void ProcessOrder(Order order)
{
// ... Process the order ...
}
}
class EmailService
{
public void SendEmailConfirmation(Order order)
{
// ... Send email confirmation ...
}
}
class InvoiceGenerator
{
public void GenerateInvoice(Order order)
{
// ... Generate the invoice ...
}
}
By following SRP, we ensure that each class has a clear purpose, making the code more modular, maintainable, and easier to understand.
2. Open-Closed Principle (OCP):
The Open-Closed Principle suggests that software entities should be open for extension but closed for modification. This means we should be able to extend the behavior of a class without modifying its existing code. Let’s explore how we can implement this principle.
// Bad Practice - Modifying existing class
class Shape
{
public virtual double Area()
{
// ... Calculate area ...
}
}
class Circle : Shape
{
public override double Area()
{
// ... Calculate circle area ...
}
}
class Square : Shape
{
public override double Area()
{
// ... Calculate square area ...
}
}
// Good Practice - Extending behavior through interfaces
interface IShape
{
double Area();
}
class Circle : IShape
{
public double Area()
{
// ... Calculate circle area ...
}
}
class Square : IShape
{
public double Area()
{
// ... Calculate square area ...
}
}
By using interfaces, we adhere to OCP and create more flexible and adaptable systems that can be easily extended without altering existing code.
3. Liskov Substitution Principle (LSP):
The Liskov Substitution Principle emphasizes that objects of derived classes should be substitutable for objects of the base class without affecting program correctness. Let’s see how we can maintain LSP.
// Bad Practice - Violating LSP
class Bird
{
public virtual void Fly()
{
// ... Fly like a bird ...
}
}
class Penguin : Bird
{
public override void Fly()
{
throw new NotSupportedException("Penguins cannot fly.");
}
}
// Good Practice - Upholding LSP
interface IFlyable
{
void Fly();
}
class Bird : IFlyable
{
public void Fly()
{
// ... Fly like a bird ...
}
}
class Penguin : IFlyable
{
public void Fly()
{
// Penguins cannot fly, but still conform to the interface.
}
}
By following LSP, we ensure that derived classes can seamlessly replace their base class counterparts, promoting code consistency and maintainability.
4. Interface Segregation Principle (ISP):
The Interface Segregation Principle advises segregating interfaces into smaller, focused ones, rather than having large, monolithic interfaces. This promotes a more granular and concise design. Let’s see how to implement ISP.
// Bad Practice - Large, monolithic interface
interface IWorker
{
void Work();
void Eat();
void Sleep();
}
class Robot : IWorker
{
// Implementing unnecessary methods for a robot.
}
class Human : IWorker
{
// Implementing unnecessary methods for a human.
}
// Good Practice - Segregated interfaces
interface IWorkable
{
void Work();
}
interface IEatable
{
void Eat();
}
interface ISleepable
{
void Sleep();
}
class Robot : IWorkable
{
public void Work()
{
// ... Robot work logic ...
}
}
class Human : IWorkable, IEatable, ISleepable
{
public void Work()
{
// ... Human work logic ...
}
public void Eat()
{
// ... Human eat logic ...
}
public void Sleep()
{
// ... Human sleep logic ...
}
}
By adhering to ISP, we create leaner and more focused interfaces, enabling better code maintainability and adaptability.
5. Dependency Inversion Principle (DIP):
The Dependency Inversion Principle suggests relying on abstractions rather than concrete implementations. High-level modules should not depend on low-level modules; both should depend on abstractions. Let’s apply DIP.
// Bad Practice - High-level module depends on low-level module
class OrderProcessor
{
private readonly EmailService _emailService;
public OrderProcessor()
{
_emailService = new EmailService();
}
public void ProcessOrder(Order order)
{
// ... Process the order ...
_emailService.SendEmailConfirmation(order);
}
}
// Good Practice - High-level module depends on abstraction
interface IEmailService
{
void SendEmailConfirmation(Order order);
}
class EmailService : IEmailService
{
public void SendEmailConfirmation(Order order)
{
// ... Send email confirmation ...
}
}
class OrderProcessor
{
private readonly IEmailService _emailService;
public OrderProcessor(IEmailService emailService)
{
_emailService = emailService;
}
public void ProcessOrder(Order order)
{
// ... Process the order ...
_emailService.SendEmailConfirmation(order);
}
}
By following DIP, we promote loose coupling and enable easier testing, extensibility, and a more modular design.
Conclusion:
Incorporating SOLID principles in your software development journey can be transformational. These principles empower developers to write cleaner, more maintainable, and extensible code, which results in robust and scalable software solutions. As you apply SRP, OCP, LSP, ISP, and DIP in your projects, you’ll witness the growth of your coding prowess and the emergence of truly clean code that stands the test of time. Embrace SOLID principles and elevate your coding skills to new heights!
Note: This article has been written by Kawser Hamid and republished on MudMatter with Author’s Permission. Please find the original link here – Mastering SOLID Design Principles: A Blueprint for Clean Code.
Understanding Clean Architecture is crucial for building maintainable and scalable software. Let’s provide a concise explanation of Clean Architecture:
Clean Architecture: A Brief Explanation
Clean Architecture is a software architecture pattern that emphasizes the separation of concerns and the independence of the application’s business logic from external concerns like frameworks, databases, and user interfaces. It was popularized by Robert C. Martin (Uncle Bob) and aims to create a maintainable and flexible codebase that can withstand changes over time.
Key Concepts:
Separation of Concerns: Clean Architecture promotes dividing the application into distinct layers, each with its specific responsibilities. This separation enables changing one part of the system without affecting the other parts.
Dependency Rule: The inner layers should not depend on the outer layers. Business logic and core functionality reside in the innermost layer, which should have no knowledge of external frameworks or technologies.
Dependency Inversion Principle (DIP): High-level modules should not depend on low-level modules; both should depend on abstractions. This principle fosters a flexible and maintainable codebase by decoupling concrete implementations from abstractions.
Entities: Core domain models representing business entities exist at the heart of the architecture. They are independent of the external layers and encapsulate core business rules.
Use Cases (Interactors): Use cases represent application-specific operations or business workflows. They contain the application’s business logic and orchestrate interactions between entities and external layers.
Interface Adapters: These adapters convert data between the use cases and external components, such as databases, web services, or user interfaces. They allow the use cases to remain independent of external technologies.
Frameworks and Drivers: The outermost layer is responsible for interacting with external frameworks, databases, and user interfaces. It should not contain business logic but should adapt the data to and from the use cases.
Benefits of Clean Architecture:
Maintainability: The separation of concerns makes it easier to maintain and modify the application over time, as changes in one part don’t affect the others.
Testability: Clean Architecture promotes testability by allowing isolated testing of use cases and business rules without involving external dependencies.
Flexibility: The architecture’s decoupling allows for easy replacement of technologies or frameworks without significant changes to the core application.
Scalability: The modular structure of Clean Architecture facilitates scaling the application by adding or modifying modules as needed.
Focus on Business Logic: Clean Architecture helps developers focus on implementing core business rules rather than being bogged down by external concerns.
Sample Structure of the Clean Architecture Project:
├── src
│ ├── Core # Contains the core business logic and domain models, view models, etc.
│ │ ├── Entities # Contains domain models/entities
│ │ │ ├── Product.cs # Sample domain model (can have more entities)
│ │ │ └── ...
│ │ ├── Services # Contains business logic services
│ │ │ ├── IProductService.cs # Sample service interface
│ │ │ ├── ProductService.cs # Sample service implementation
│ │ │ └── ...
│ │ └── ...
│ ├── Infrastructure # Contains infrastructure concerns such as data access, external services, etc.
│ │ ├── Data # Contains data access related classes
│ │ │ ├── ApplicationDbContext.cs # Sample DbContext class
│ │ │ ├── ProductRepository.cs # Sample repository implementation
│ │ │ └── ...
│ │ ├── ExternalServices # Contains code for external services integration
│ │ │ ├── EmailService.cs # Sample external service integration
│ │ │ └── ...
│ │ └── ...
│ └── UI # Contains the user interface layer, including controllers, views, and extensions, etc.
│ ├── Controllers # Contains controllers for handling HTTP requests and responses
│ │ ├── ProductController.cs # Sample controller
│ │ └── ...
│ ├── Views # Contains views for rendering UI components
│ │ ├── Product # Folder for Product-related views
│ │ │ ├── Index.cshtml # Sample view for displaying products
│ │ │ ├── Create.cshtml # Sample view for creating a new product
│ │ │ ├── Edit.cshtml # Sample view for editing an existing product
│ │ │ └── ...
│ │ └── ...
│ └── ...
├── UnitTest
│ ├── Core.Tests # Contains unit tests for the core layer
│ │ ├── ProductServiceTests.cs # Sample unit test for ProductService
│ │ └── ...
│ ├── Infrastructure.Tests # Contains unit tests for the infrastructure layer
│ │ ├── ProductRepositoryTests.cs # Sample unit test for ProductRepository
│ │ └── ...
│ ├── UI.Tests # Contains unit tests for the UI layer
│ │ ├── ProductControllerTests.cs # Sample unit test for ProductController
│ │ └── ...
│ └── ...
└── README.md # Project documentation
Please note that this is a simplified representation of the project structure, and in a real-world application, you may have more folders and files based on your specific requirements. The above structure adheres to the Clean Architecture principles, with a clear separation of concerns between the core domain logic, infrastructure concerns (data access and external services), and the user interface layer. The tests folder contains separate test projects for each layer, allowing you to write unit tests to ensure the functionality of each component.
Core:
Contains the core business logic, including domain models and services.
This layer represents the heart of the application, encapsulating the essential business rules and entities.
├── Core
│ ├── Entities # Domain entities representing business objects
│ │ └── User.cs # Example entity class representing a user
│ ├── Services # Business logic and services
│ │ └── UserService.cs # Example service class for user-related operations
│ └── ..
Example Code:
// Core/Entities/User.cs
namespace Core.Entities
{
public class User
{
public int Id { get; set; }
public string Name { get; set; }
public string Email { get; set; }
// Other properties and methods relevant to the user entity
}
}
// Core/Services/UserService.cs
using Core.Entities;
using System.Threading.Tasks;
namespace Core.Services
{
public class UserService
{
public async Task<User> GetUserByIdAsync(int userId)
{
// Logic to retrieve user from data source (e.g., database)
}
// Other methods for user-related operations
}
}
Infrastructure:
Contains infrastructure concerns such as data access and external services.
Repository implementations and database context reside here.
├── Infrastructure
│ ├── Data # Data access layer
│ │ ├── Repositories # Repository implementations
│ │ │ └── UserRepository.cs # Example repository for user entity
│ │ └── AppDbContext.cs # Entity Framework Core database context
│ └── ...
Example Code:
// Infrastructure/Data/Repositories/UserRepository.cs
using Core.Entities;
using Core.Interfaces;
using Microsoft.EntityFrameworkCore;
using System.Collections.Generic;
using System.Threading.Tasks;
namespace Infrastructure.Data.Repositories
{
public class UserRepository : IRepository<User>
{
private readonly AppDbContext _context;
public UserRepository(AppDbContext context)
{
_context = context;
}
public async Task<IEnumerable<User>> GetAllUsersAsync()
{
return await _context.Users.ToListAsync();
}
// Other CRUD methods for the user entity
}
}
// Infrastructure/Data/AppDbContext.cs
using Core.Entities;
using Microsoft.EntityFrameworkCore;
namespace Infrastructure.Data
{
public class AppDbContext : DbContext
{
public DbSet<User> Users { get; set; }
public AppDbContext(DbContextOptions<AppDbContext> options)
: base(options)
{
}
}
}
API:
Contains the API layer, including controllers and extensions.
This layer exposes endpoints and handles HTTP requests.
├── API
│ ├── Controllers # API controllers
│ │ └── UserController.cs # Example controller for user-related actions
│ ├── Extensions # Extension methods for configuring services
│ └── ...
Example Code:
// API/Controllers/UserController.cs
using Core.Entities;
using Core.Services;
using Microsoft.AspNetCore.Mvc;
using System.Collections.Generic;
using System.Threading.Tasks;
namespace API.Controllers
{
[ApiController]
[Route("api/[controller]")]
public class UserController : ControllerBase
{
private readonly UserService _userService;
public UserController(UserService userService)
{
_userService = userService;
}
[HttpGet]
public async Task<ActionResult<IEnumerable<User>>> GetUsers()
{
var users = await _userService.GetAllUsersAsync();
return Ok(users);
}
// Other CRUD actions for user entity
}
}
Unit Testing:
Core.Tests
Contains unit tests for the core layer.
These tests ensure the correctness of core business logic and services.
Infrastructure.Tests
Contains unit tests for the infrastructure layer.
These tests validate data access and repository implementations.
API.Tests
Contains unit tests for the API layer.
These tests verify the functionality of API controllers and endpoints.
Conclusion:
Clean Architecture is a powerful pattern that promotes code organization, testability, and maintainability. By following its principles, developers can create robust and adaptable software that stands the test of time and can accommodate future changes and enhancements with ease.
Note: This article has been written by Kawser Hamid and republished on MudMatter with Author’s Permission. Please find the original link here – Understanding Clean Architecture.
This template is for a clean structured ASP.NET Core API project, following the RESTful principles, Clean Architecture principles, SOLID design principles, implementing the Dependency Injection, Repository, and Unit of Work design pattern, and utilizing Entity Framework Core for data access. It provides a standardized structure and organization for building robust and maintainable ASP.NET Core API applications with complete CRUD (Create, Read, Update, Delete) operations.
Project Structure
The project structure is designed to promote separation of concerns and modularity, making it easier to understand, test, and maintain the application.
├── src
│ ├── Core # Contains the core business logic, domain models, view models, etc.
│ ├── Infrastructure # Contains infrastructure concerns such as data access, external services, etc.
│ └── API # Contains the API layer, including controllers, extensions, etc.
├── tests
│ ├── Core.Tests # Contains unit tests for the core layer
│ ├── Infrastructure.Tests # Contains unit tests for the infrastructure layer
│ └── API.Tests # Contains unit tests for the API layer
└── README.md # Project documentation (you are here!)
REST API
The API project contains the controllers responsible for handling HTTP requests and responses, adhering to RESTful principles. Here’s an overview of the key components involved in building RESTful APIs using ASP.NET Core:
Controllers: The API project contains controllers that handle HTTP requests and responses. Each controller is responsible for a specific resource or entity. Controllers define HTTP methods (GET, POST, PUT, DELETE) that map to specific actions for CRUD operations on entities.
Models/DTOs: The Core project may contain Data Transfer Objects (DTOs) that represent the data to be sent over the API. DTOs help in decoupling the client’s data format from the server’s data format.
Routing: The routing mechanism in ASP.NET Core maps incoming HTTP requests to the appropriate controller and action method based on the URL. RESTful APIs typically use a resource-based URL pattern.
HTTP Methods: RESTful APIs use standard HTTP methods (GET, POST, PUT, DELETE) to perform CRUD operations on resources. Each HTTP method corresponds to a specific action on the API.
Status Codes: RESTful APIs use standard HTTP status codes to indicate the success or failure of an API request. For example, 200 (OK) for successful GET requests, 201 (Created) for successful POST requests, 204 (No Content) for successful DELETE requests, etc.
Validation: RESTful APIs should include proper validation logic to ensure that incoming data is valid and adheres to the expected format.
Getting Started
To use this project template, follow the steps below:
Ensure the .NET 7 SDK is installed on your machine.
Clone or download this repository to your local machine.
Open the solution in your preferred IDE (e.g., Visual Studio, Visual Studio Code).
Build the solution to restore NuGet packages and compile the code.
Configure the necessary database connection settings in the appsettings.json file of the Infrastructure project.
Open the Package Manager Console, select Project.Infrastructure project, and run the Update-Database command to create the database.
Run the application by starting the Project.API project.
Project Features
This project template includes the following features:
Clean Architecture: The project is structured according to the principles of Clean Architecture, which promotes the separation of concerns and a clear division of responsibilities.
SOLID Design Principles: The code adheres to SOLID principles (Single Responsibility, Open-Closed, Liskov Substitution, Interface Segregation, and Dependency Inversion), making it easier to maintain and extend.
Repository Pattern: The repository pattern abstracts the data access layer and provides a consistent interface for working with data.
Unit of Work Pattern: The unit of work pattern helps manage transactions and ensures consistency when working with multiple repositories.
Entity Framework Core: The project utilizes Entity Framework Core as the ORM (Object-Relational Mapping) tool for data access.
ASP.NET Core API: The project includes an ASP.NET Core API project that serves as the API layer, handling HTTP requests and responses.
CRUD Operations: The project template provides a foundation for implementing complete CRUD (Create, Read, Update, Delete) operations on entities using Entity Framework Core.
Dependency Injection: The project utilizes the built-in dependency injection container in ASP.NET Core, making it easy to manage and inject dependencies throughout the application.
Unit Testing: The solution includes separate test projects for unit testing the core, infrastructure, and API layers.
Usage
The project template provides a starting point for building RESTful APIs using ASP.NET Core. You can modify and extend the existing code to suit your specific application requirements. Here’s an overview of the key components involved in building RESTful APIs:
Models: The Core project contains the domain models representing the entities you want to perform CRUD operations on. Update the models or add new ones according to your domain.
Repositories: The Infrastructure project contains repository implementations that handle data access operations using Entity Framework Core. Modify the repositories or create new ones to match your entity models and database structure.
Services: The Core project contains services that encapsulate the business logic and orchestrate the operations on repositories. Update or create new services to handle CRUD operations on your entities.
Controllers: The API project contains controllers that handle HTTP requests and responses. Update or create new controllers to expose the CRUD endpoints for your entities. Implement the appropriate HTTP methods (GET, POST, PUT, DELETE) and perform actions on the core services accordingly.
Make sure to update the routes, validation, and error-handling logic to align with your application requirements and best practices.
Note: This article has been written by Kawser Hamid and republished on MudMatter with Author’s Permission. Please find the original link here – Clean Structured API Project – ASP.NET Core.
This template is for a clean structured ASP.NET Core web project, follows the Clean Architecture principles, SOLID design principles, implements the Dependency Injection, Repository, and Unit of Work design pattern, and utilizes Entity Framework Core for data access. It provides a standardized structure and organization for building robust and maintainable ASP.NET Core web applications with complete CRUD (Create, Read, Update, Delete) operations.
Project Structure
The project structure is designed to promote separation of concerns and modularity, making it easier to understand, test, and maintain the application.
├── src
│ ├── Core # Contains the core business logic and domain models, view models, etc.
│ ├── Infrastructure # Contains infrastructure concerns such as data access, external services, etc.
│ └── UI # Contains the user interface layer, including controllers, views, and extensions, etc.
├── tests
│ ├── Core.Tests # Contains unit tests for the core layer
│ ├── Infrastructure.Tests # Contains unit tests for the infrastructure layer
│ └── UI.Tests # Contains unit tests for the UI layer
└── README.md # Project documentation (you are here!)
Getting Started
To use this project template, follow the steps below:
Ensure the .NET 7 SDK is installed on your machine.
Clone or download this repository to your local machine.
Open the solution in your preferred IDE (e.g., Visual Studio, Visual Studio Code).
Build the solution to restore NuGet packages and compile the code.
Configure the necessary database connection settings in the appsettings.json file of the Infrastructure project.
Open the Package Manager Console, select Project.Infrastructure project and run the Update-Database command to create the database
Run the application by starting the Project.UI project.
Project Features
This project template includes the following features:
Clean Architecture: The project is structured according to the principles of Clean Architecture, which promotes the separation of concerns and a clear division of responsibilities.
SOLID Design Principles: The code adheres to SOLID principles (Single Responsibility, Open-Closed, Liskov Substitution, Interface Segregation, and Dependency Inversion), making it easier to maintain and extend.
Repository Pattern: The repository pattern abstracts the data access layer and provides a consistent interface for working with data.
Unit of Work Pattern: The unit of work pattern helps manage transactions and ensures consistency when working with multiple repositories.
Entity Framework Core: The project utilizes Entity Framework Core as the ORM (Object-Relational Mapping) tool for data access.
ASP.NET Core Web: The project includes an ASP.NET Core web project that serves as the user interface layer, handling HTTP requests and responses.
CRUD Operations: The project template provides a foundation for implementing complete CRUD (Create, Read, Update, Delete) operations on entities using Entity Framework Core.
Dependency Injection: The project utilizes the built-in dependency injection container in ASP.NET Core, making it easy to manage and inject dependencies throughout the application.
Unit Testing: The solution includes separate test projects for unit testing the core, infrastructure, and UI layers.
Usage
The project template provides a starting point for implementing CRUD operations on entities using Entity Framework Core. You can modify and extend the existing code to suit your specific application requirements. Here’s an overview of the key components involved in the CRUD operations:
Models: The Core project contains the domain models representing the entities you want to perform CRUD operations on. Update the models or add new ones according to your domain.
Repositories: The Infrastructure project contains repository implementations that handle data access operations using Entity Framework Core. Modify the repositories or create new ones to match your entity models and database structure.
Services: The Core project contains services that encapsulate the business logic and orchestrate the operations on repositories. Update or create new services to handle CRUD operations on your entities.
Controllers: The UI project contains controllers that handle HTTP requests and responses. Update or create new controllers to expose the CRUD endpoints for your entities.
Make sure to update the routes, validation, and error-handling logic to align with your application requirements and best practices.
Note: This article has been written by Kawser Hamid and republished on MudMatter with Author’s Permission. Please find the original link here – Clean Structured Project – ASP.NET Core.